


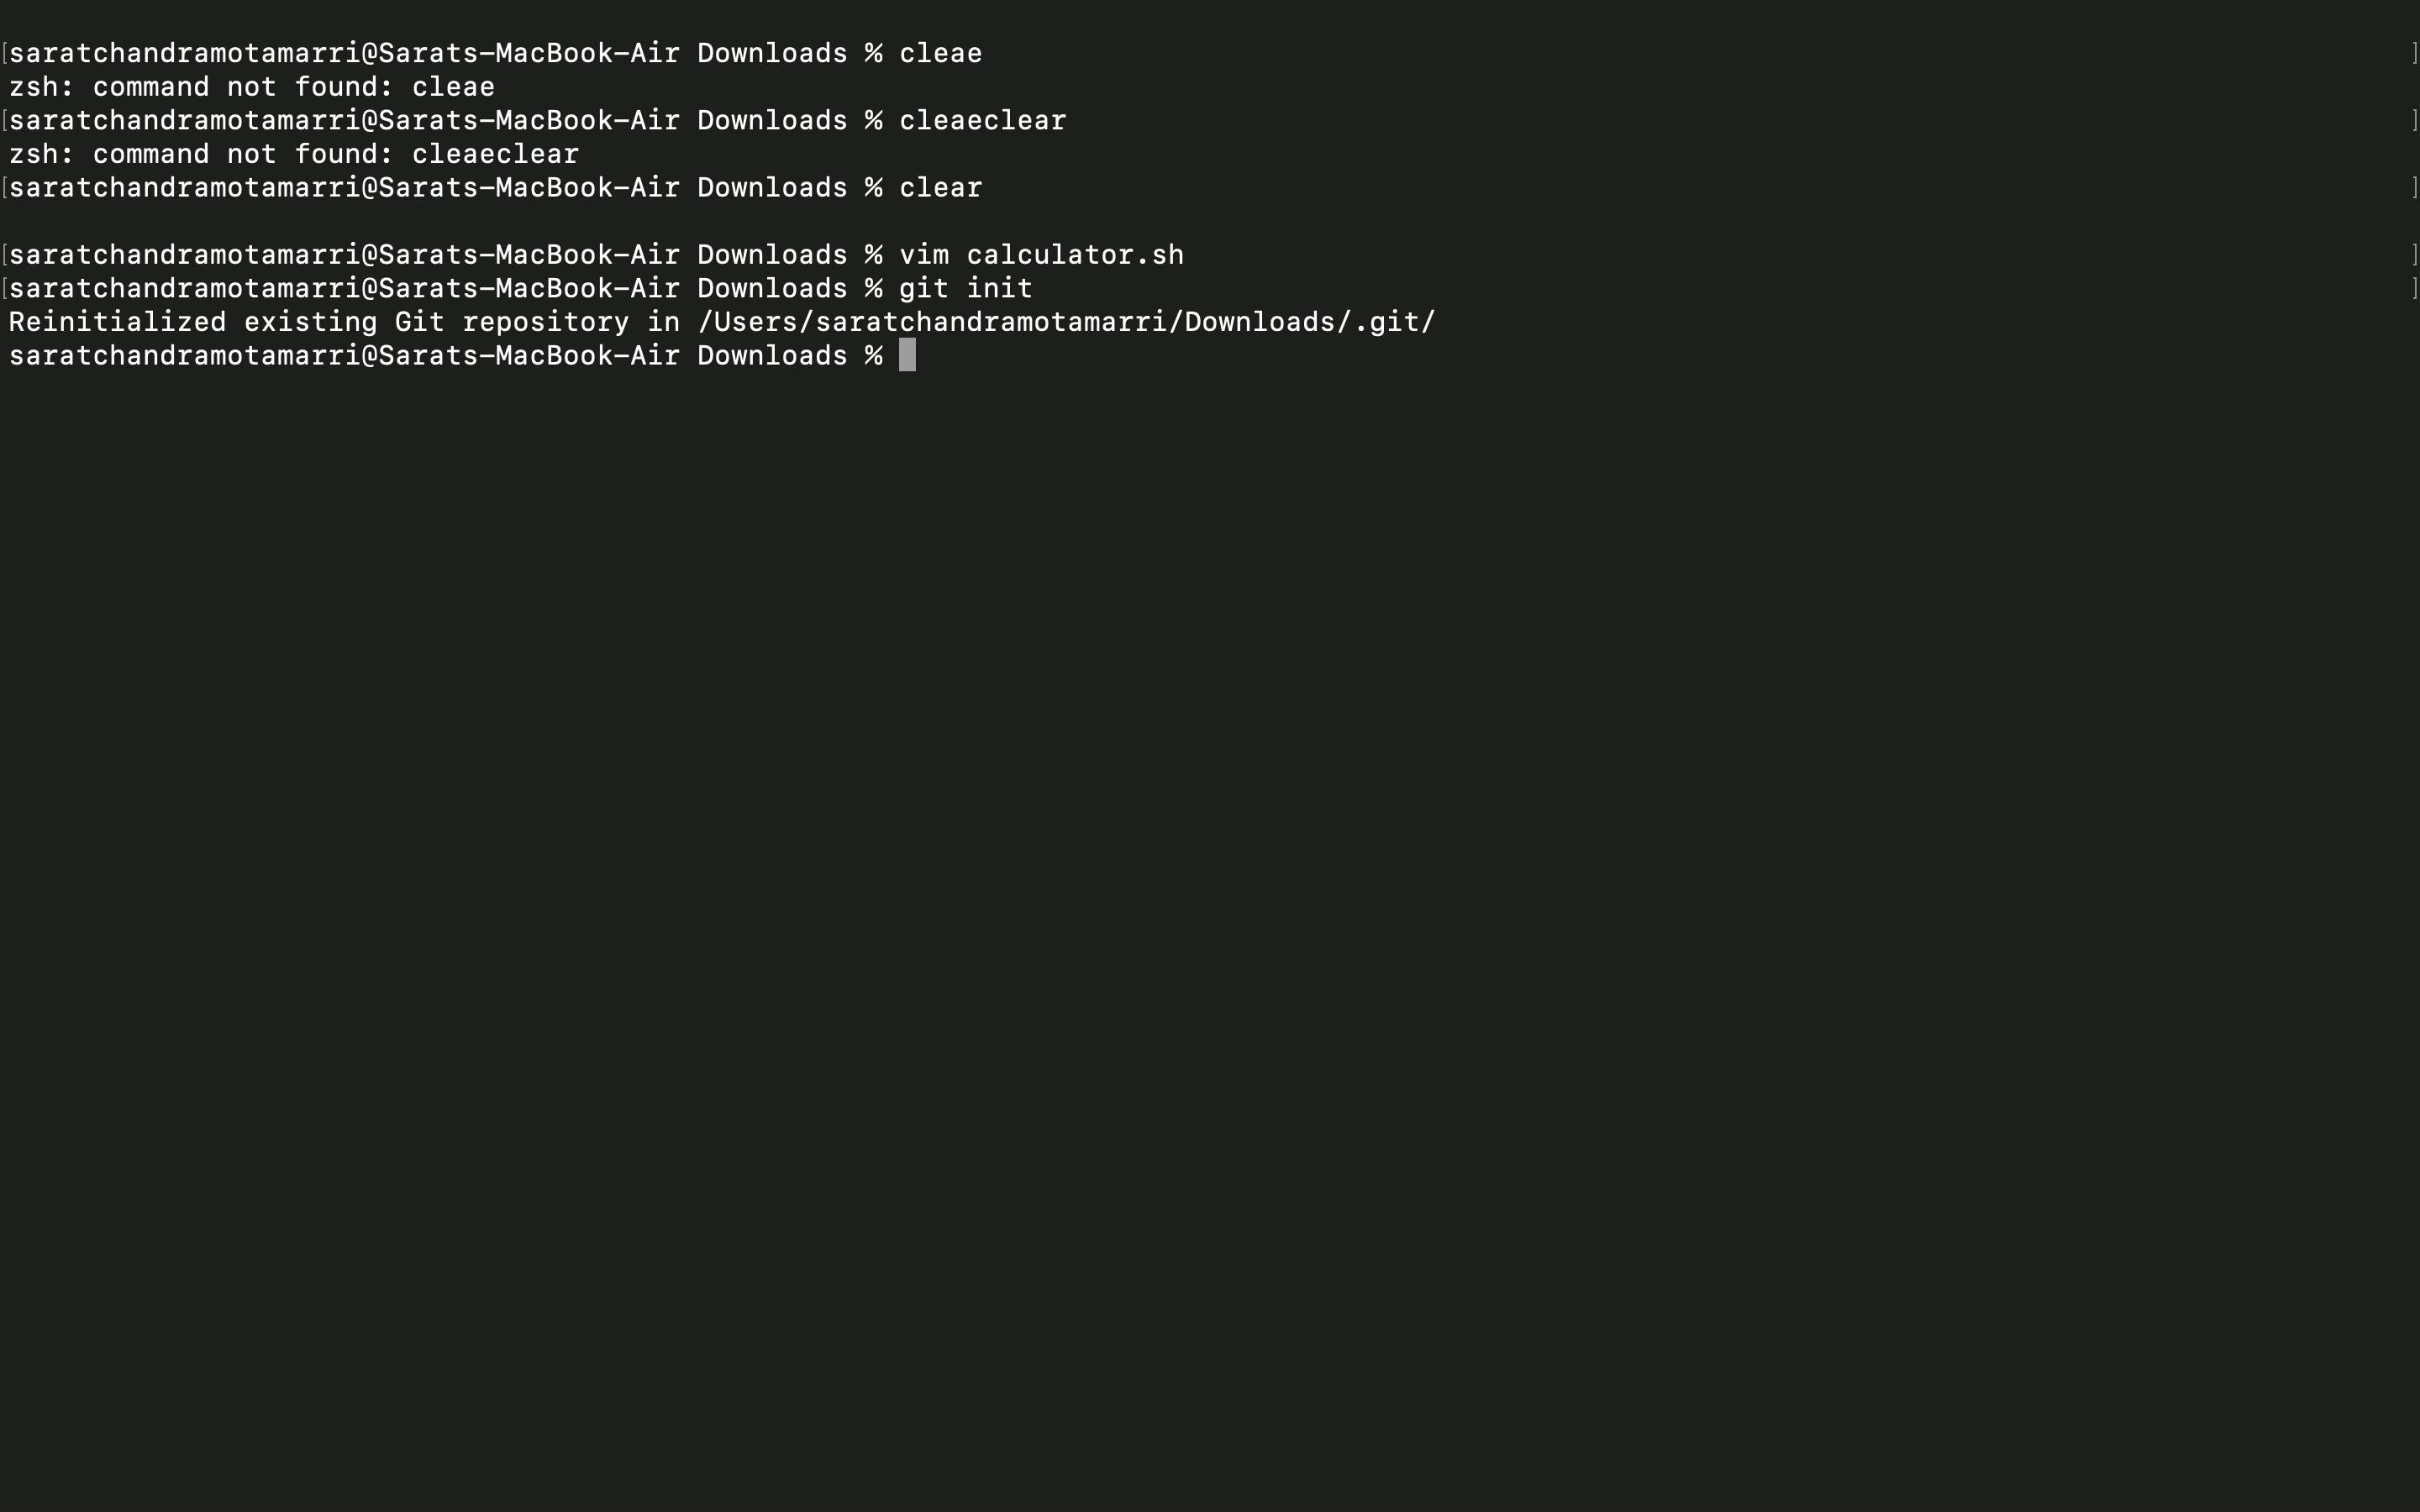
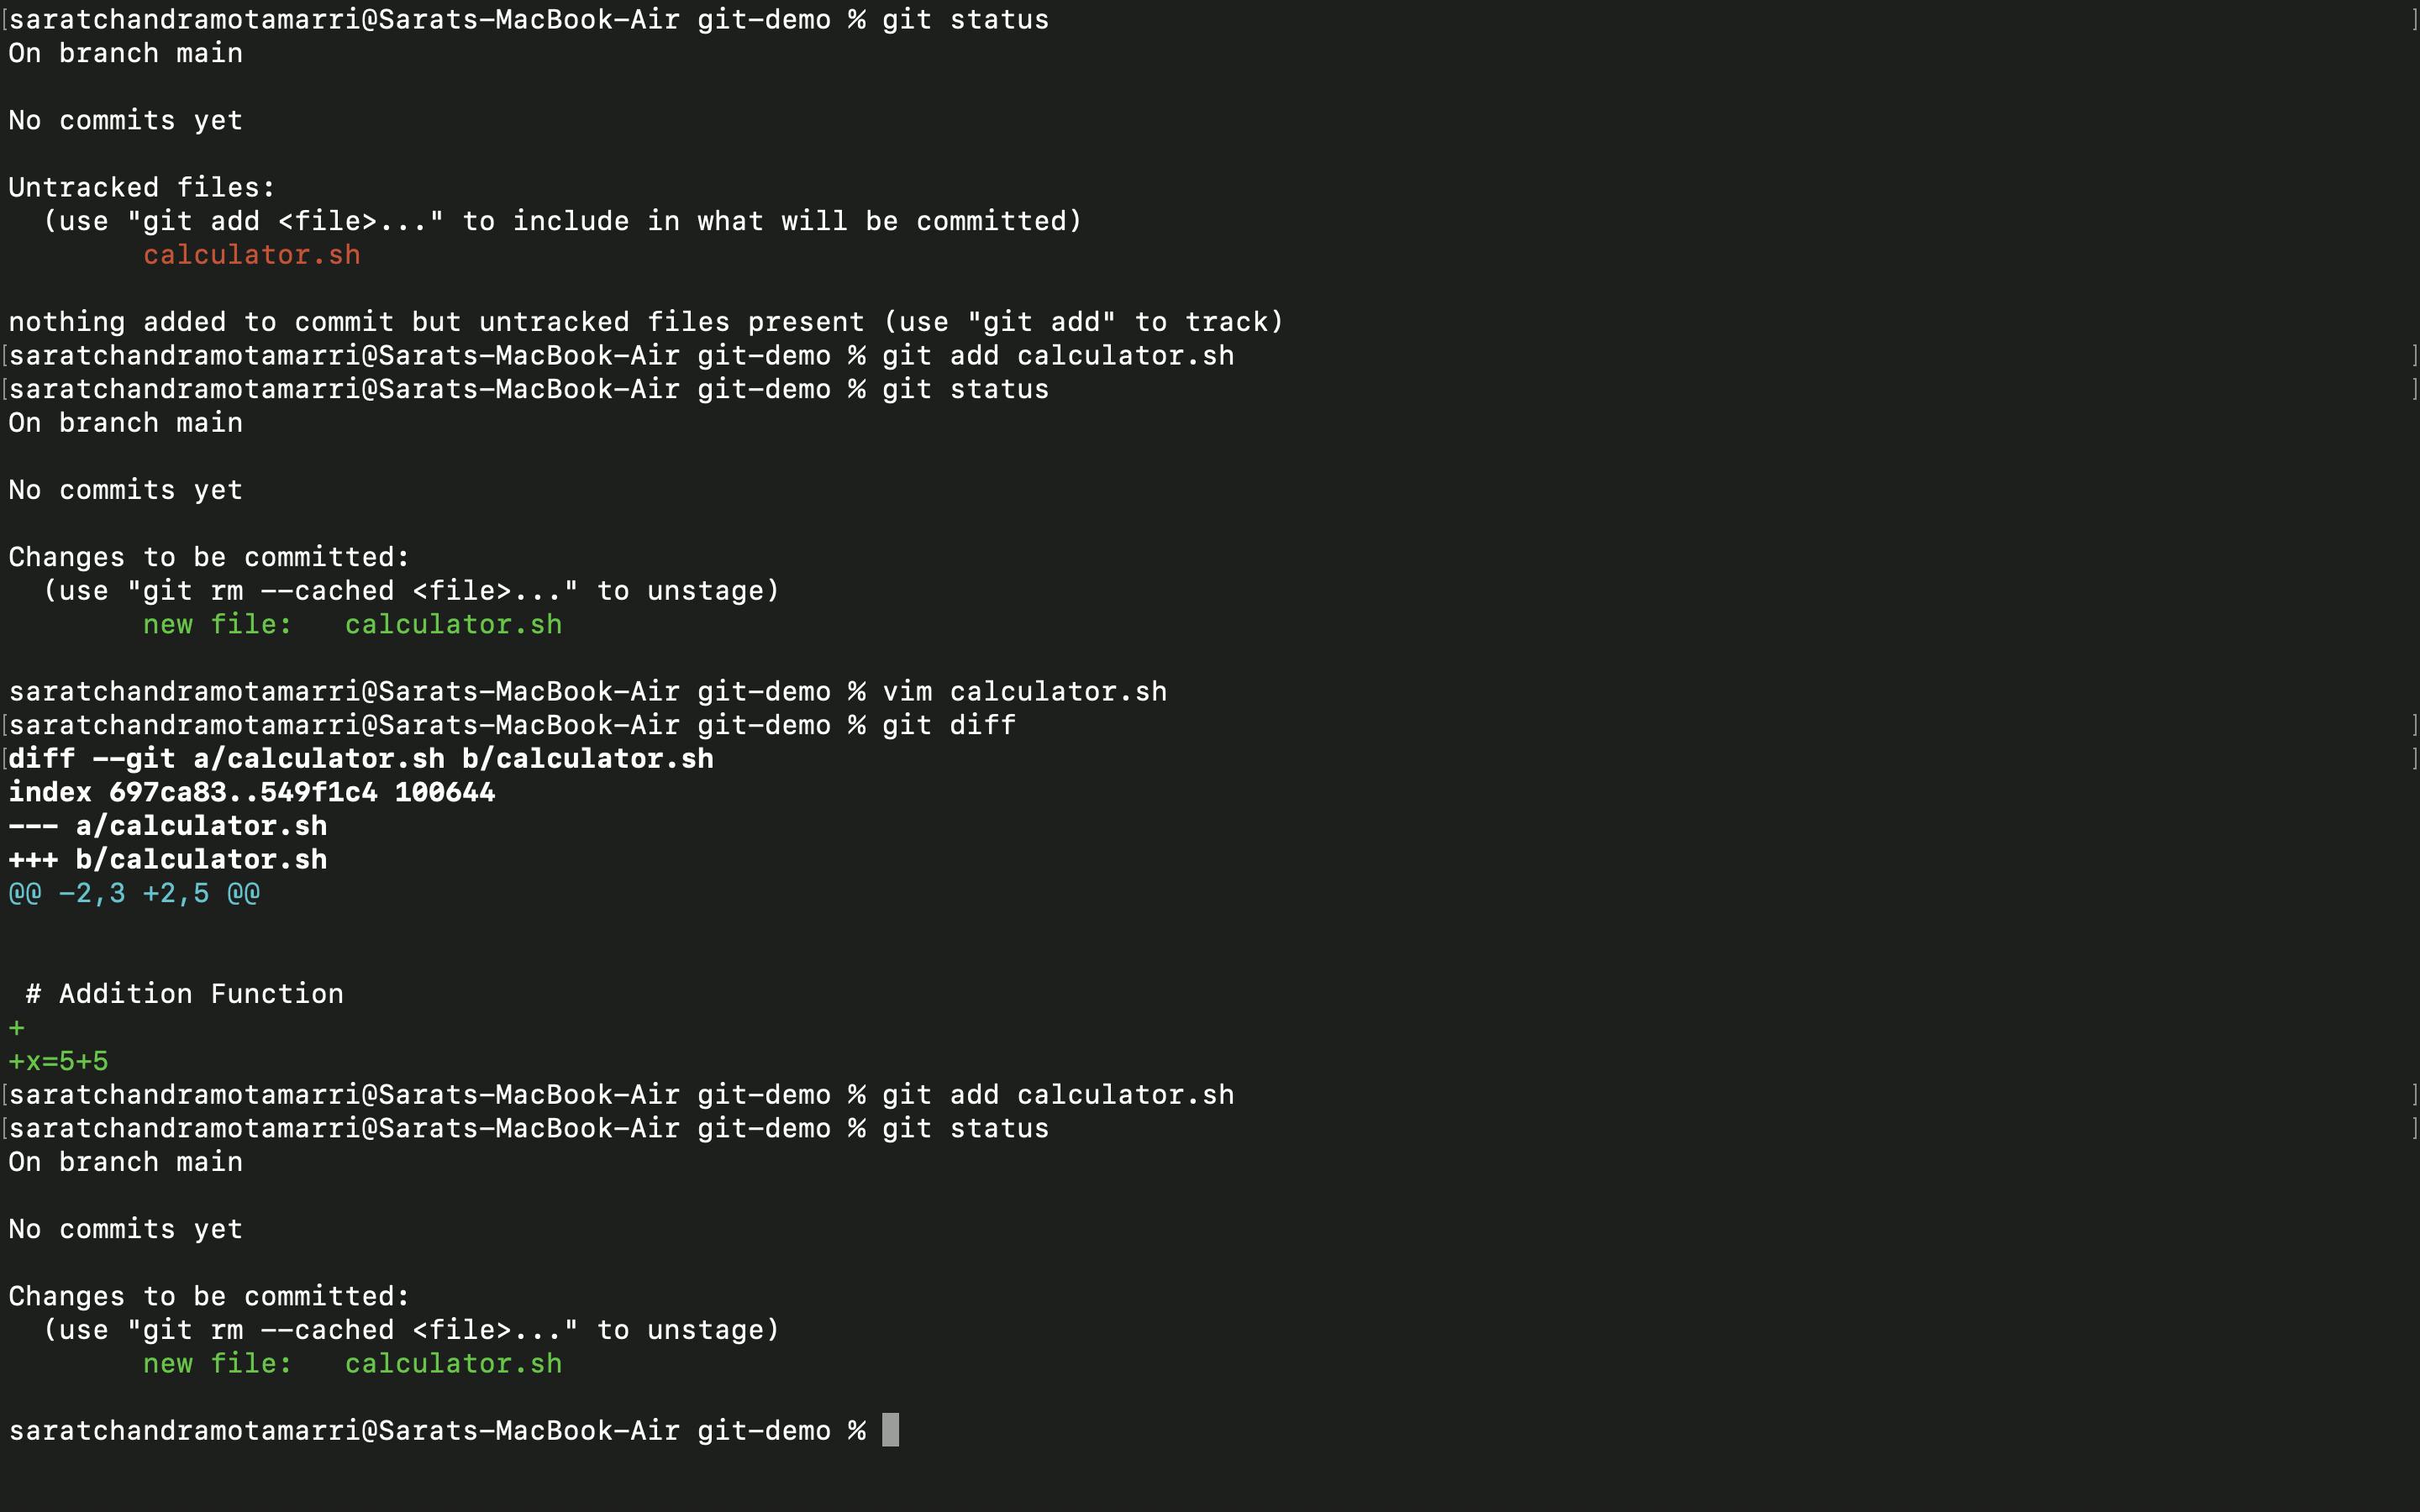
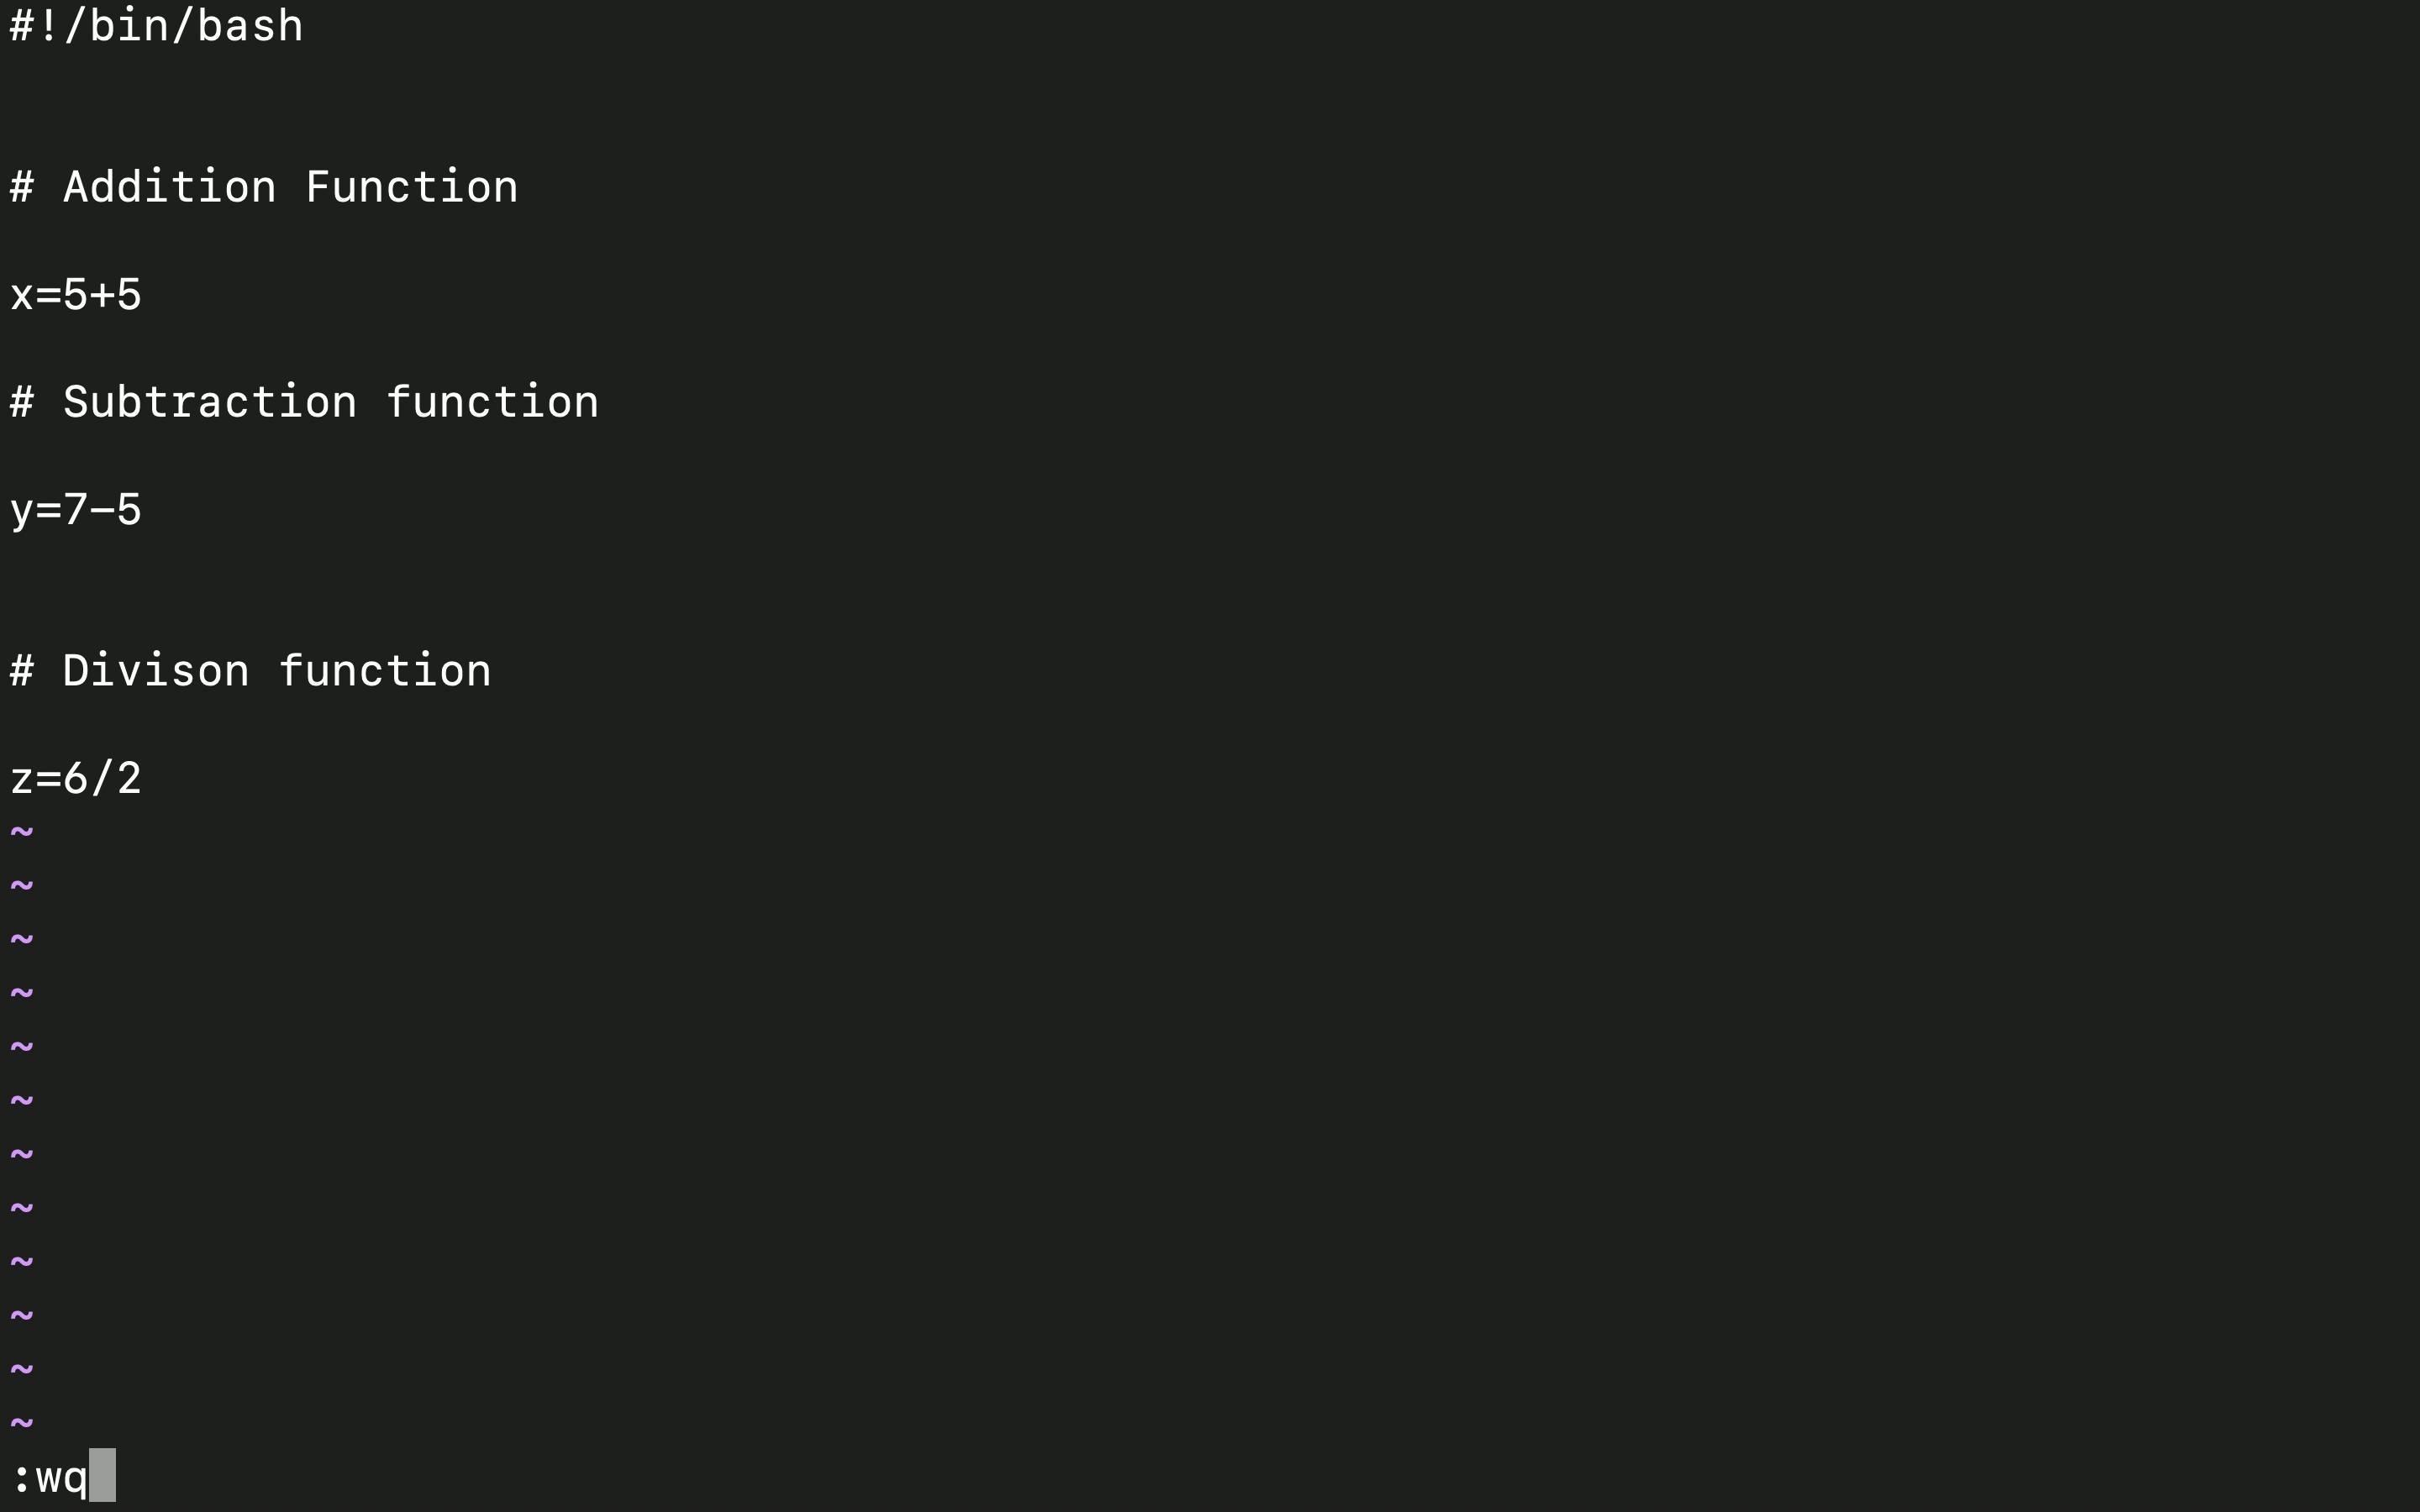
- Let's say I wanted to create a calculator app. I have created a shell script using "vim" command "vim calculator.sh"

- In this "calculator. sh" file I have added an "additional functionality".

Install Git from the official Git website at https://git-scm.com/download and download the latest version of Git (in my case I am using MAC.)
To create or initialize a git repository we use a command called "git init". when we use this "git init" command a ".git" folder is created. This ".git" folder is responsible for tracking and ensuring no sensitive data/ no secrets.
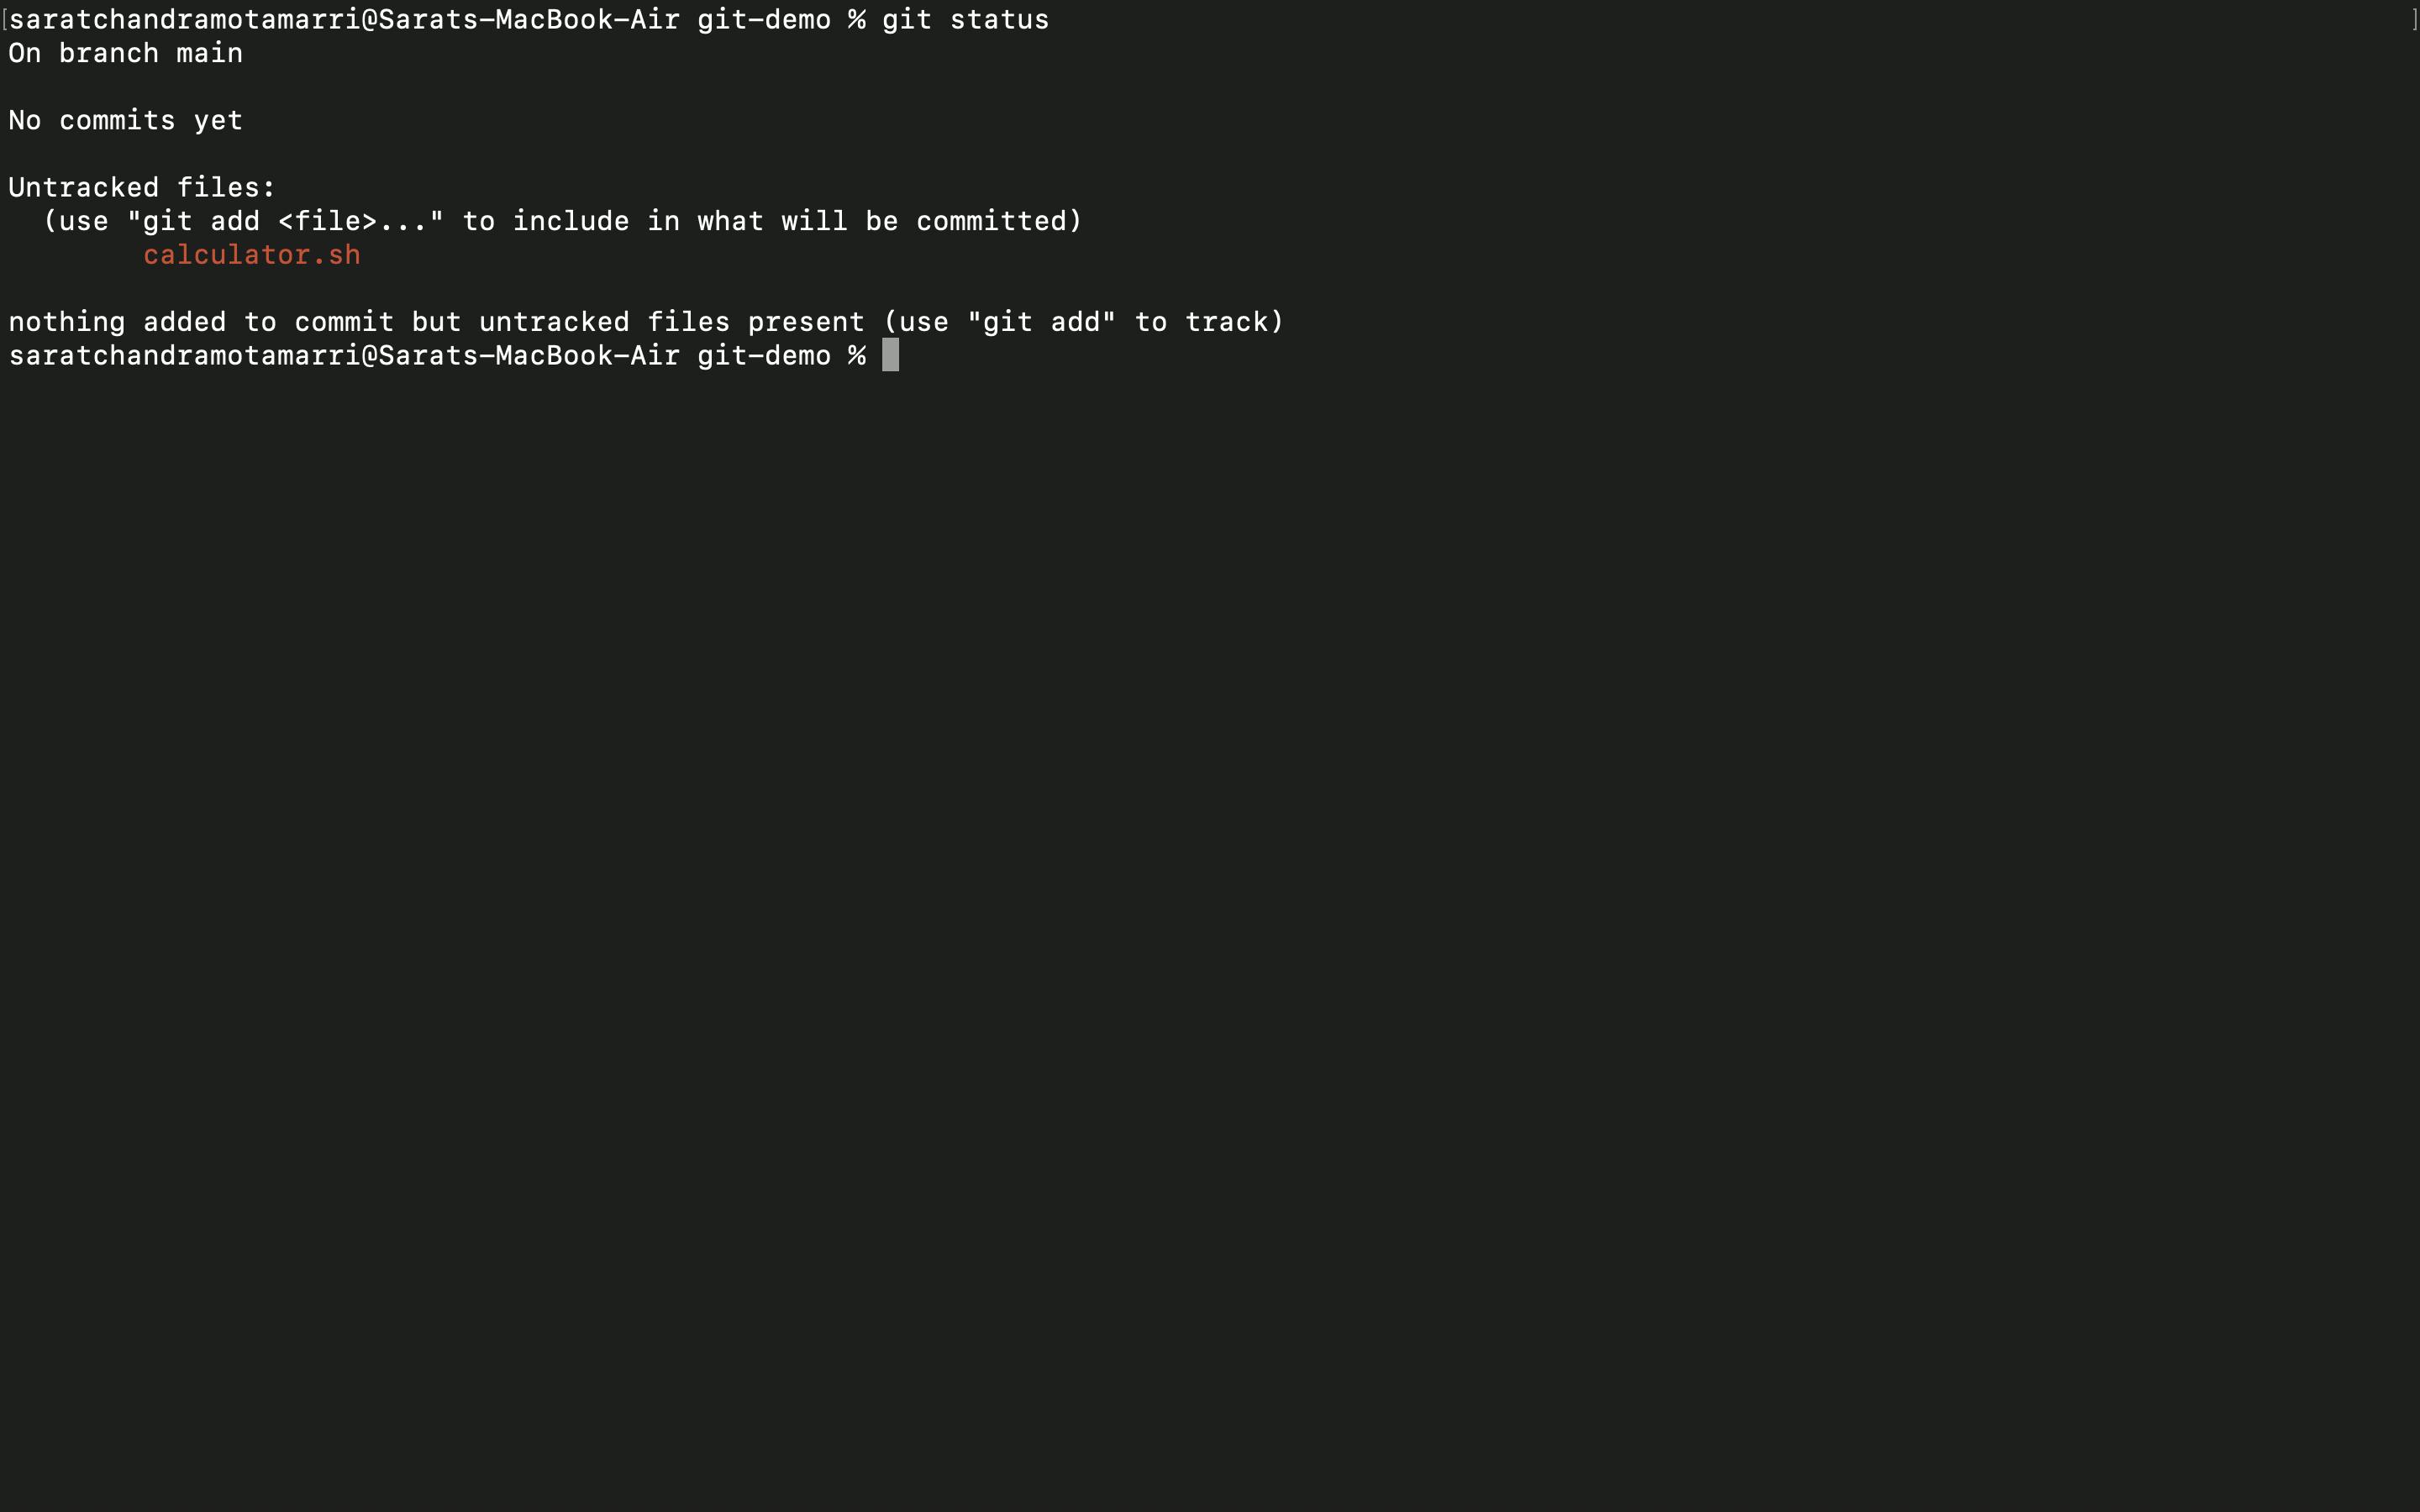
- Once initializing the repo, nothing happens, we can check by using the "git status" command. Git has no information about the "calculator.sh" file.
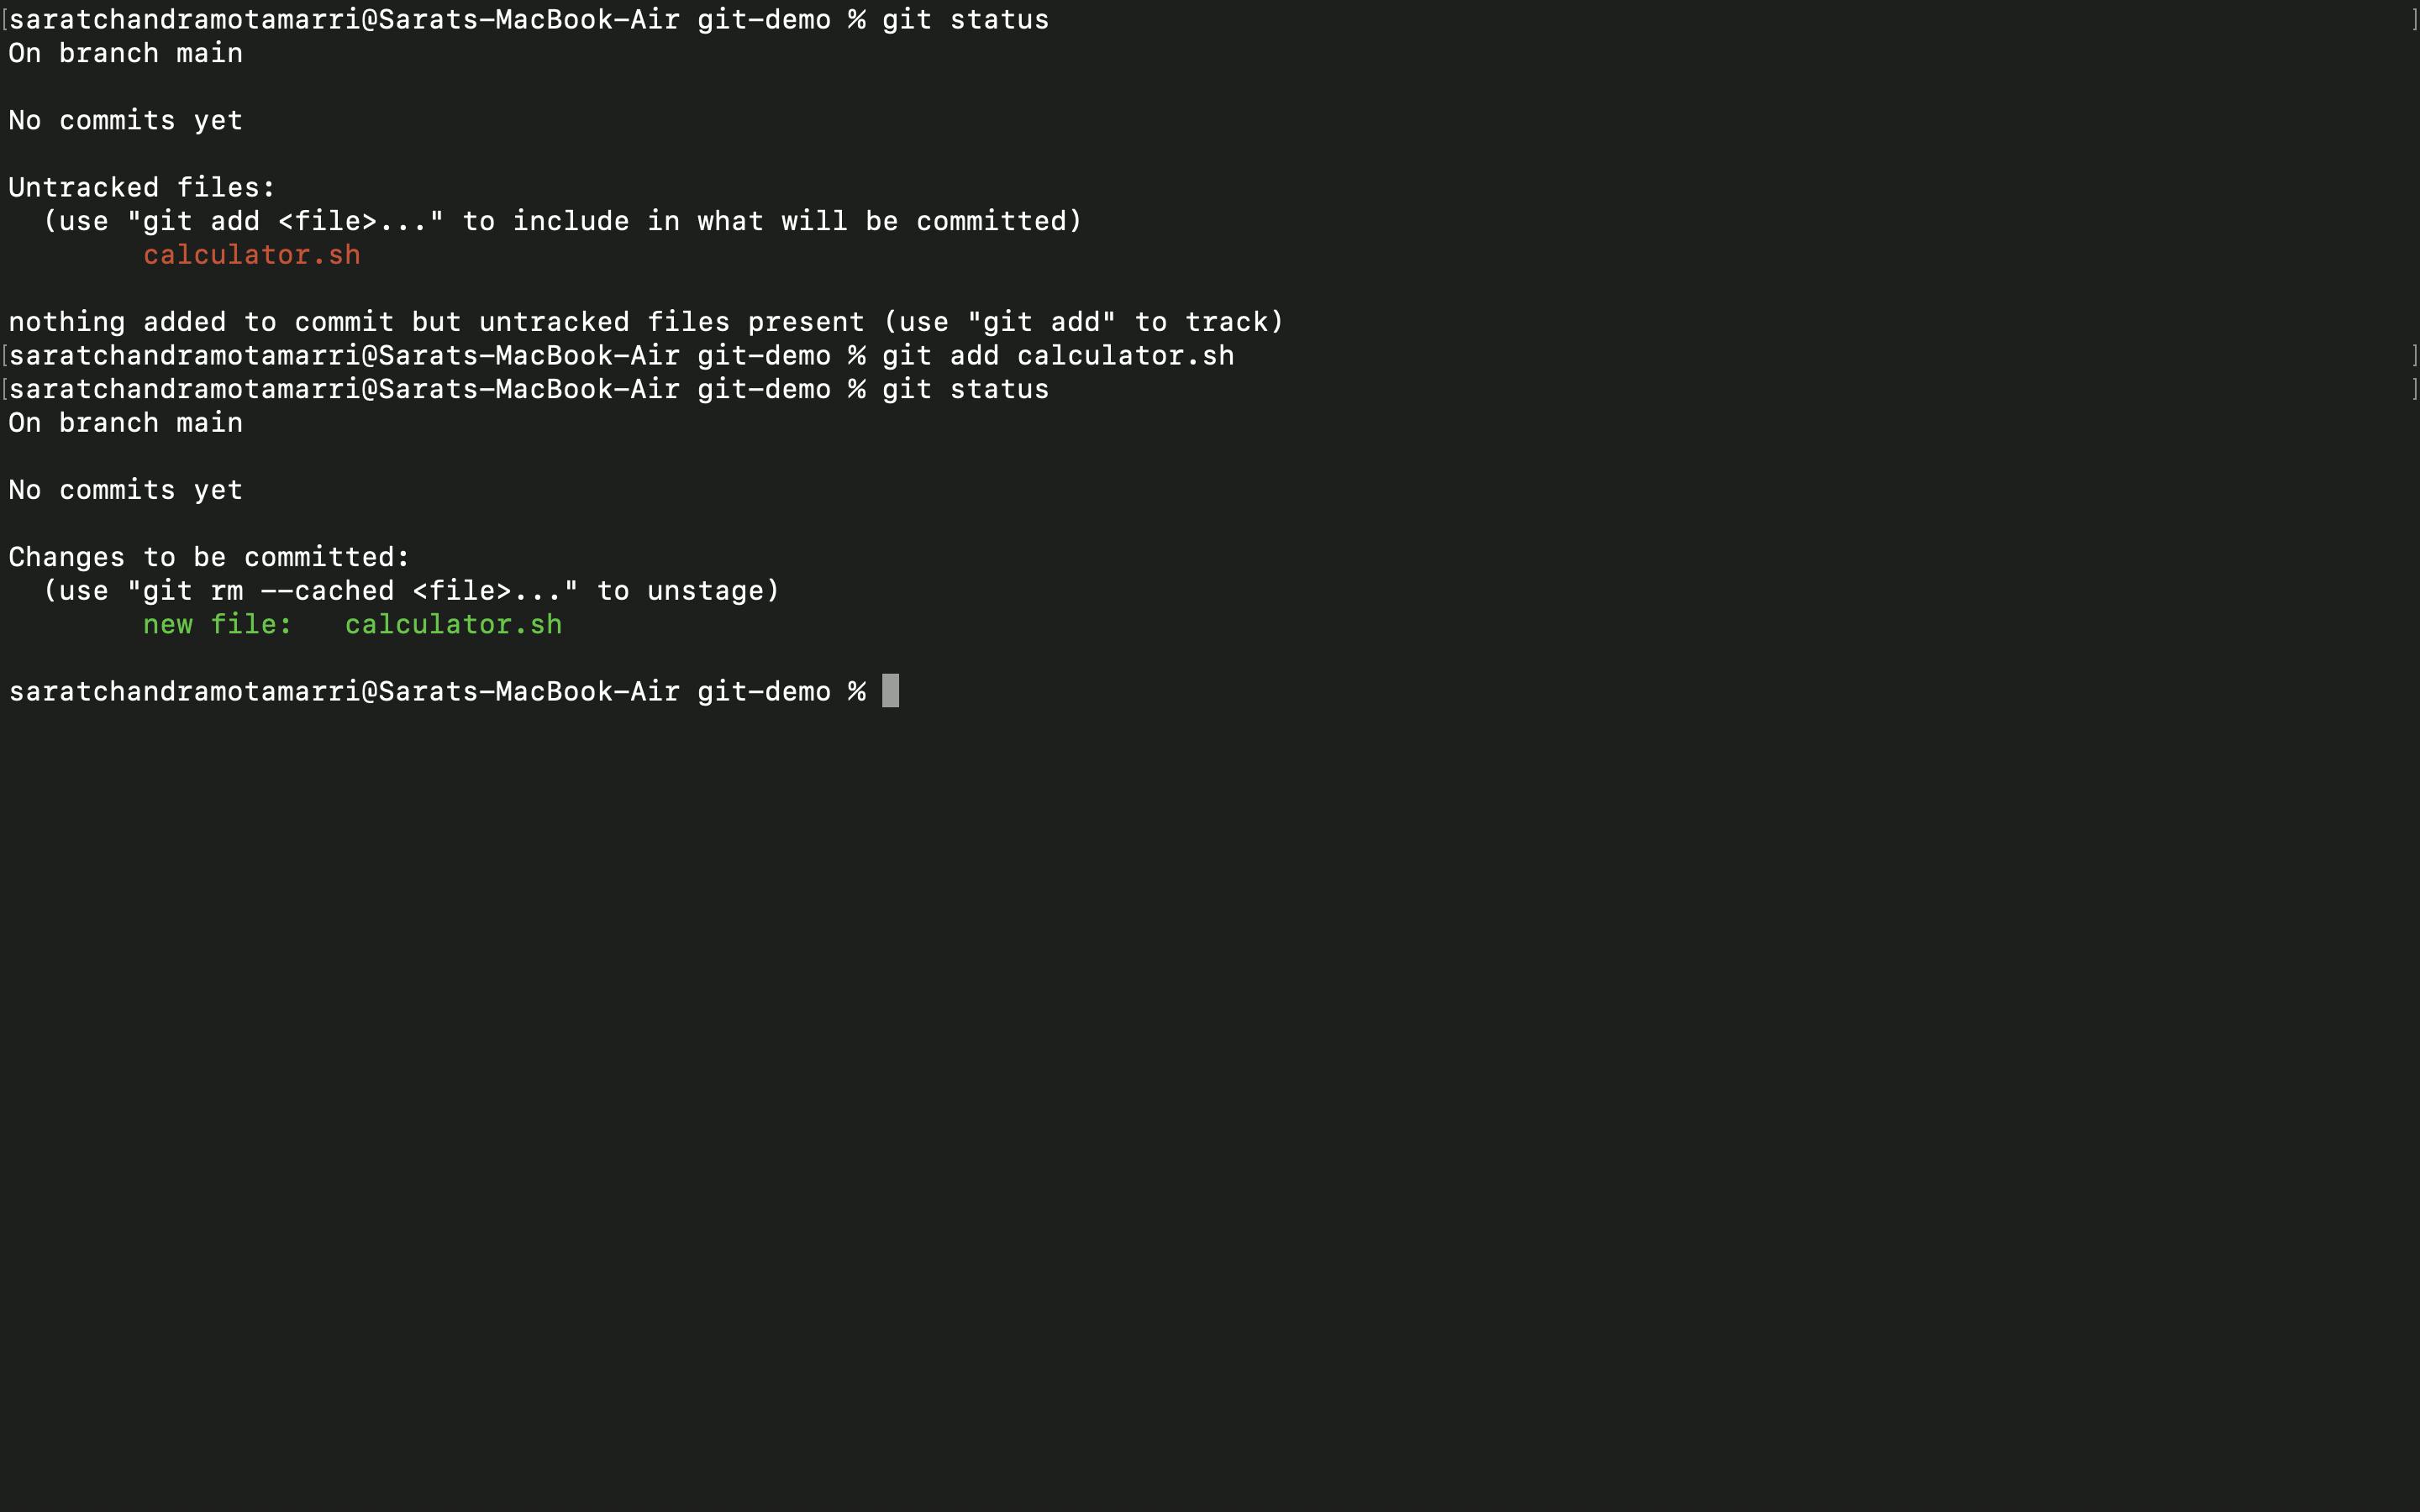
- To track this file, I will use the command "git add calculator. sh". Then again use "git status". So, now git understands and it tracks the file and asks to commit the file.
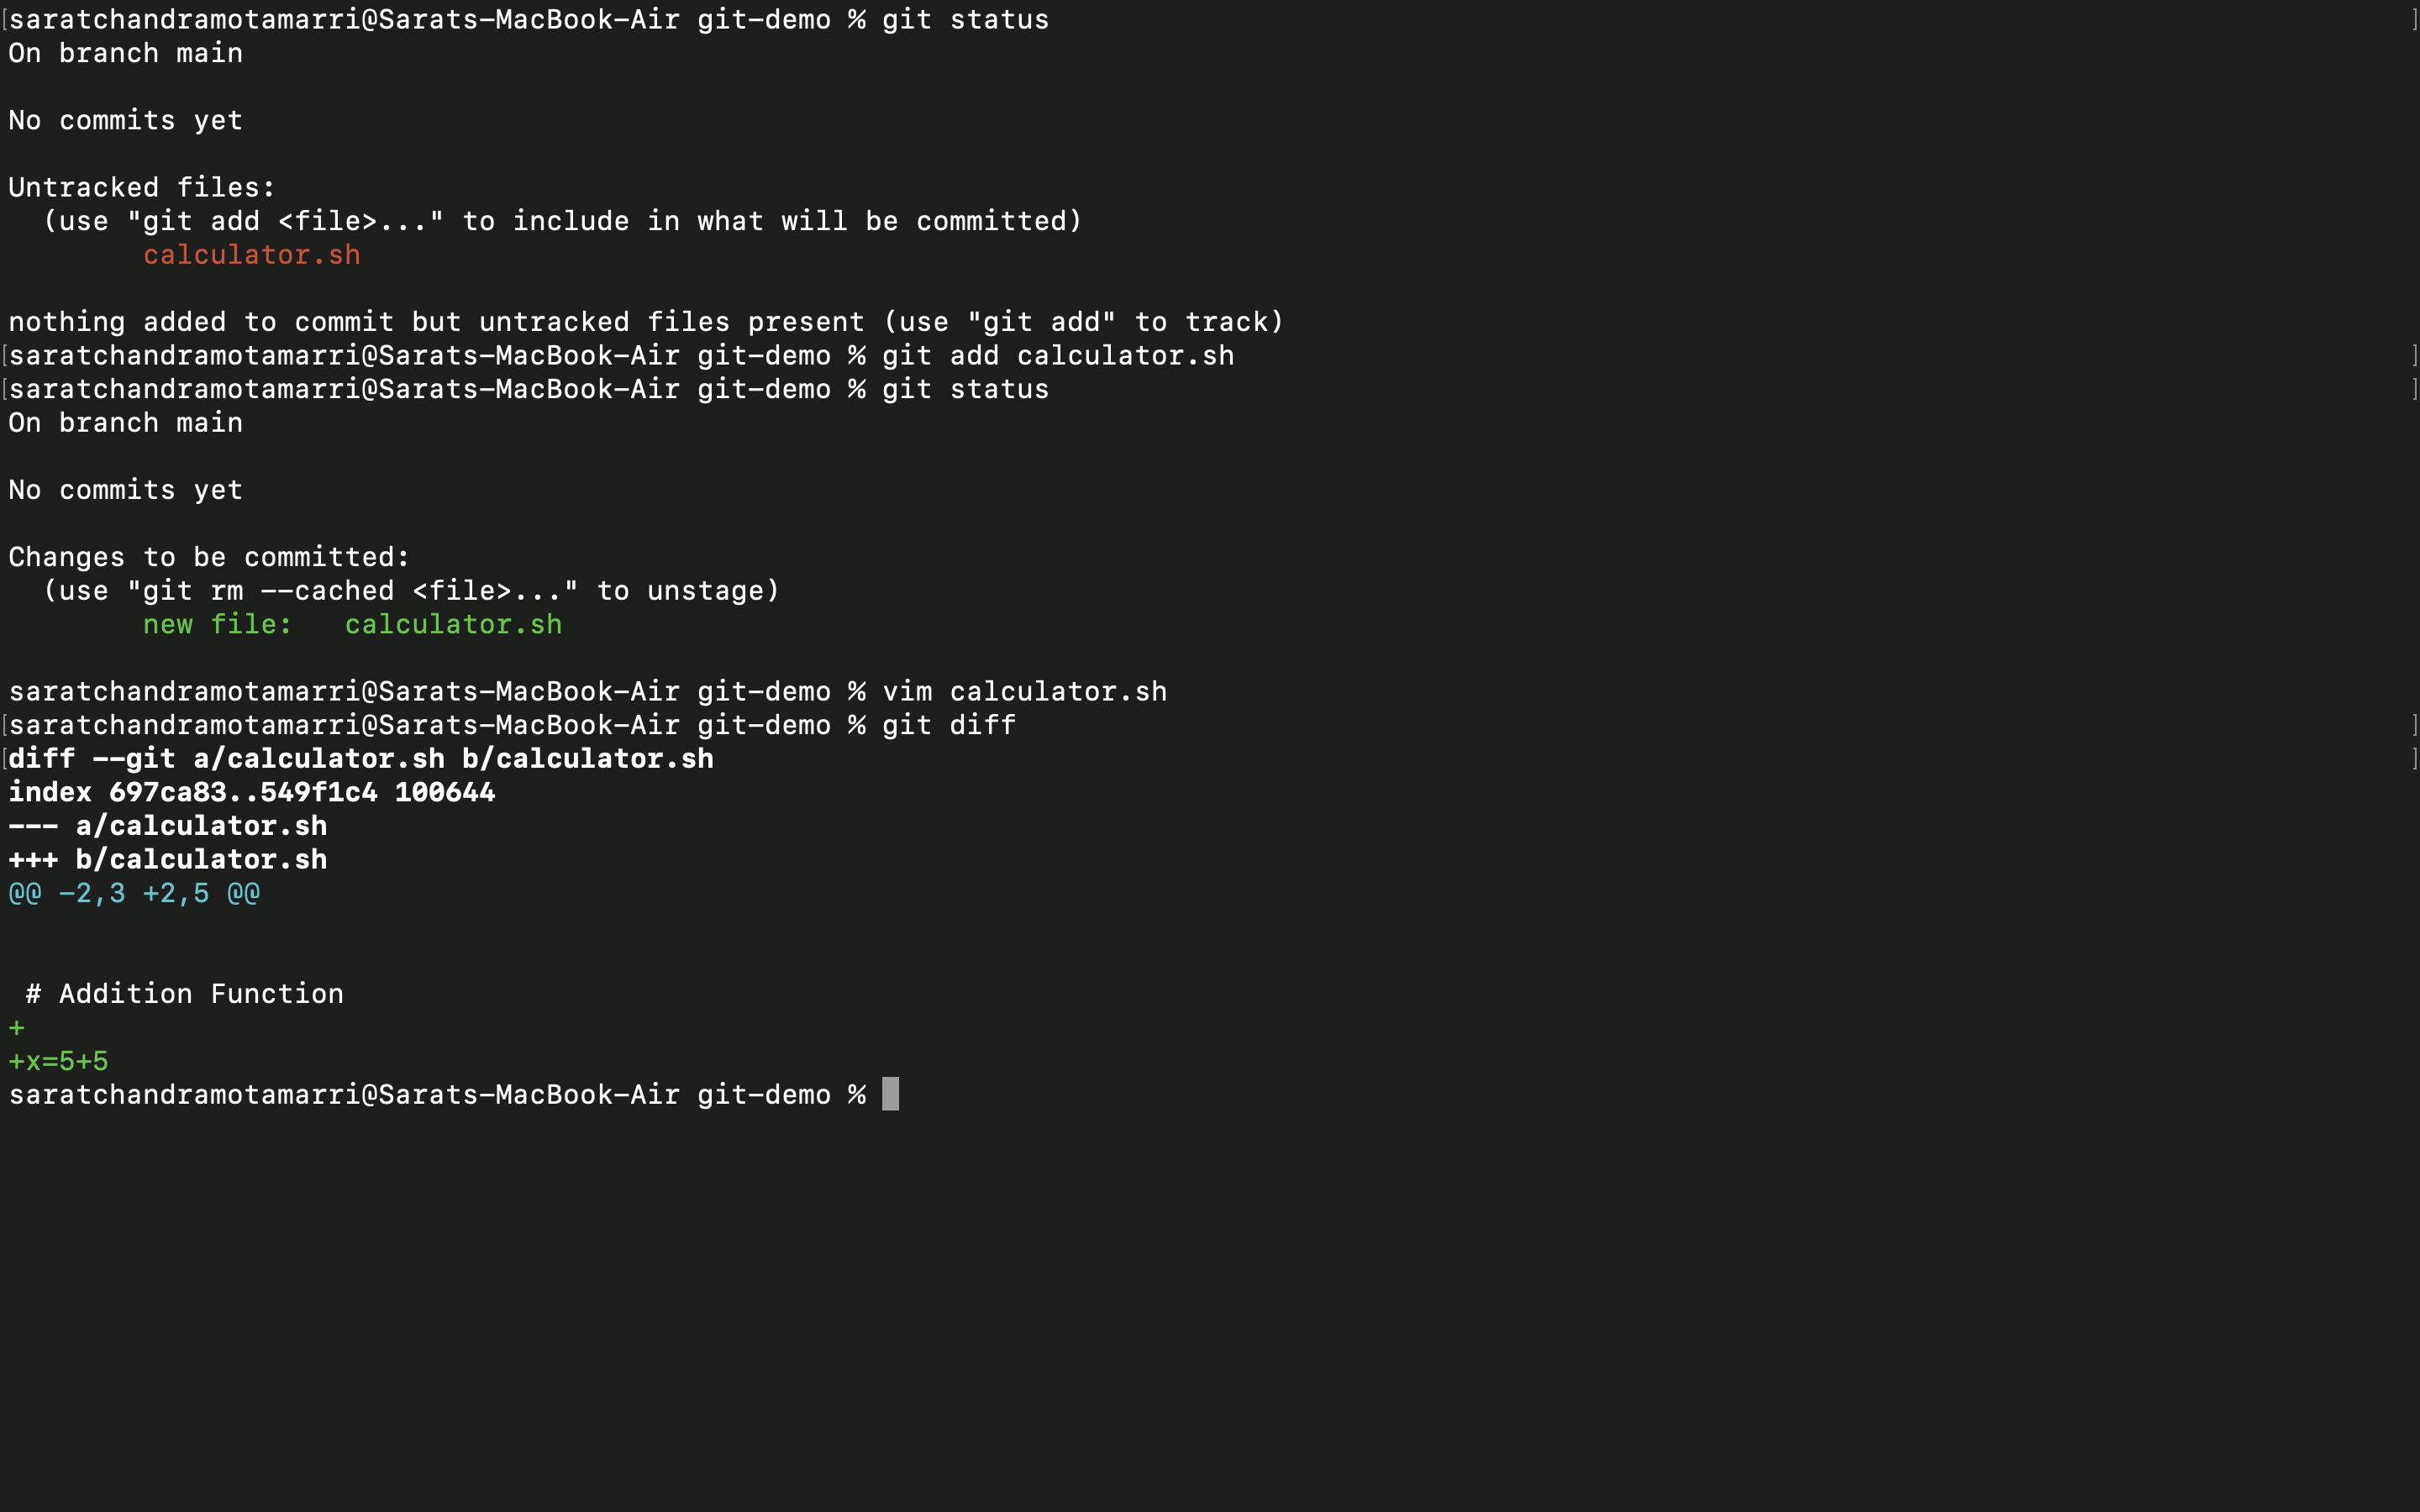
- I opened the "calculator.sh" file and added a new line

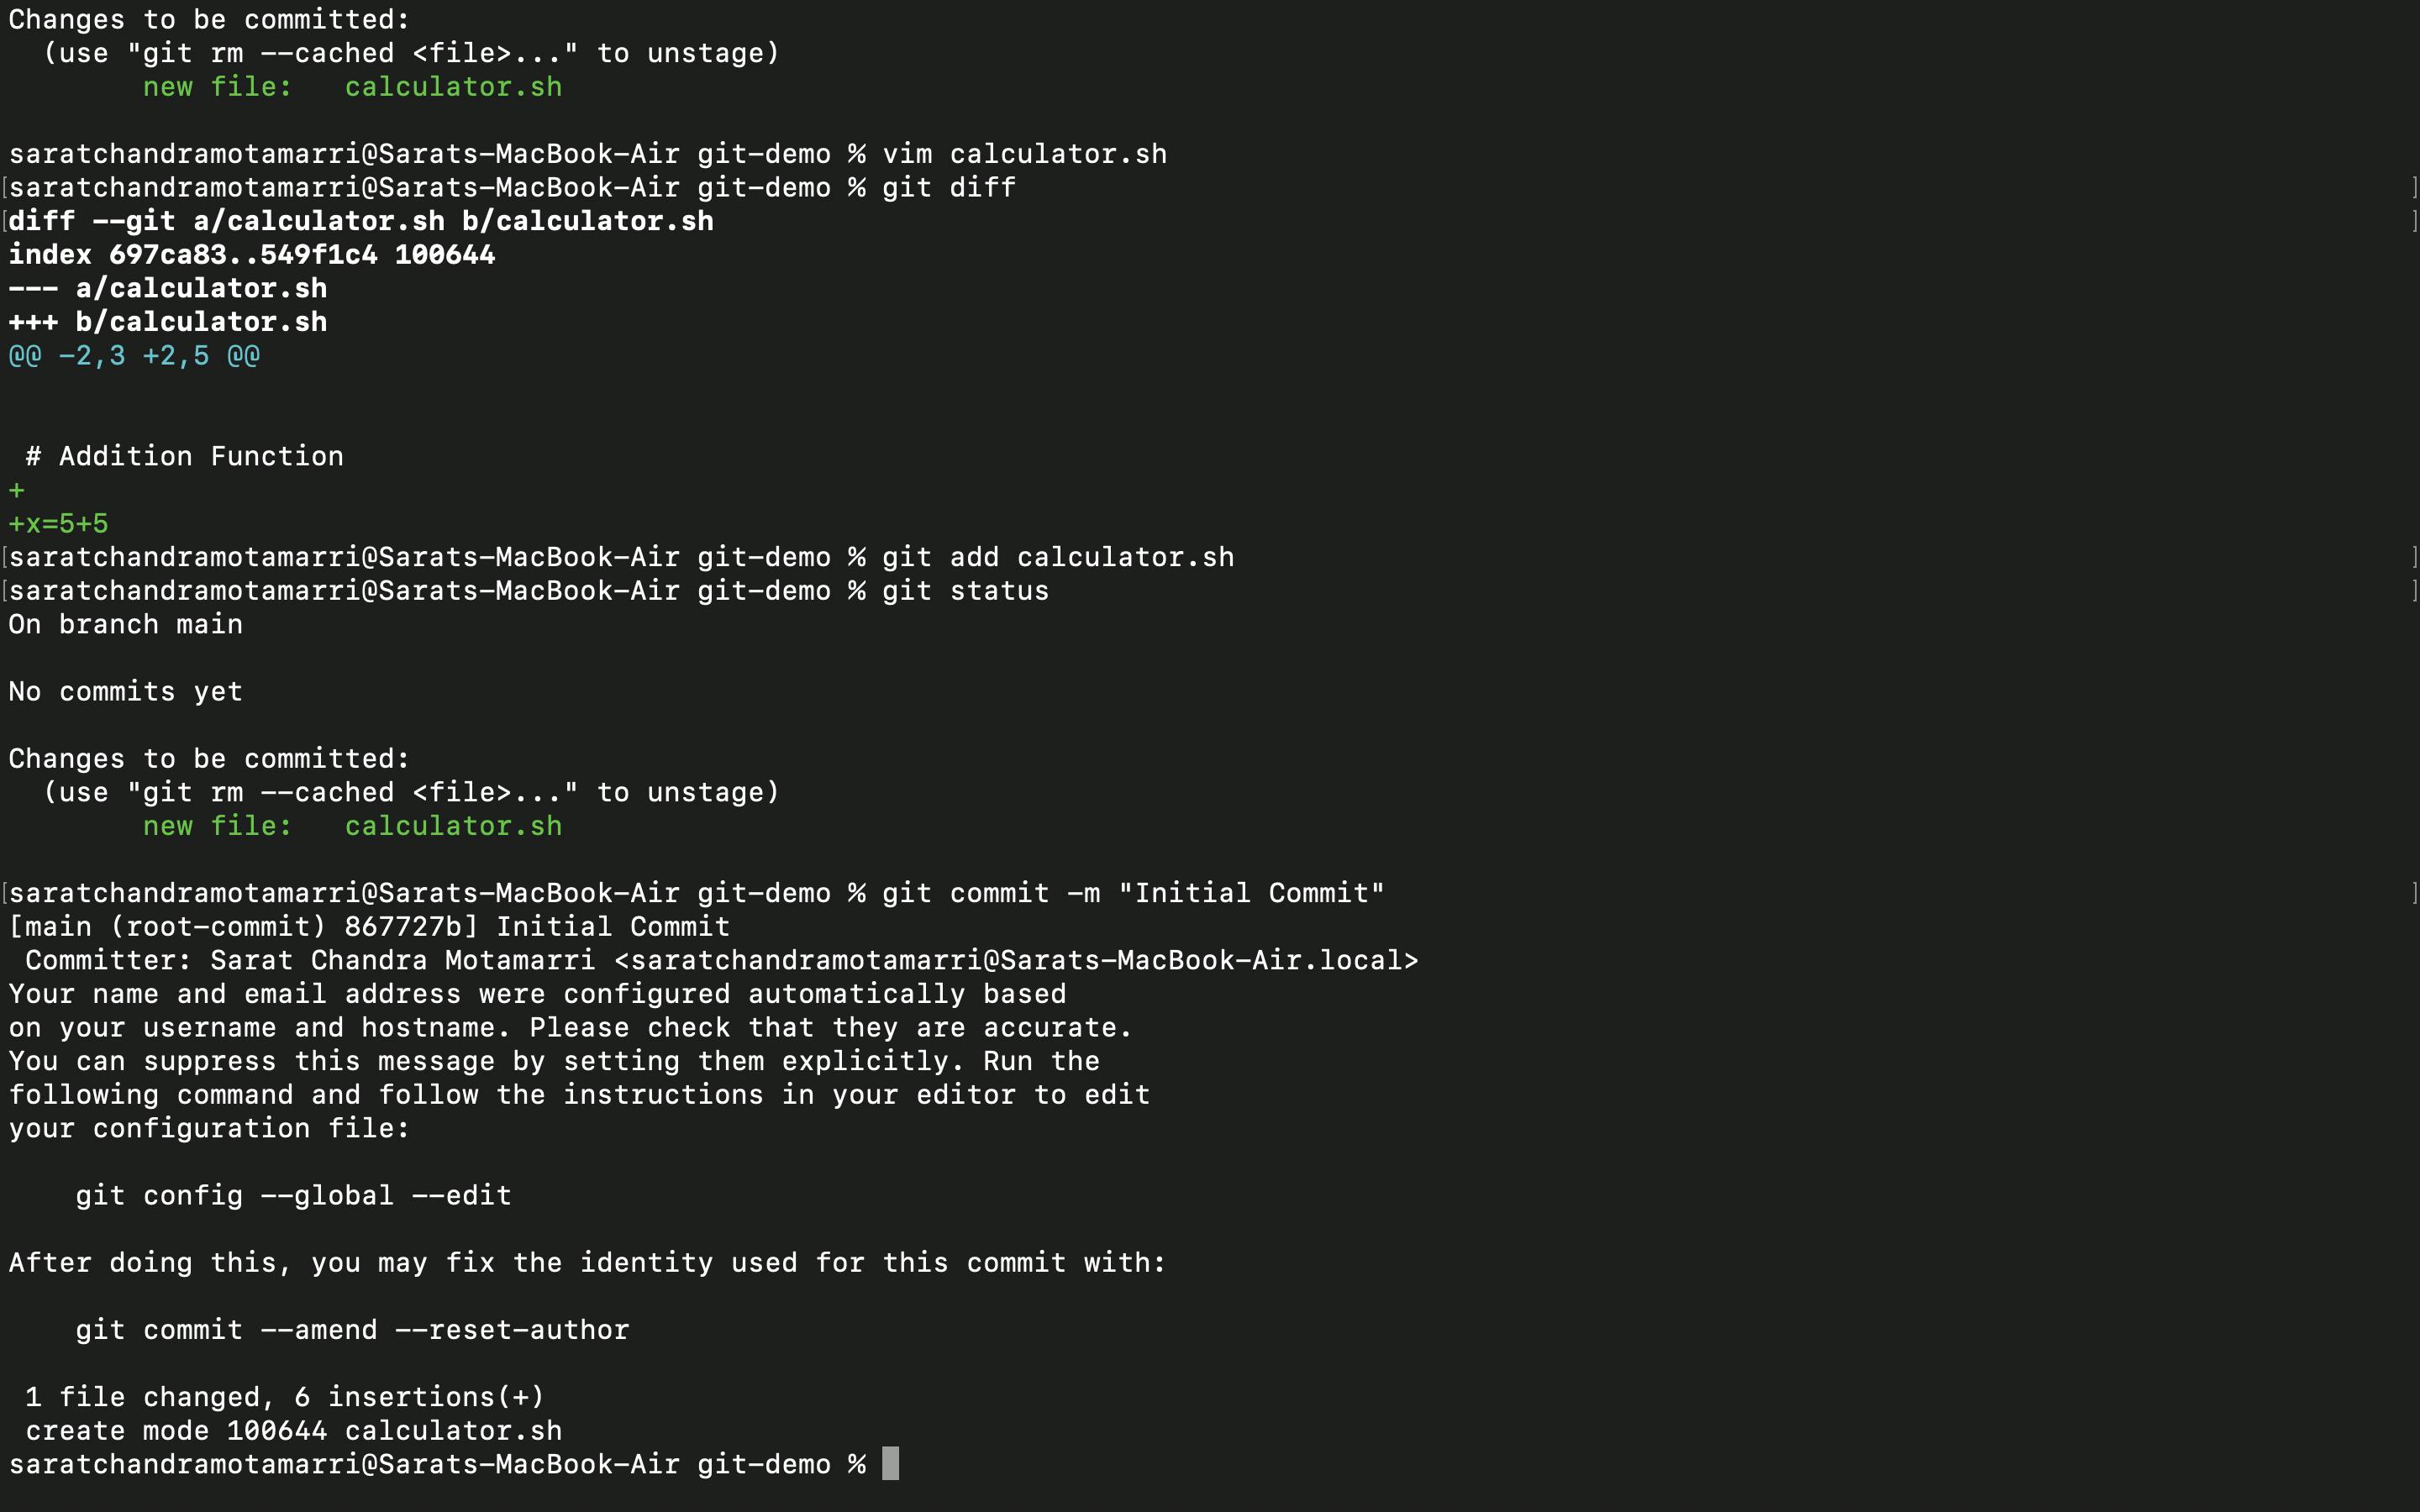
- Now I entered the "git diff" (this command helps in knowing the differences in the file, we can either delete changes or add changes made.) command and it shows there is a change somebody has added a new line "x=5+5".
- Since I have added a new line in the "calculator. sh" file "x=5+5" and it was tracked by git, I agreed on the change and used the "git add" command and checked the status again using "git status", where it says 1 new file needs to be committed.
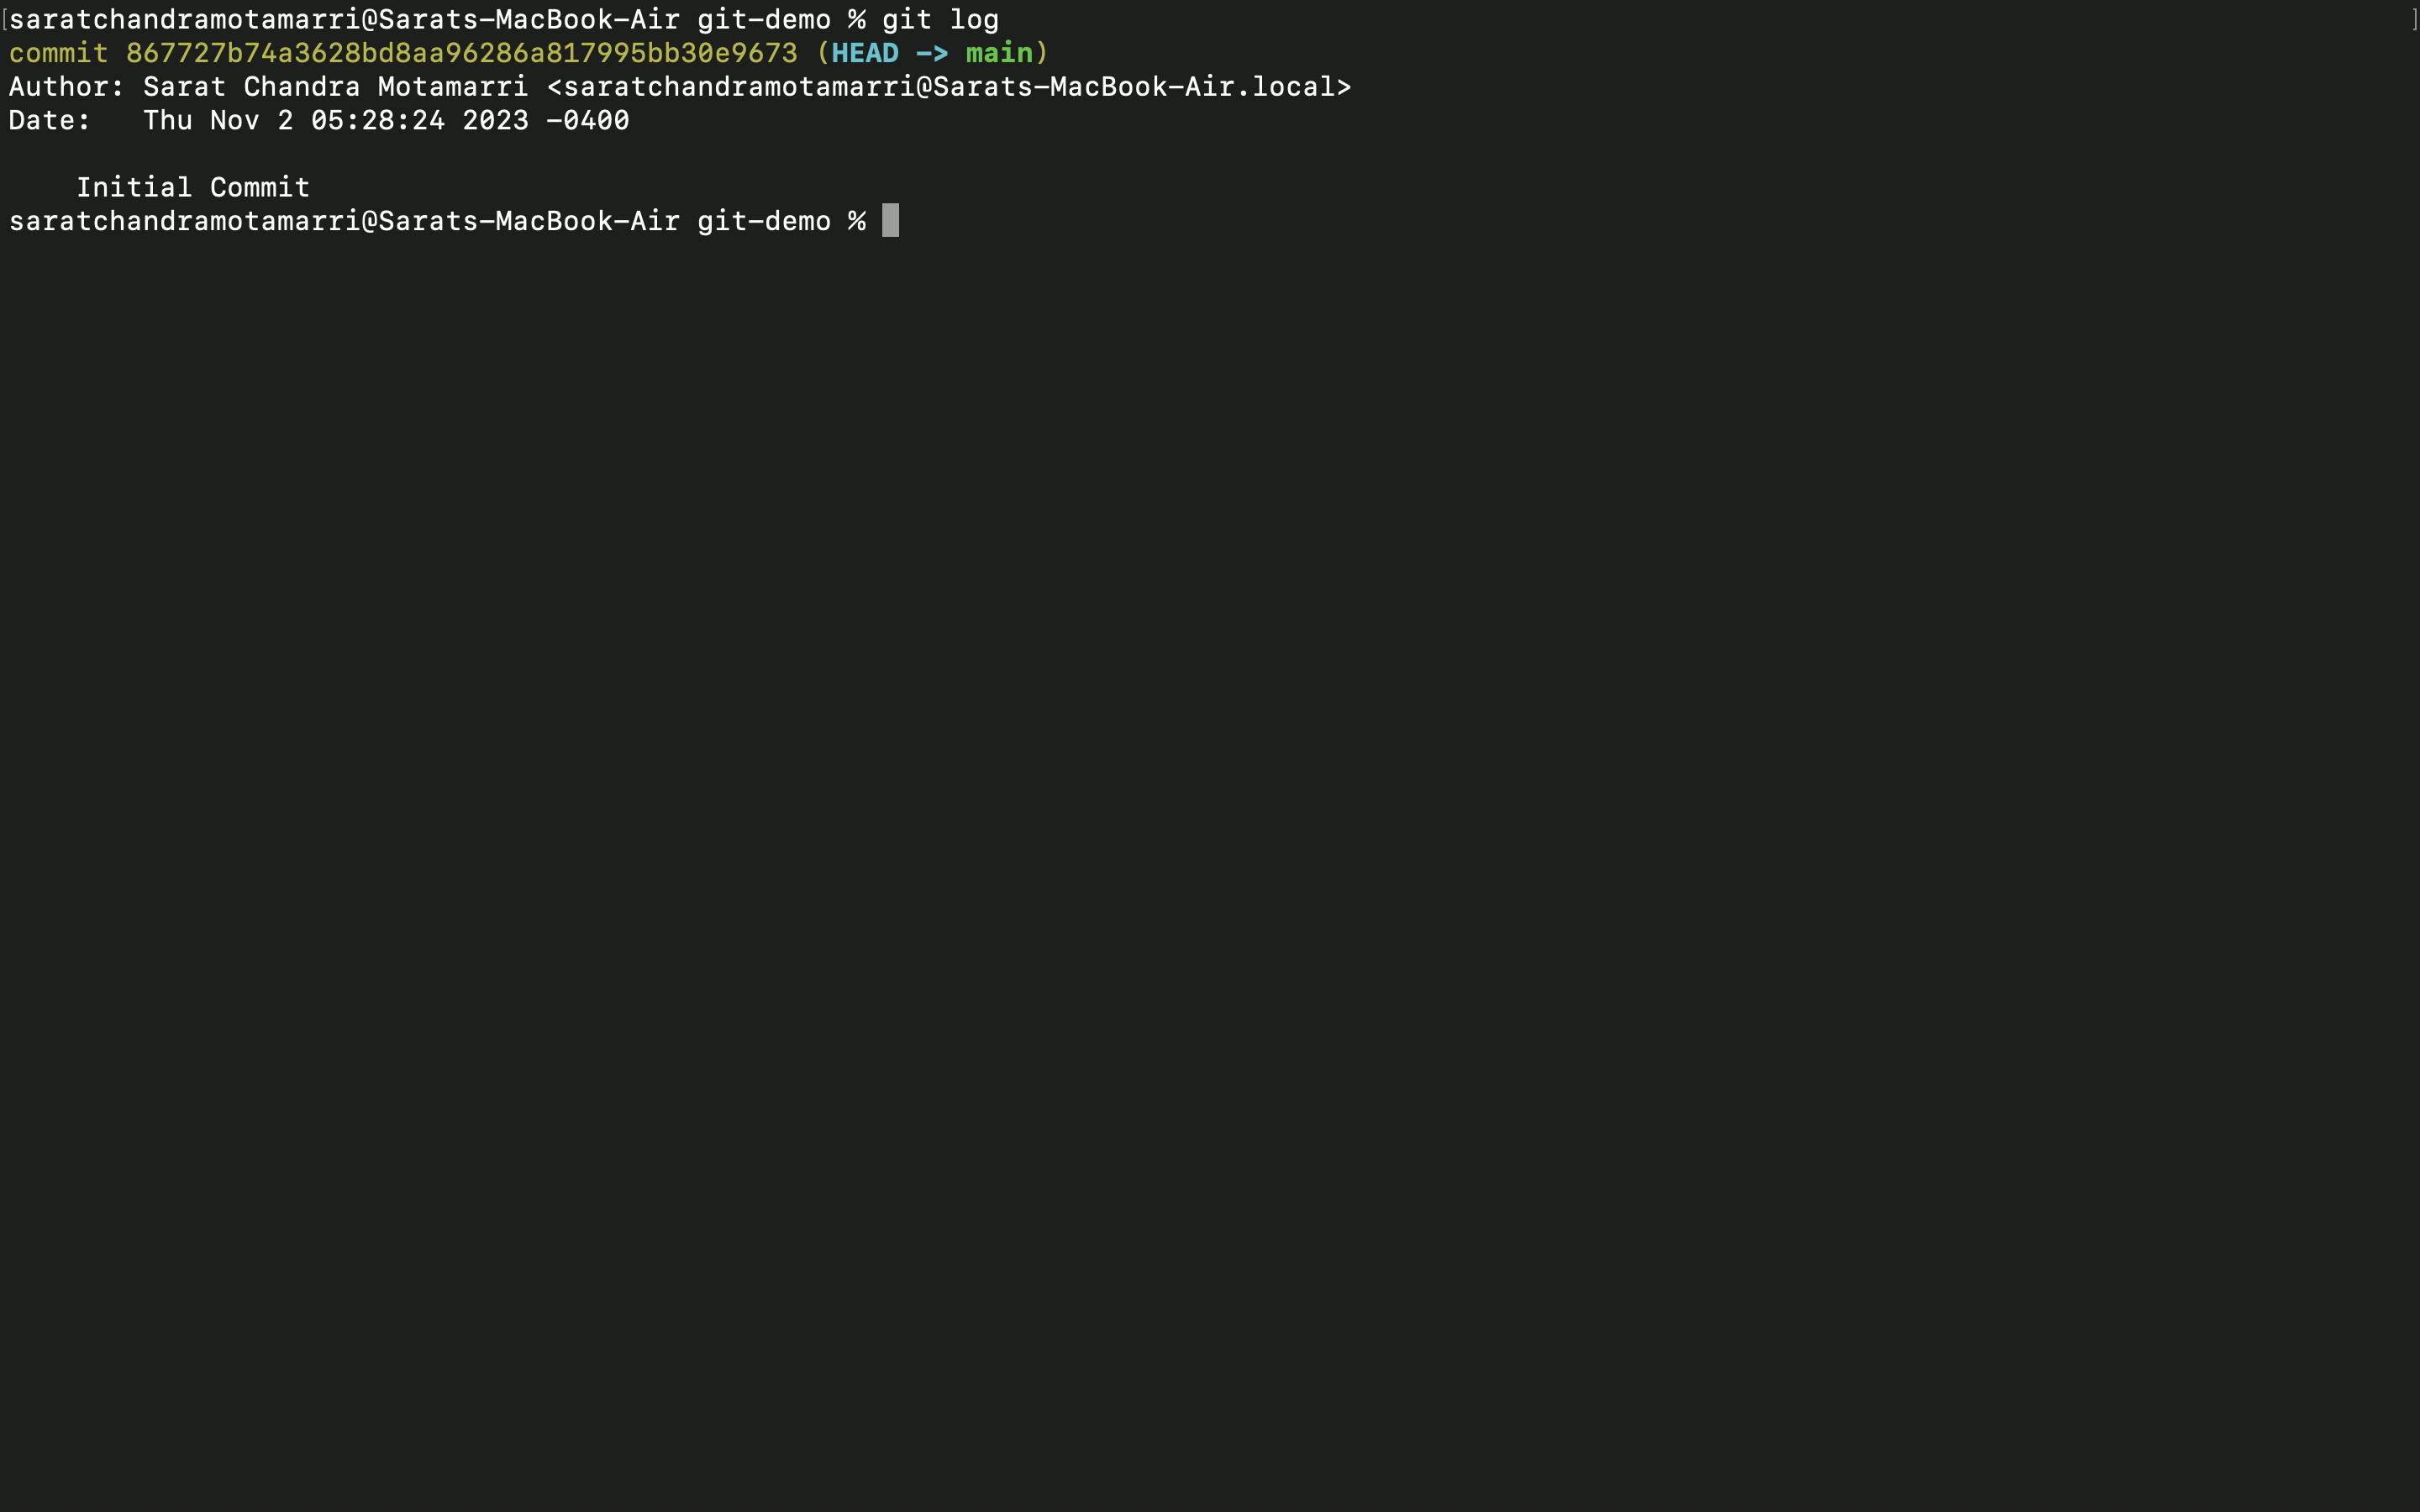
- The next thing is to commit the changes by using git commit -m "Initial Commit".
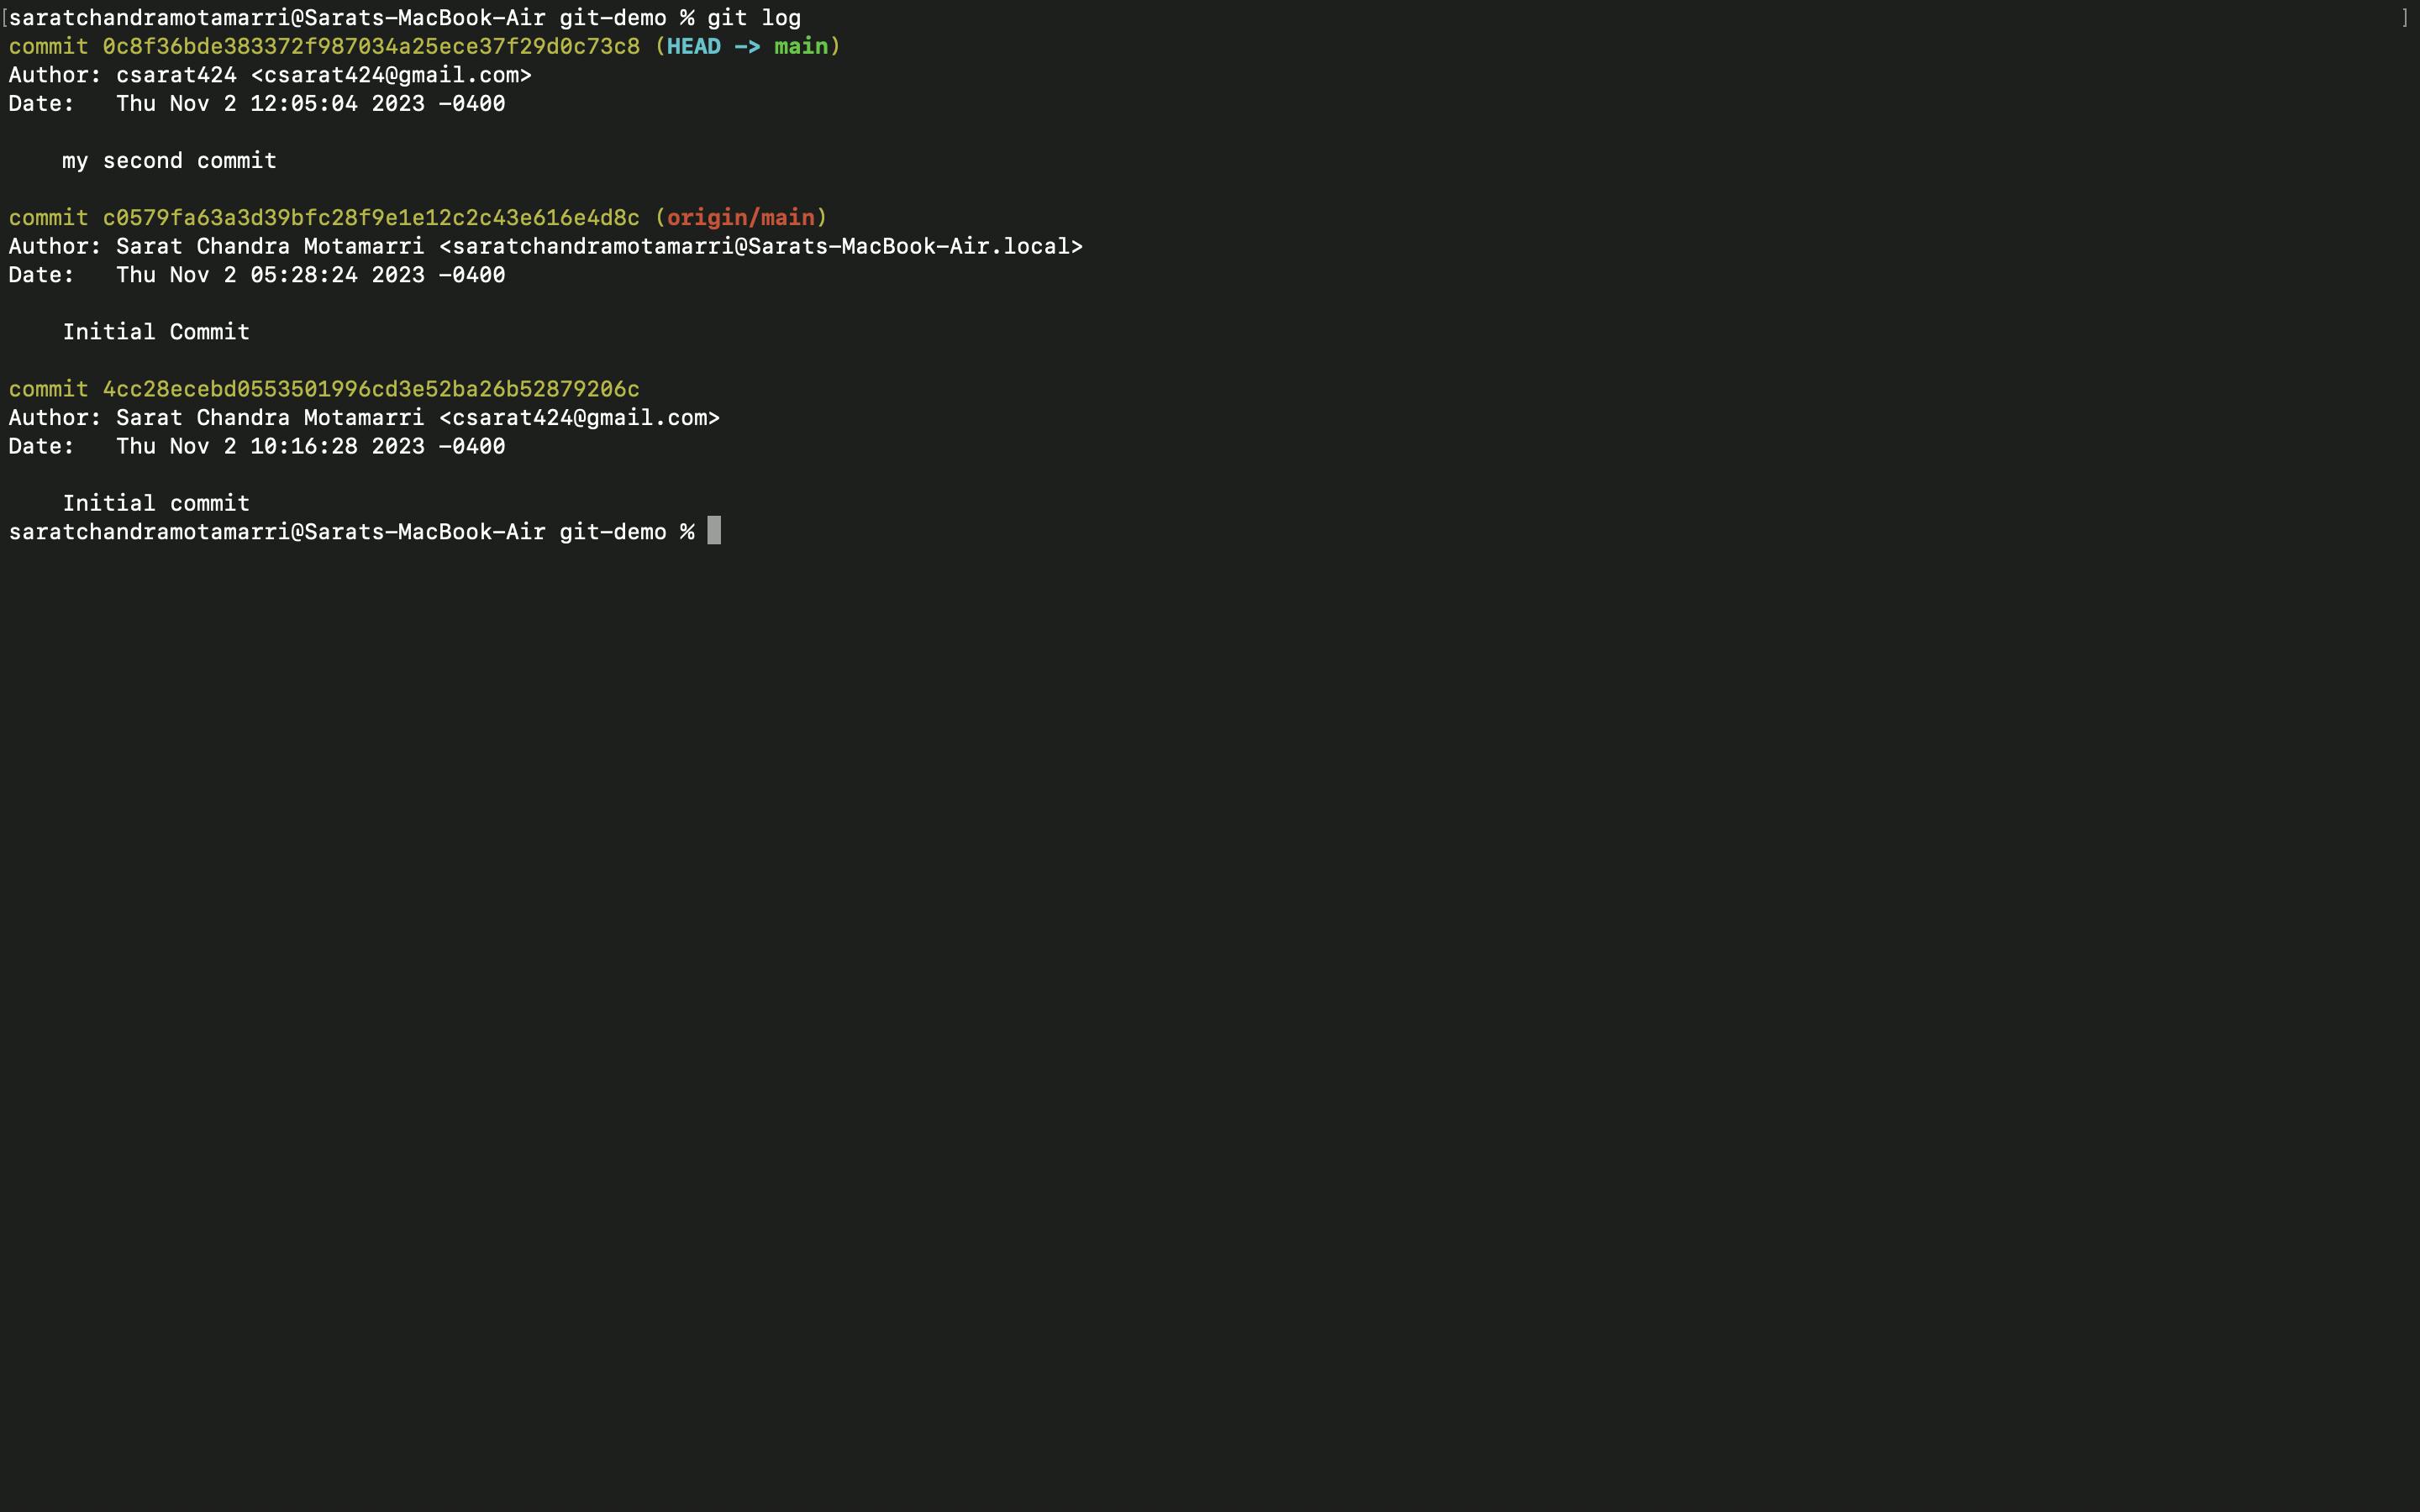
- After committing when I use "git log" it will display a list of commits. Let's say 10 developers are working in a team, It logs the name of the Author who committed. Later when we add a new line/feature and when this doesn't work as expected, we can revert to the previous commit.
- Finally, we need to push the code to GitHub central repo we need to use "git push" which pushes the entire code base from local to a central repo. End of the day we have to put in a place where everybody has to access it.
The basic commands that we use day in and day out are "git add && git commit -m " and" && git push". This is the basic workflow generally followed by all organizations.
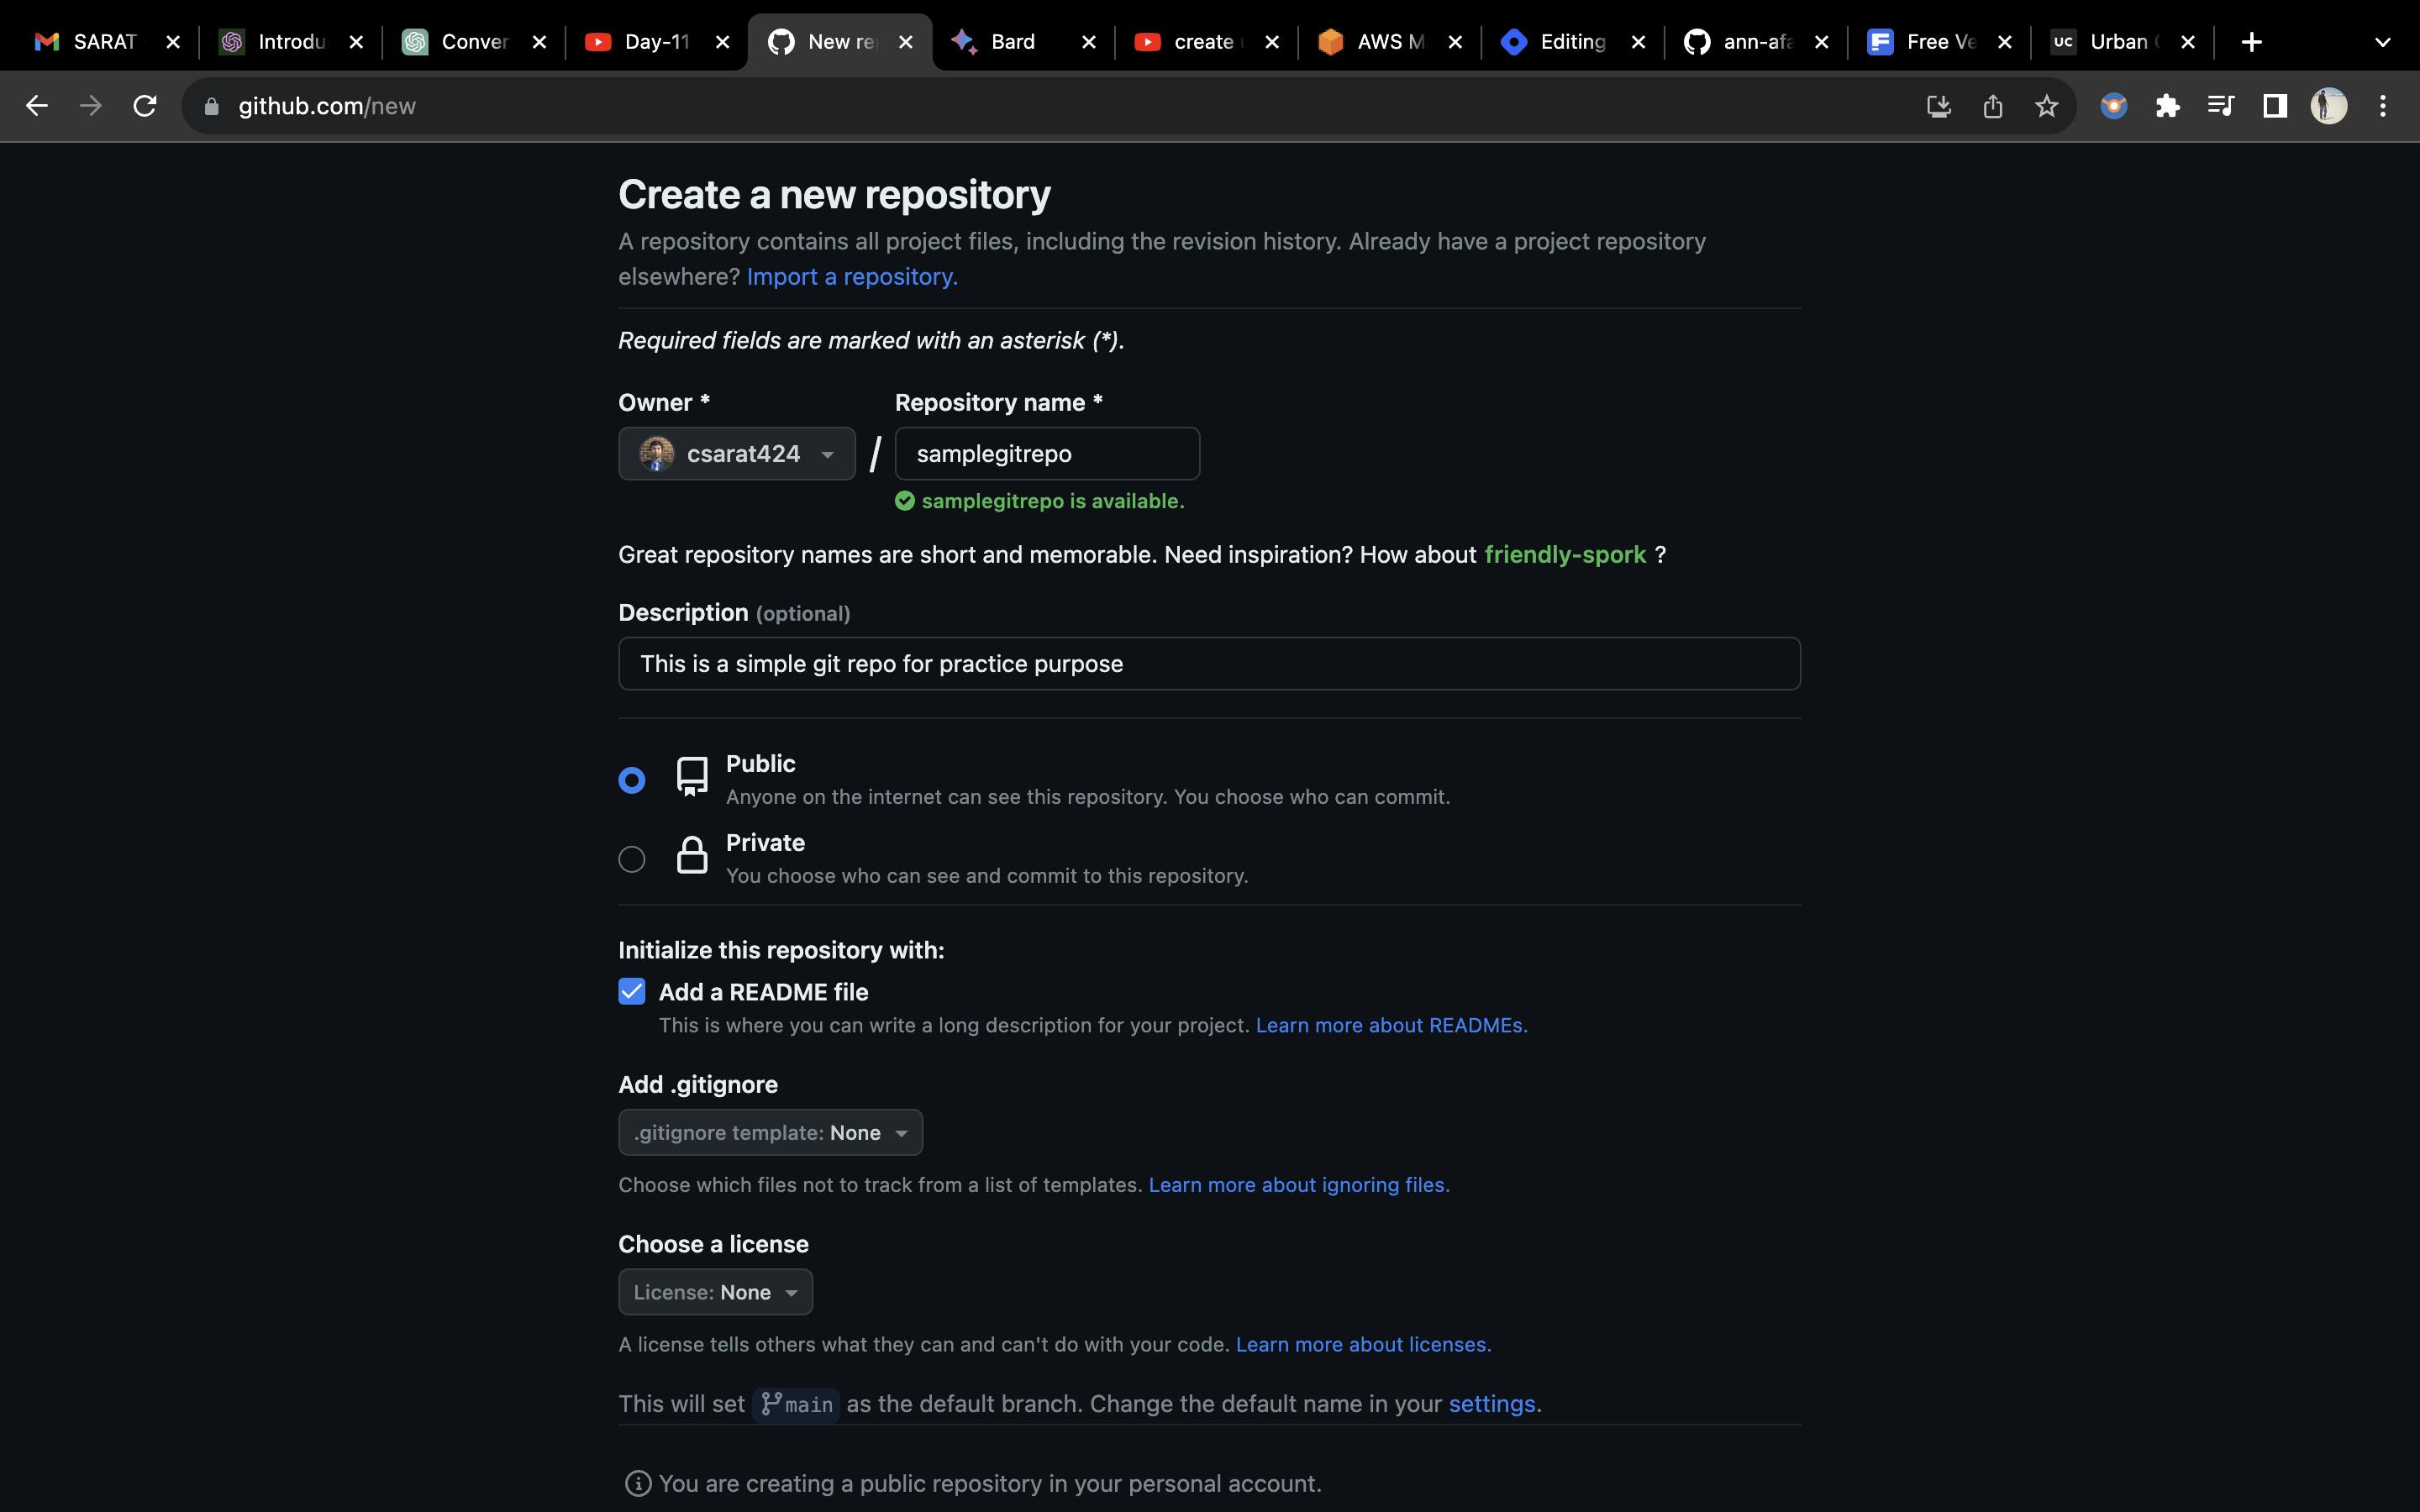
The command to push the code from local to a central repo is git remote add " ". (It can be GitHub, BitBucket etc.). Once we add the location, a repo will be created in remote as well.
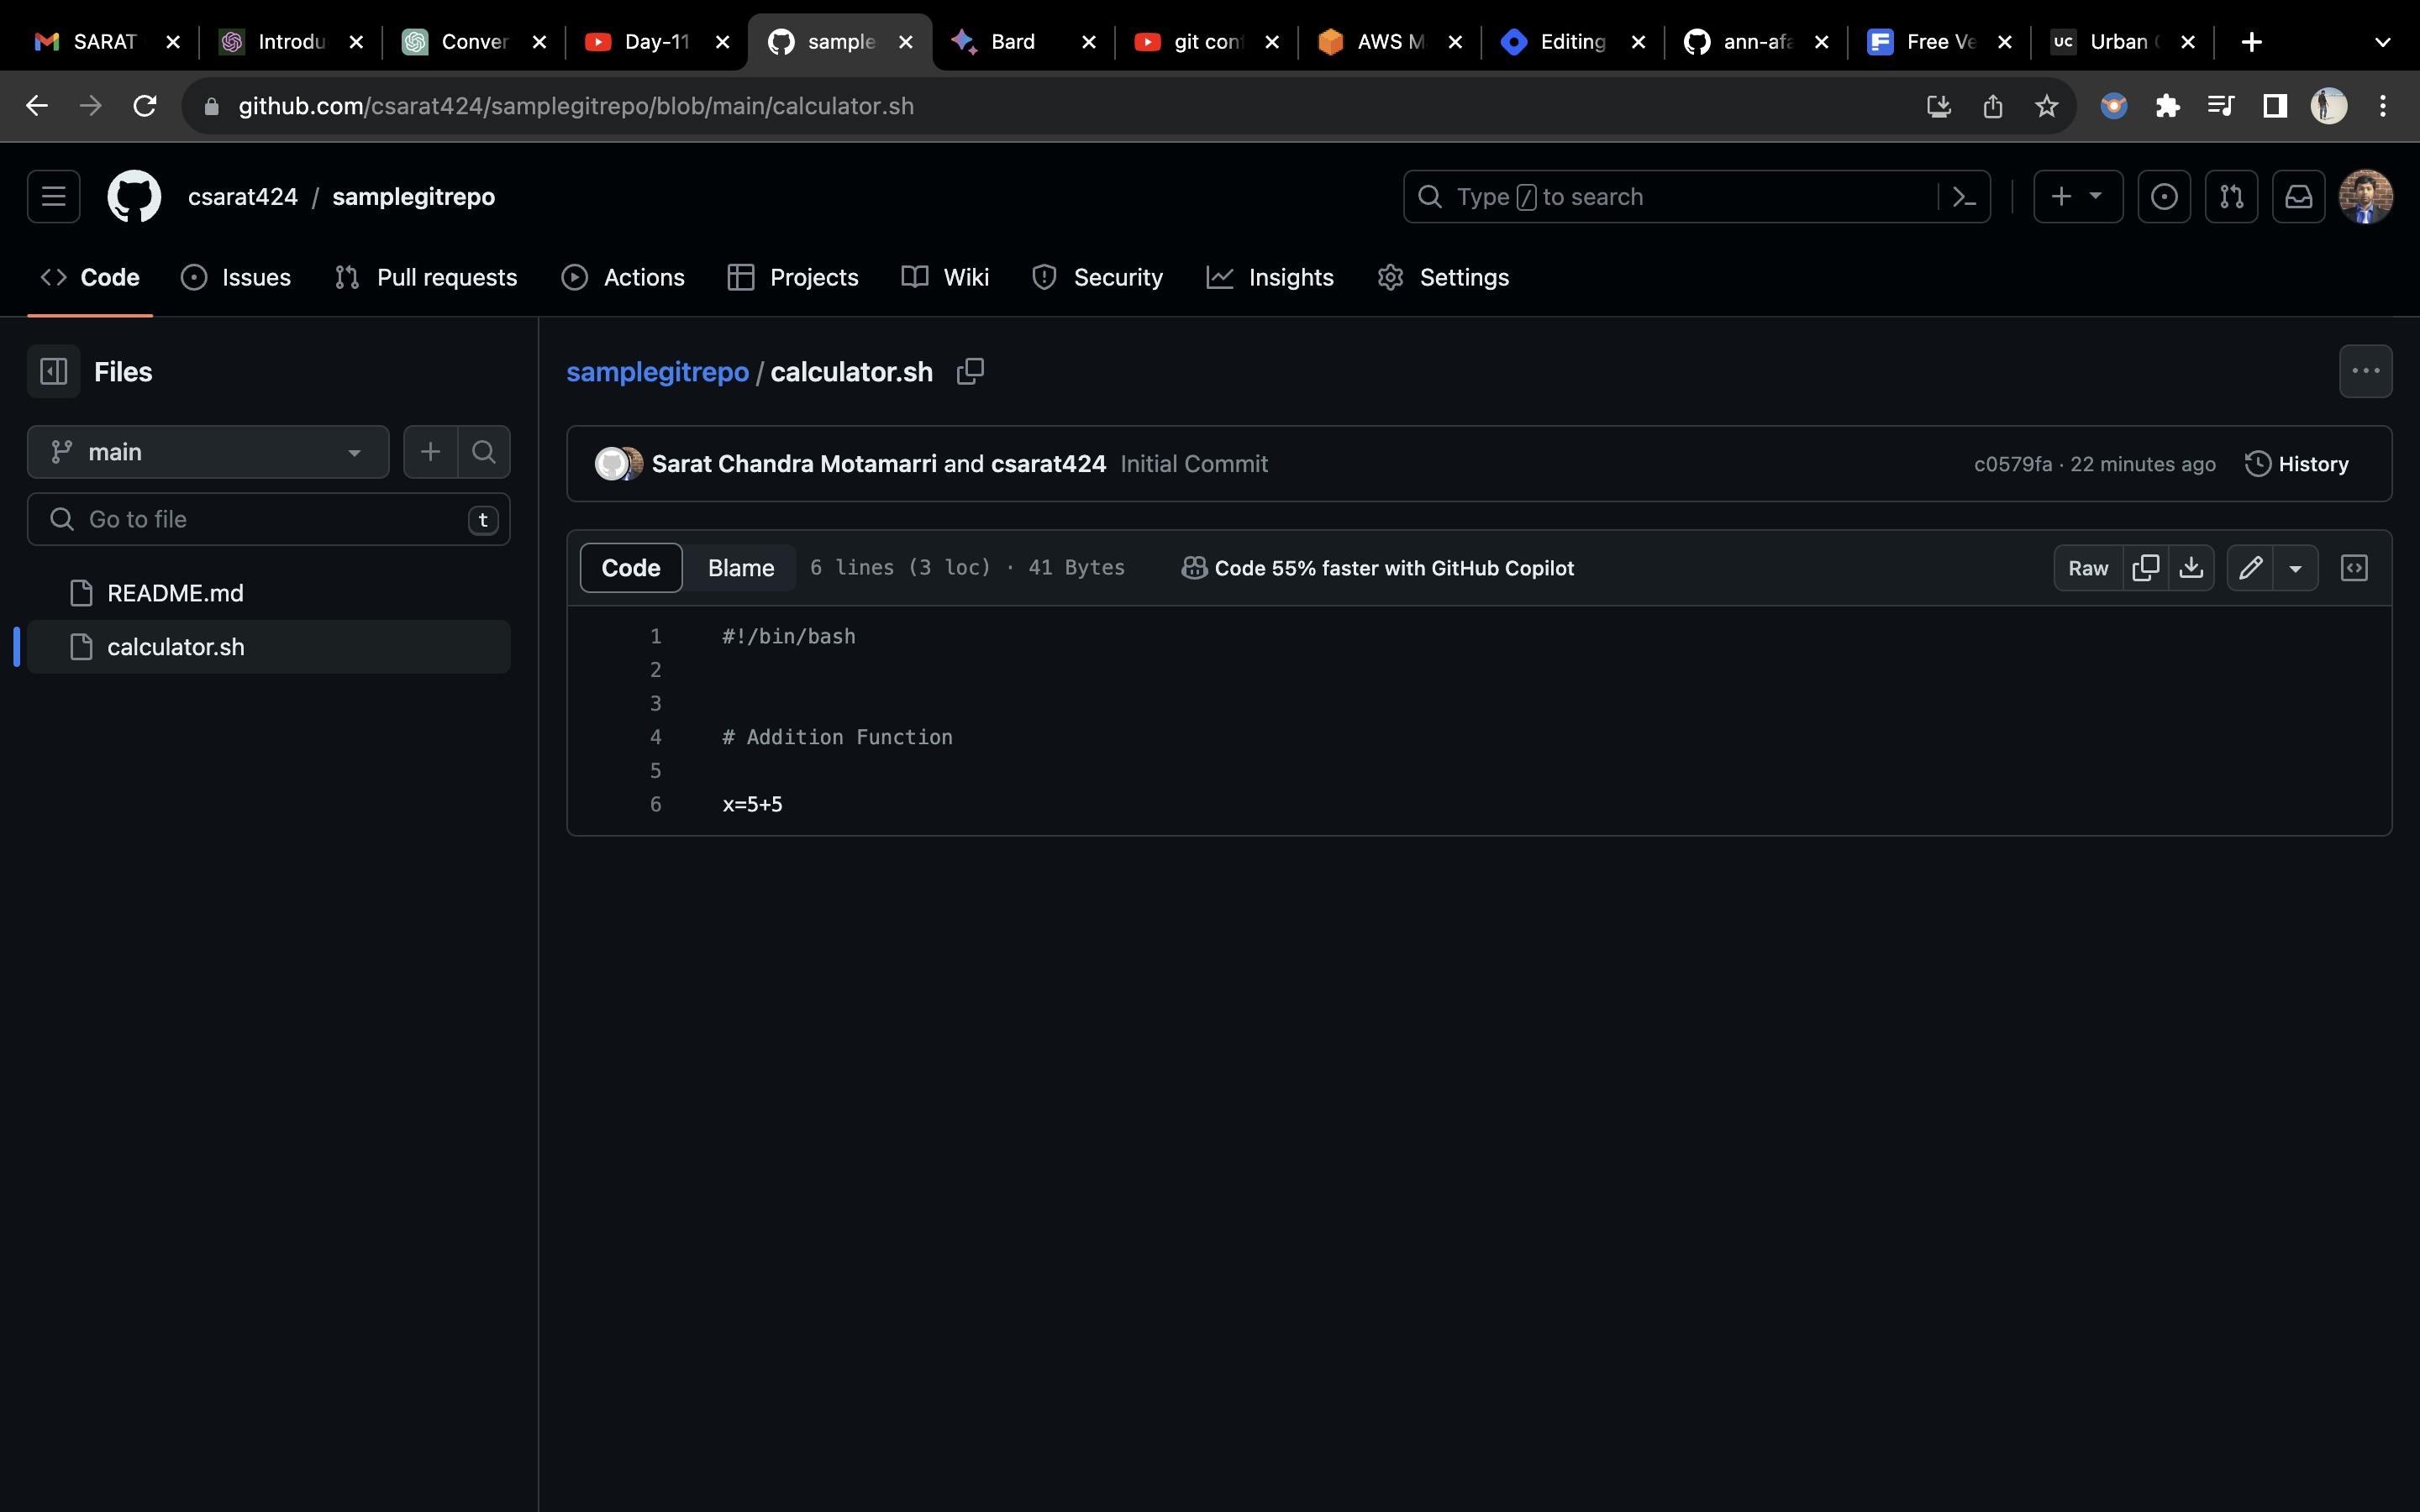
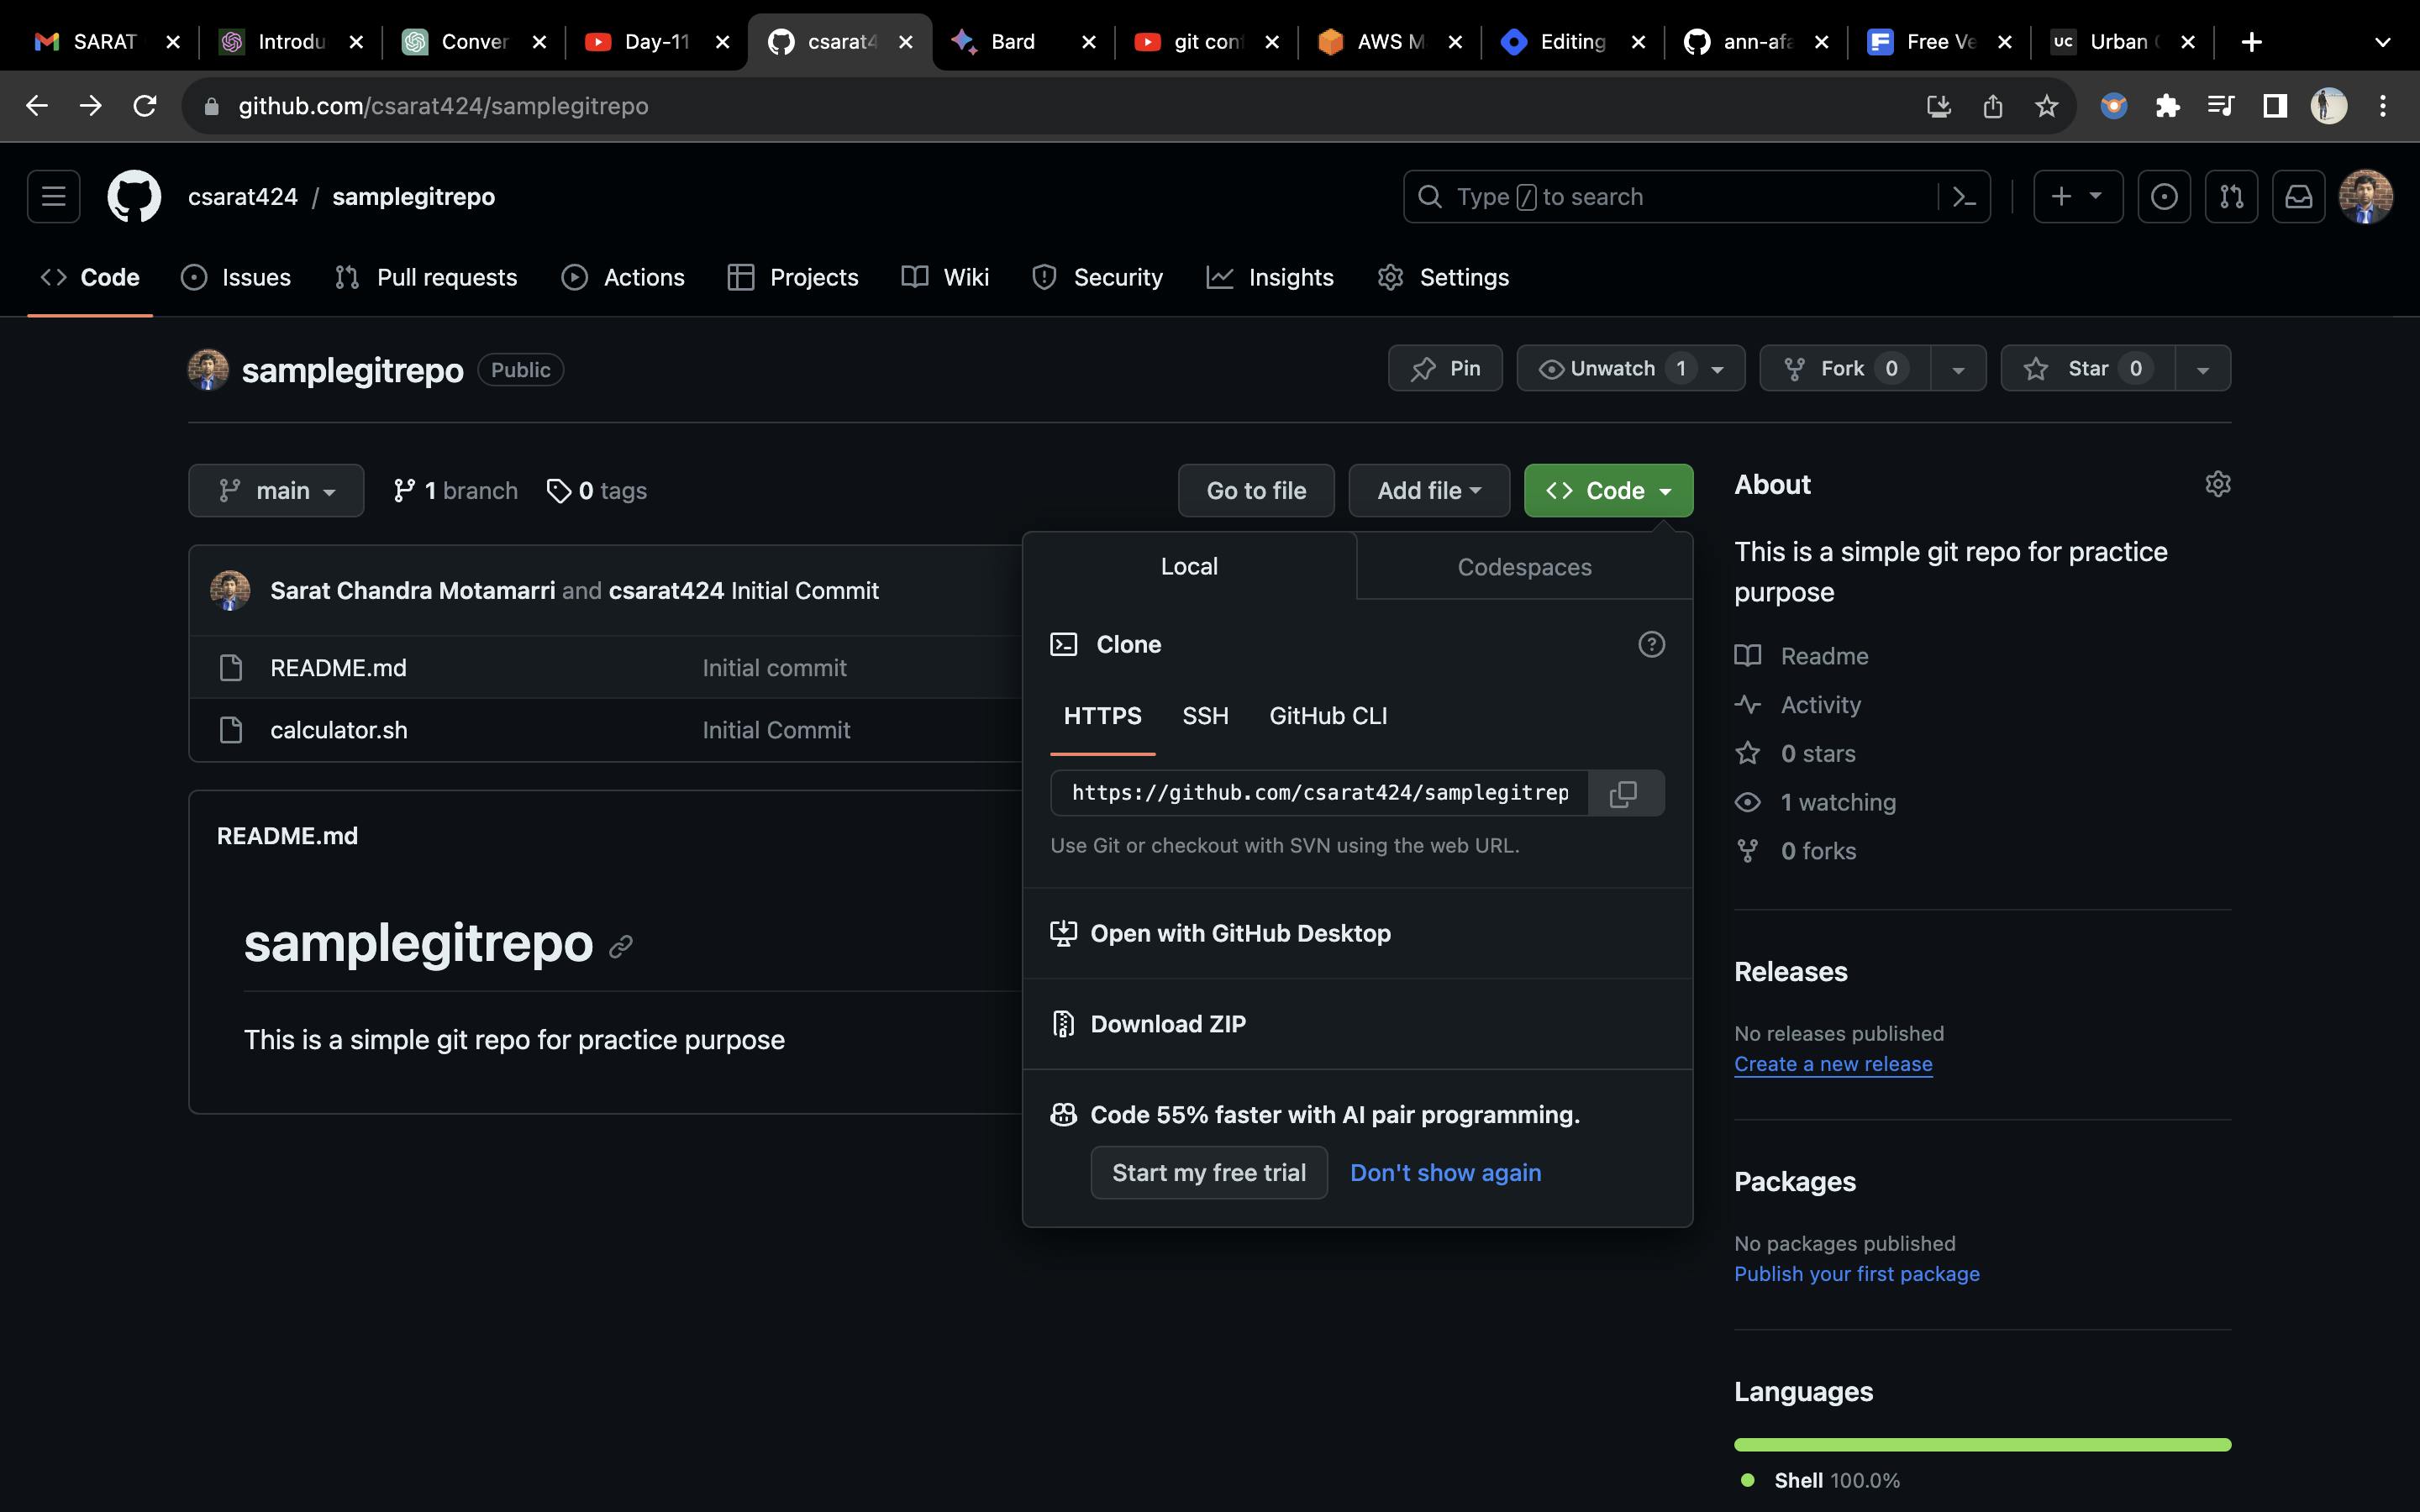
I have created a sample git repo on GitHub, for practice purposes as shown below:
- Then I pulled the changes from the remote GitHub using "git pull origin main". Finally pushed the local code base using "git push origin main". By doing so, the calculator. sh, file is pushed from my local machine to a remote GitHub repo.
If someone else wants to download this code to their local machine they can use "git clone followed by the https://" as shown below. ("git pull" also does the same)
"GIT FORK":
Let's say there's a "calculator. sh" file in the GitHub repository that you want to work on. Here's what you would do:
You "fork" their repository on the platform (e.g., GitHub).
This creates a copy of their repository in your GitHub account.
Now, you can make changes to the "calculator. sh" file in your forked repository, without affecting the original one.
You can commit your changes, create pull requests, and collaborate with others on your fork.
If your changes are accepted and merged into the original repository, that's great! If not, you can continue maintaining your fork separately.
In short, we can create multiple replicas and collaborate on those replicas.
- Now I have added another line/functionality to the calculator.sh, file and used the "git diff" command, which denotes in green lines that a new line/functionality is added and the new changes have to be git committed.

- I added the changes using "git add ." and committed using git commit -m "my second commit".

- If I do "git log" it will display my initial and second commit.
- Let's say we want to add a new line/feature to the existing app or code, then I will create a new branch using "git checkout -b branch name".

- Now, if I use "git branch" it will display all the branches.

Now I am in the division branch

- Now again I have modified or added a line/function to the calculator.sh file.
- Finally, I have repeated the process, like git add. , git commit -m "third commit" and git log which displays all the commits.
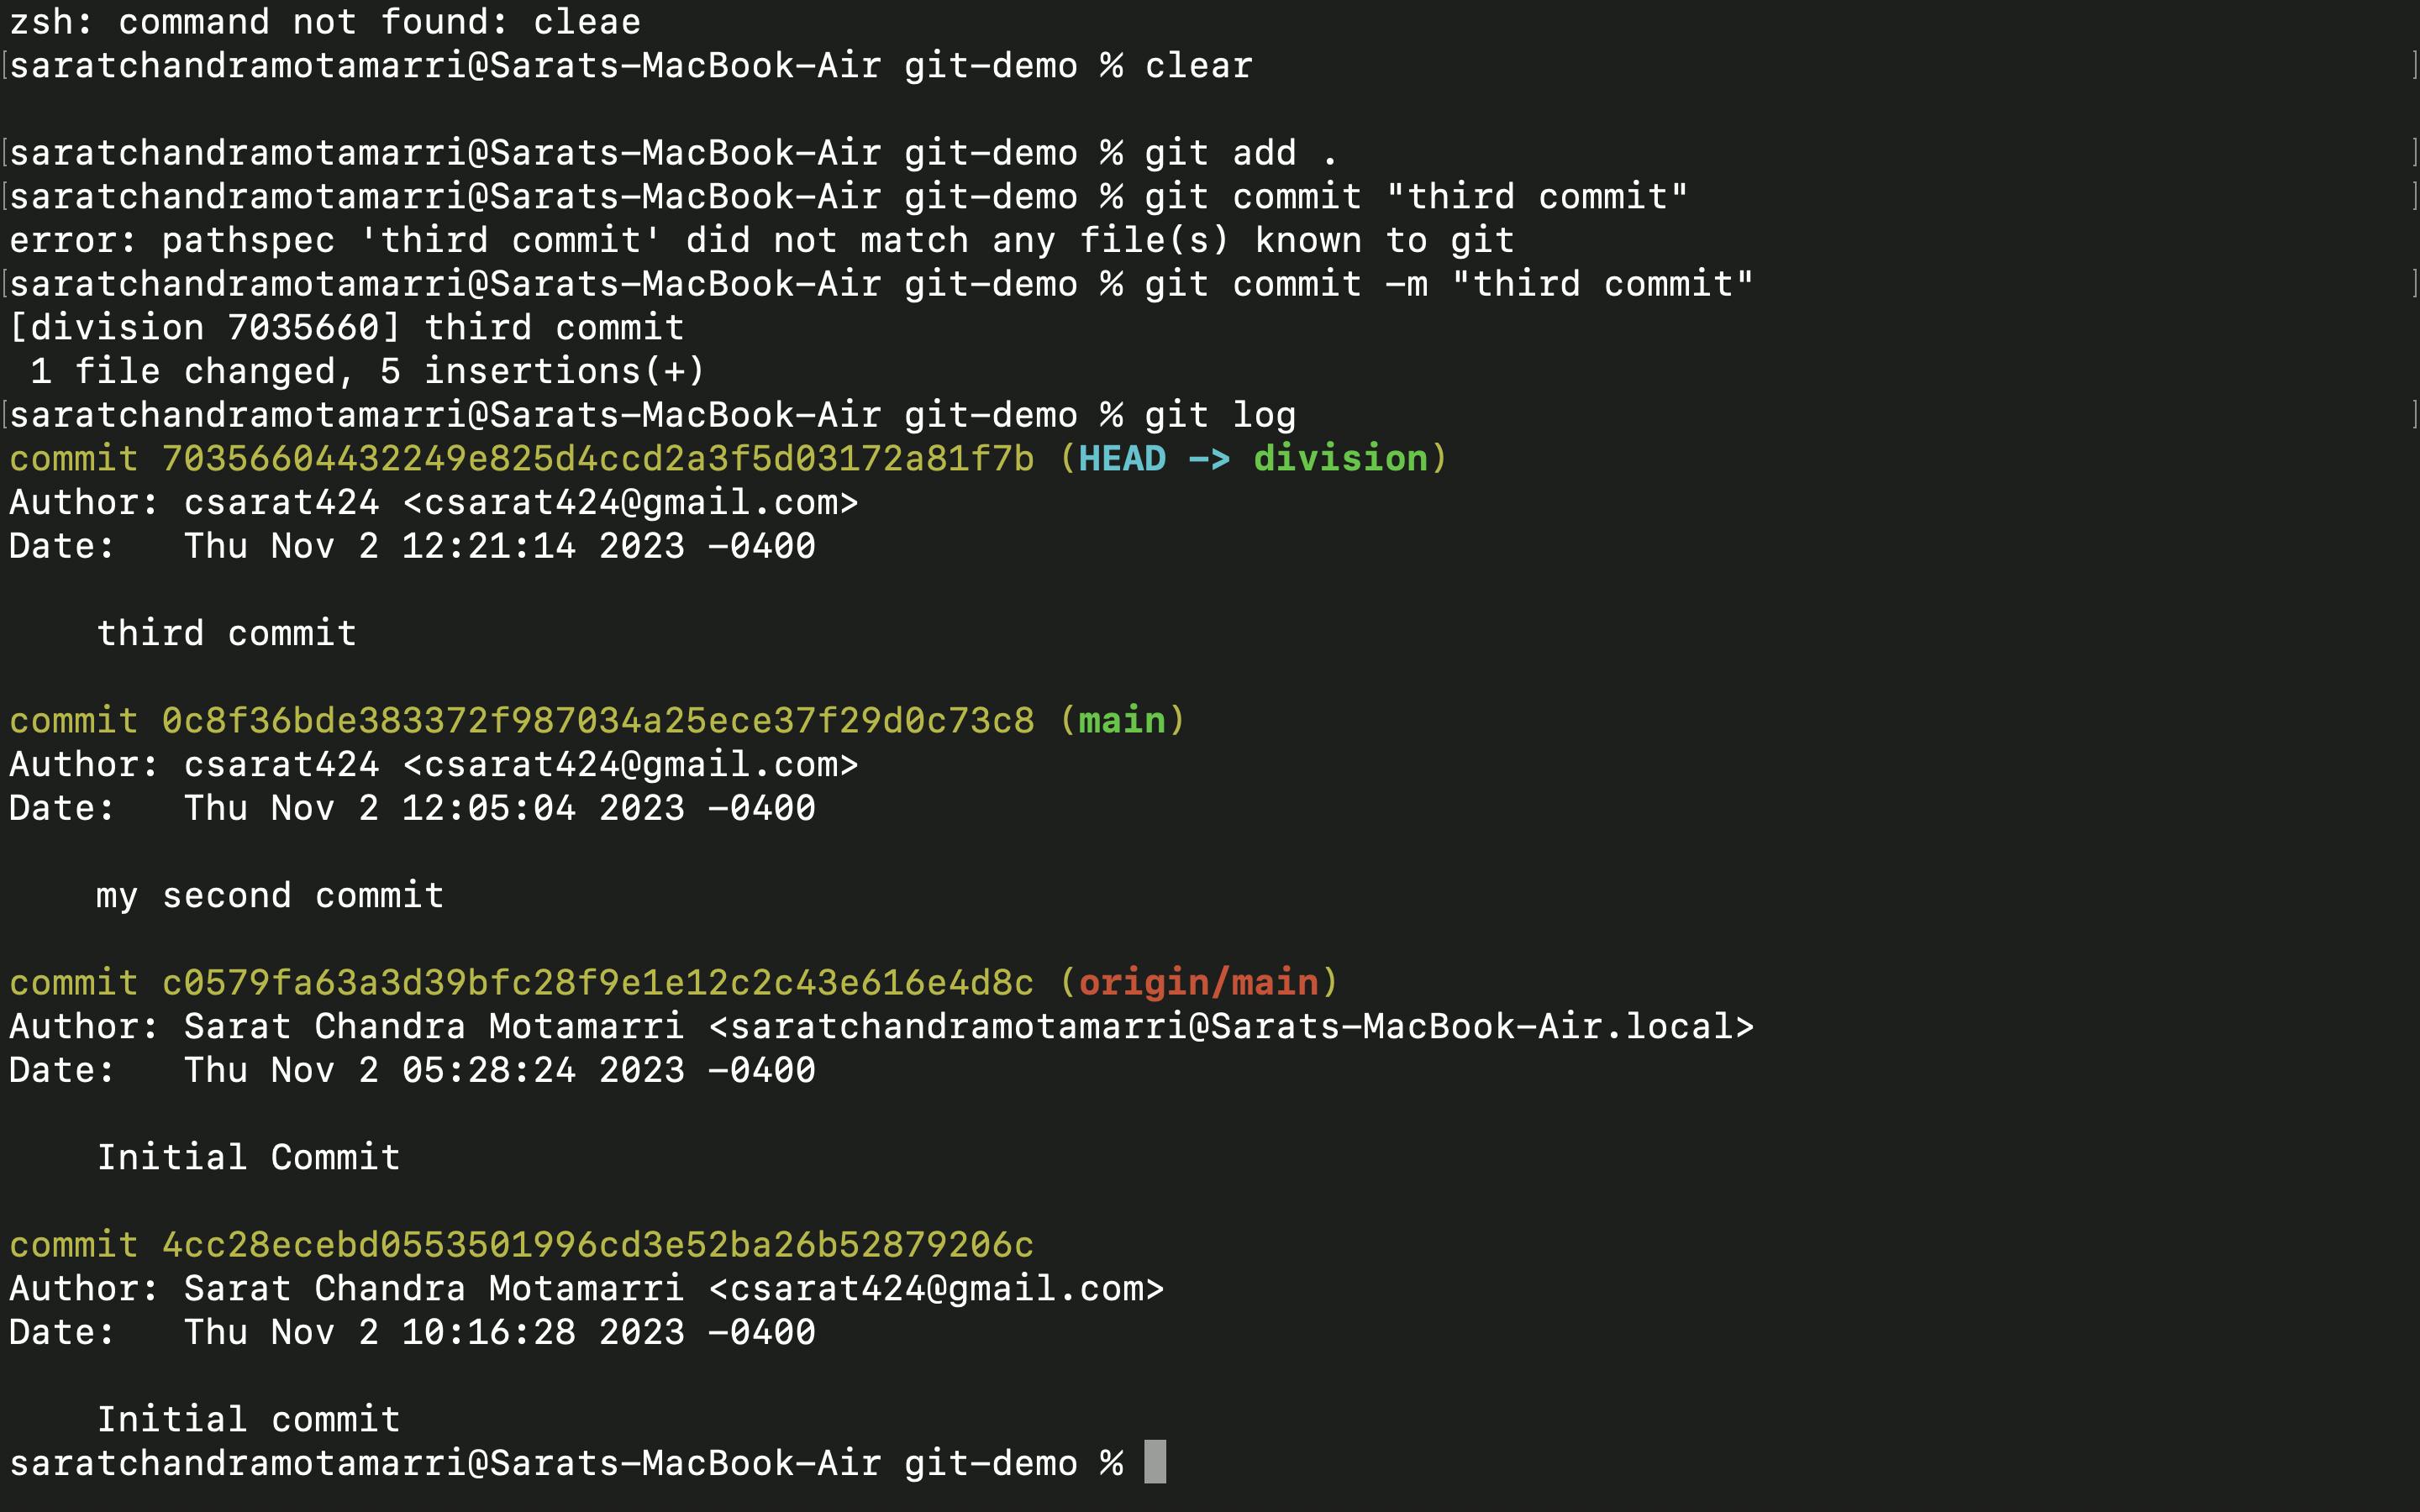
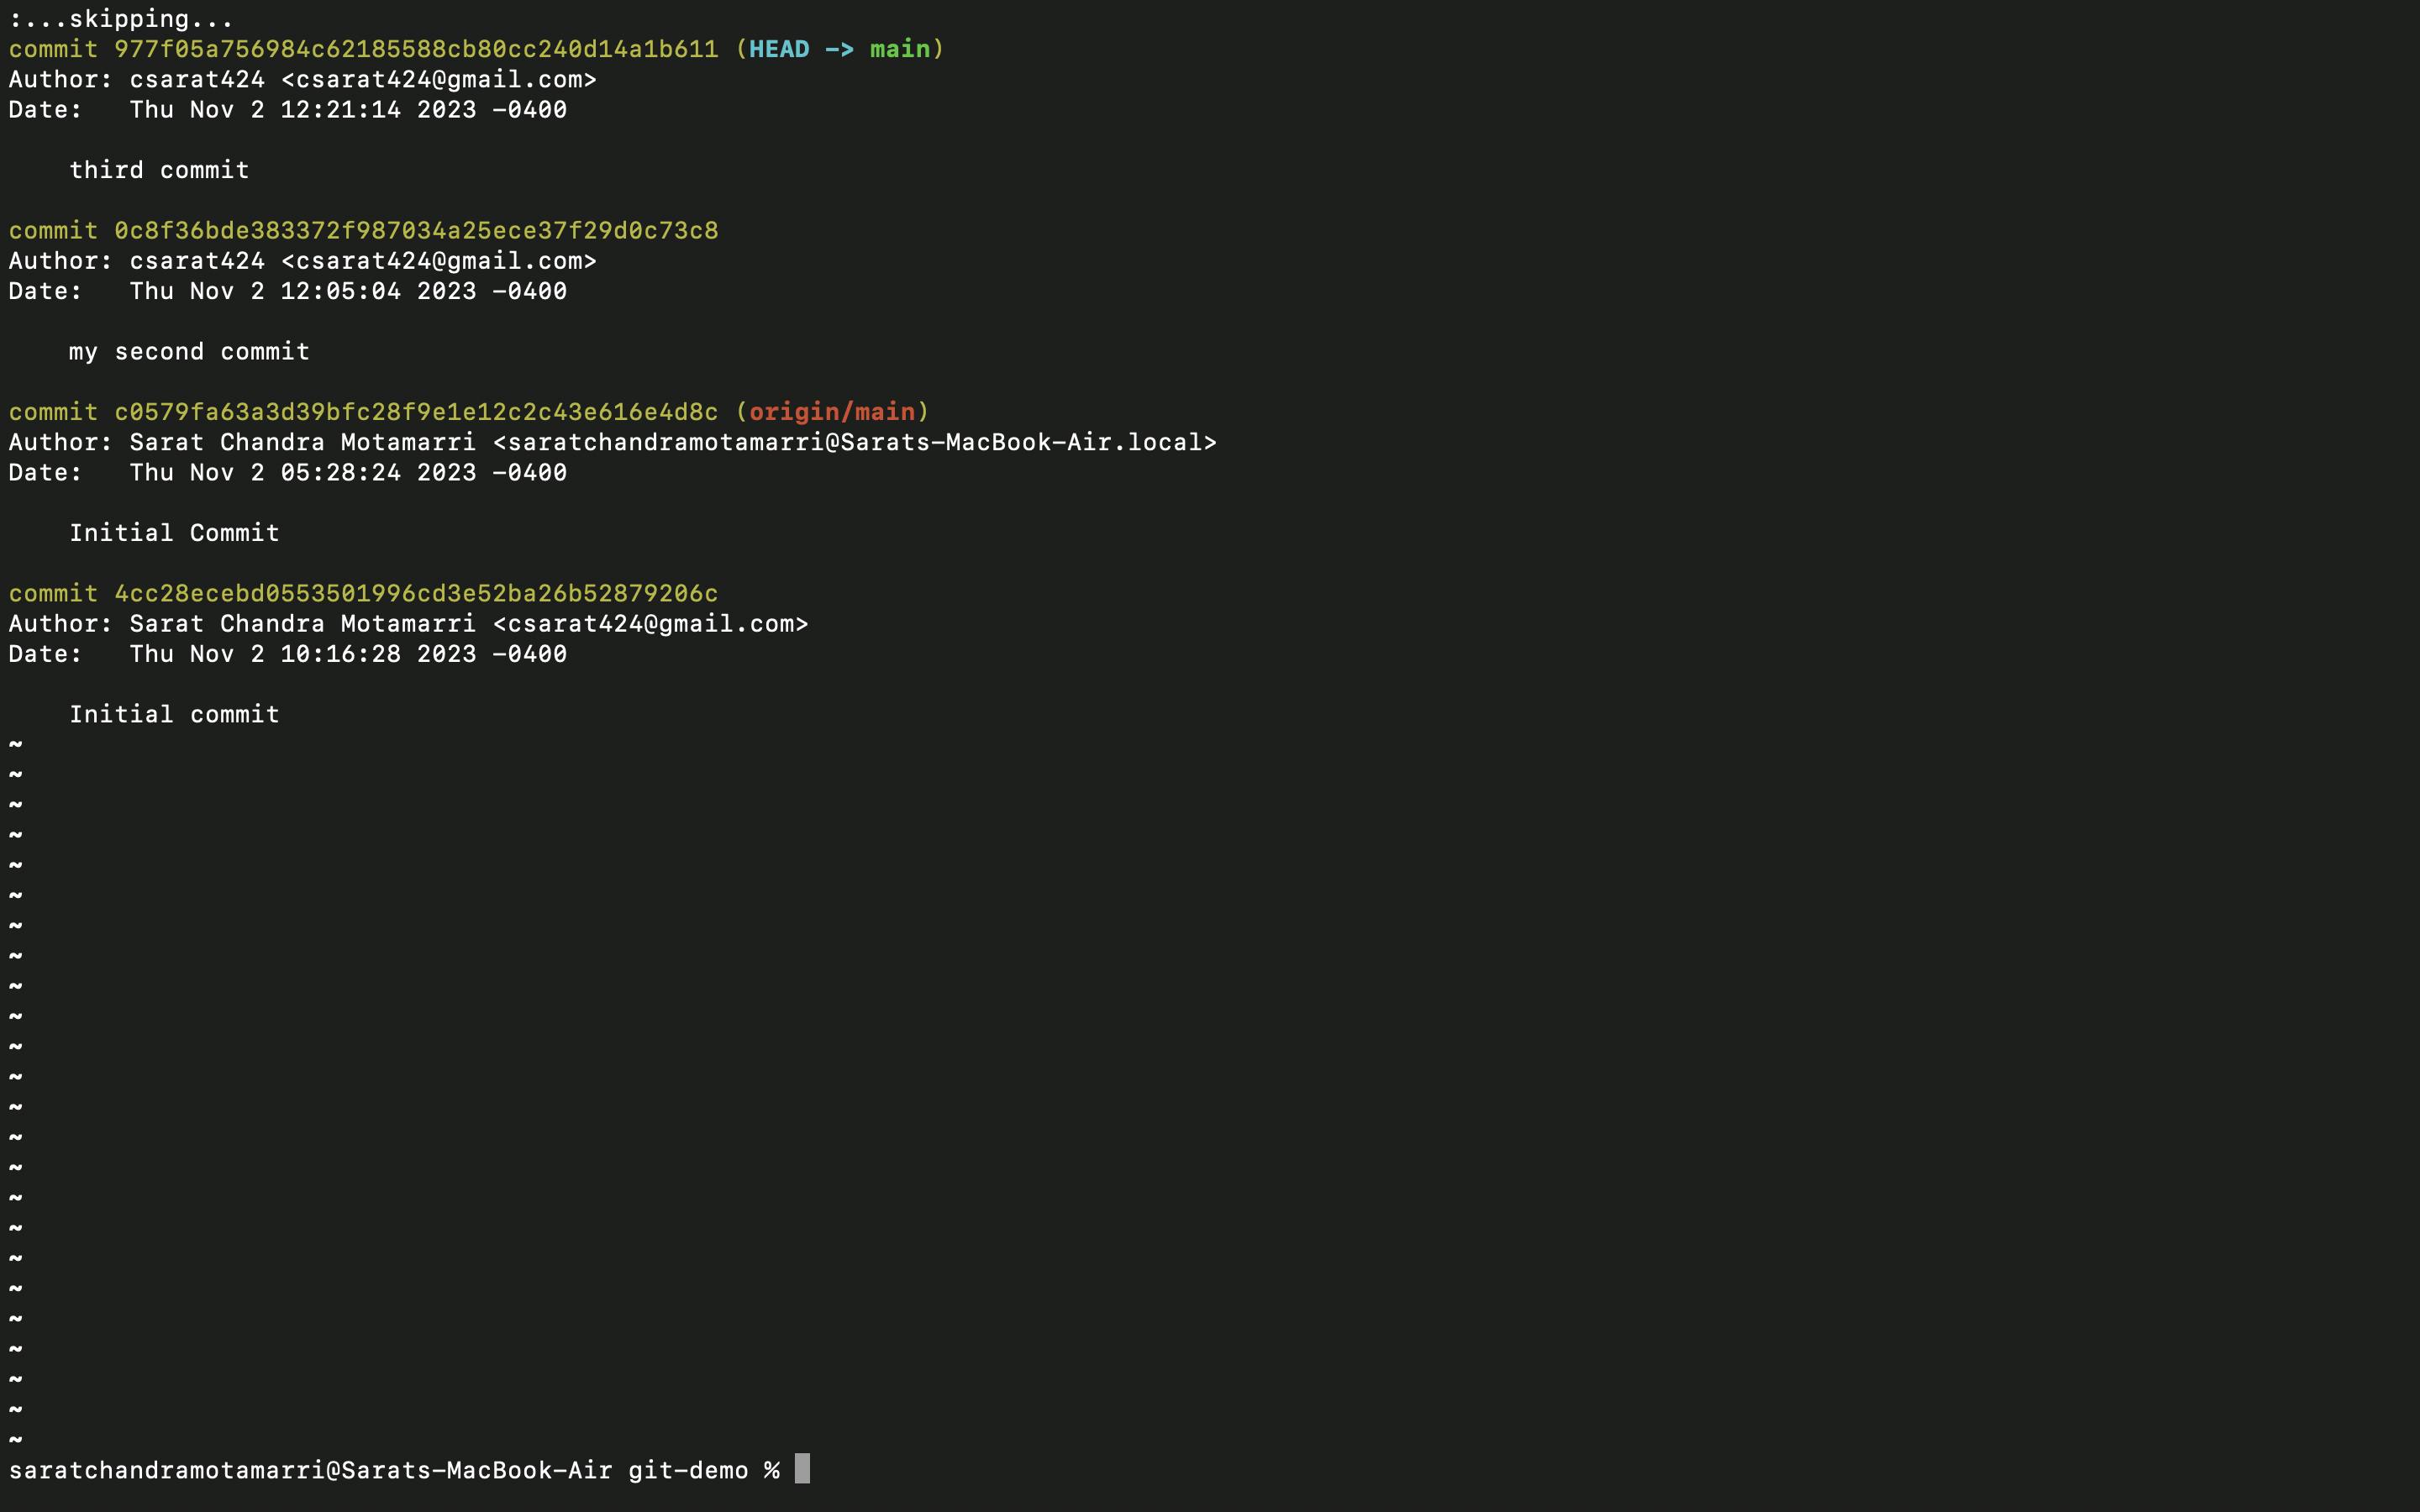
- If I switch to the main branch from my current branch(i.e. division branch) using "git checkout main" and do "git log" I will only see my initial commit and second commit.
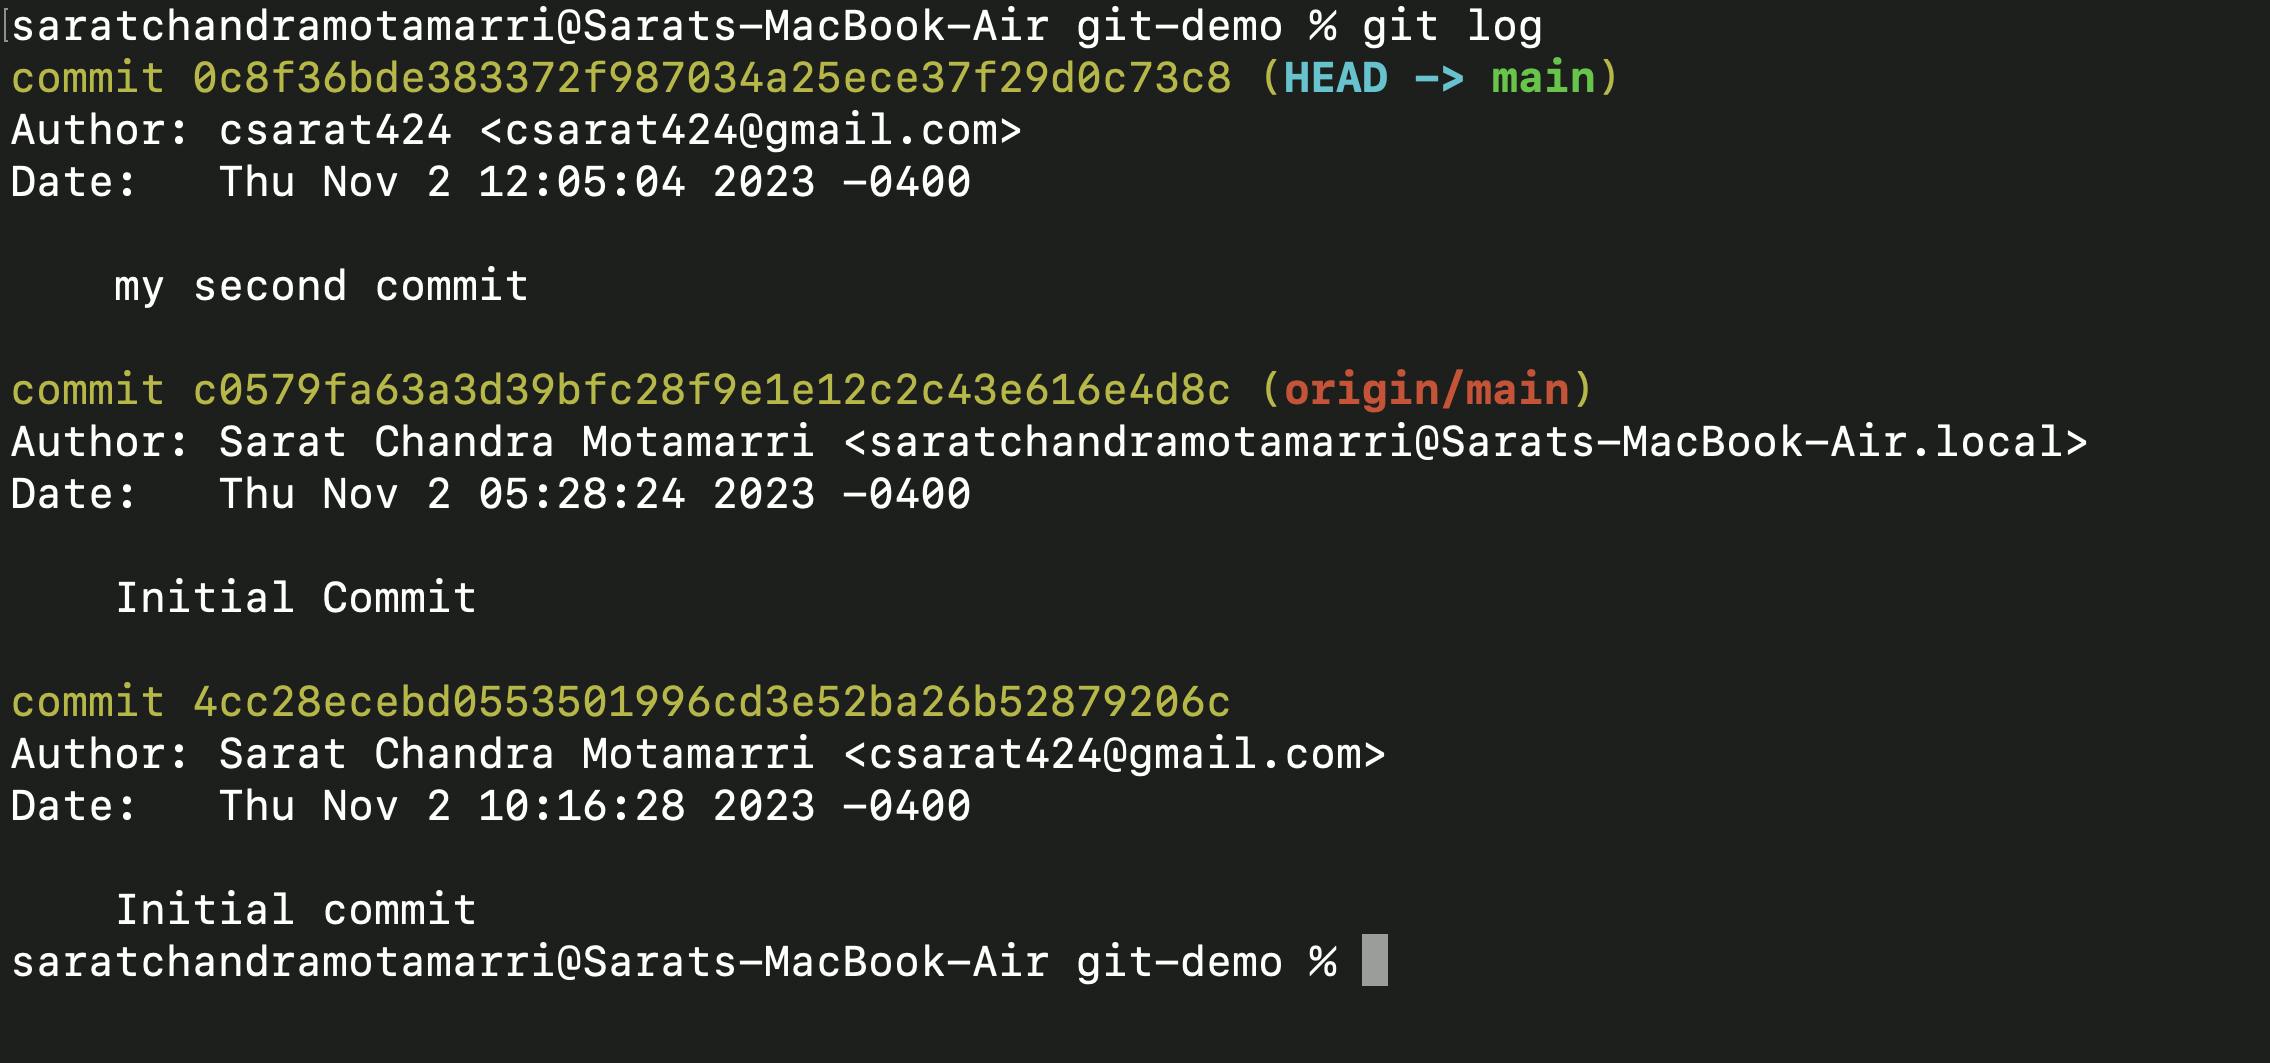
This happens because we haven't merged the "division" branch with the "main" branch. This is the primary reason we use branches in Git. It allows us to work separately/isolated without interfering with the existing features or the main code. When our branch is ready and tested, we can then integrate or "merge" it with the main codebase.
Now in this case, if we want to merge the "division" branch with the "main" branch, we have three options: "git merge", "git rebase" or "git cherry-pick".
Git cherry-pick:
This command allows to pick and apply a specific commit from one branch and apply it to another branch. This can be helpful when you want to selectively bring changes from one branch into another.
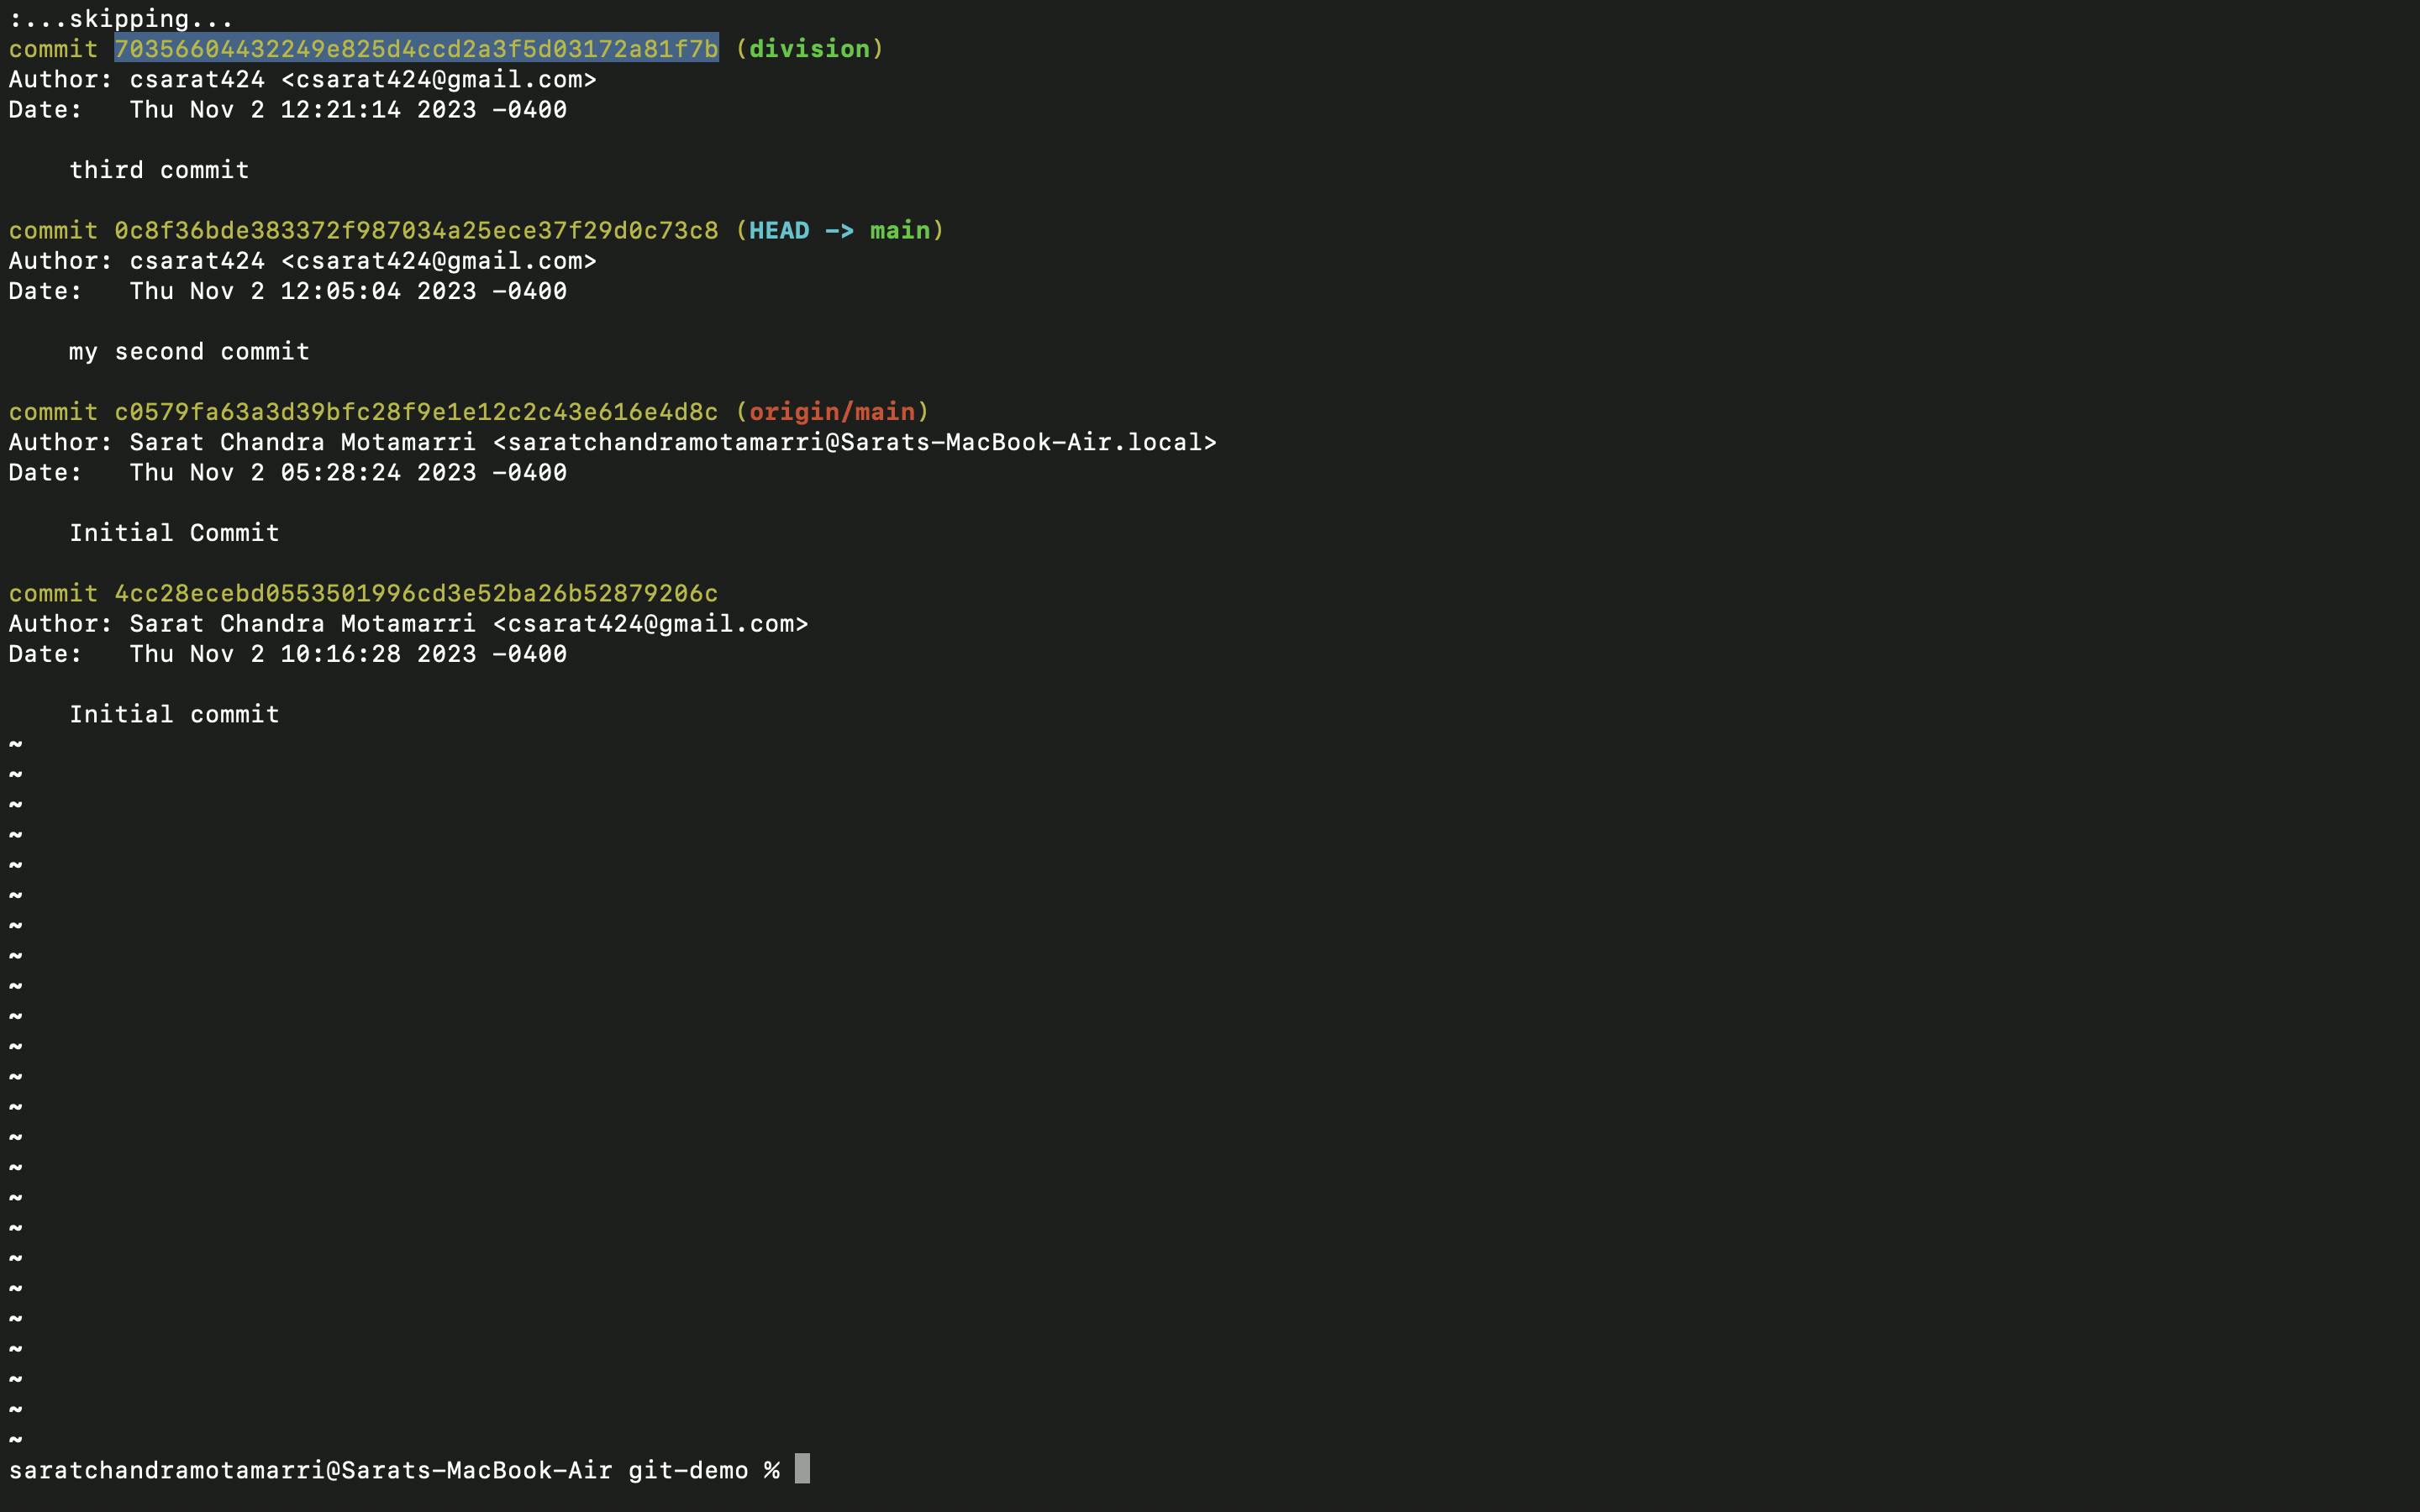
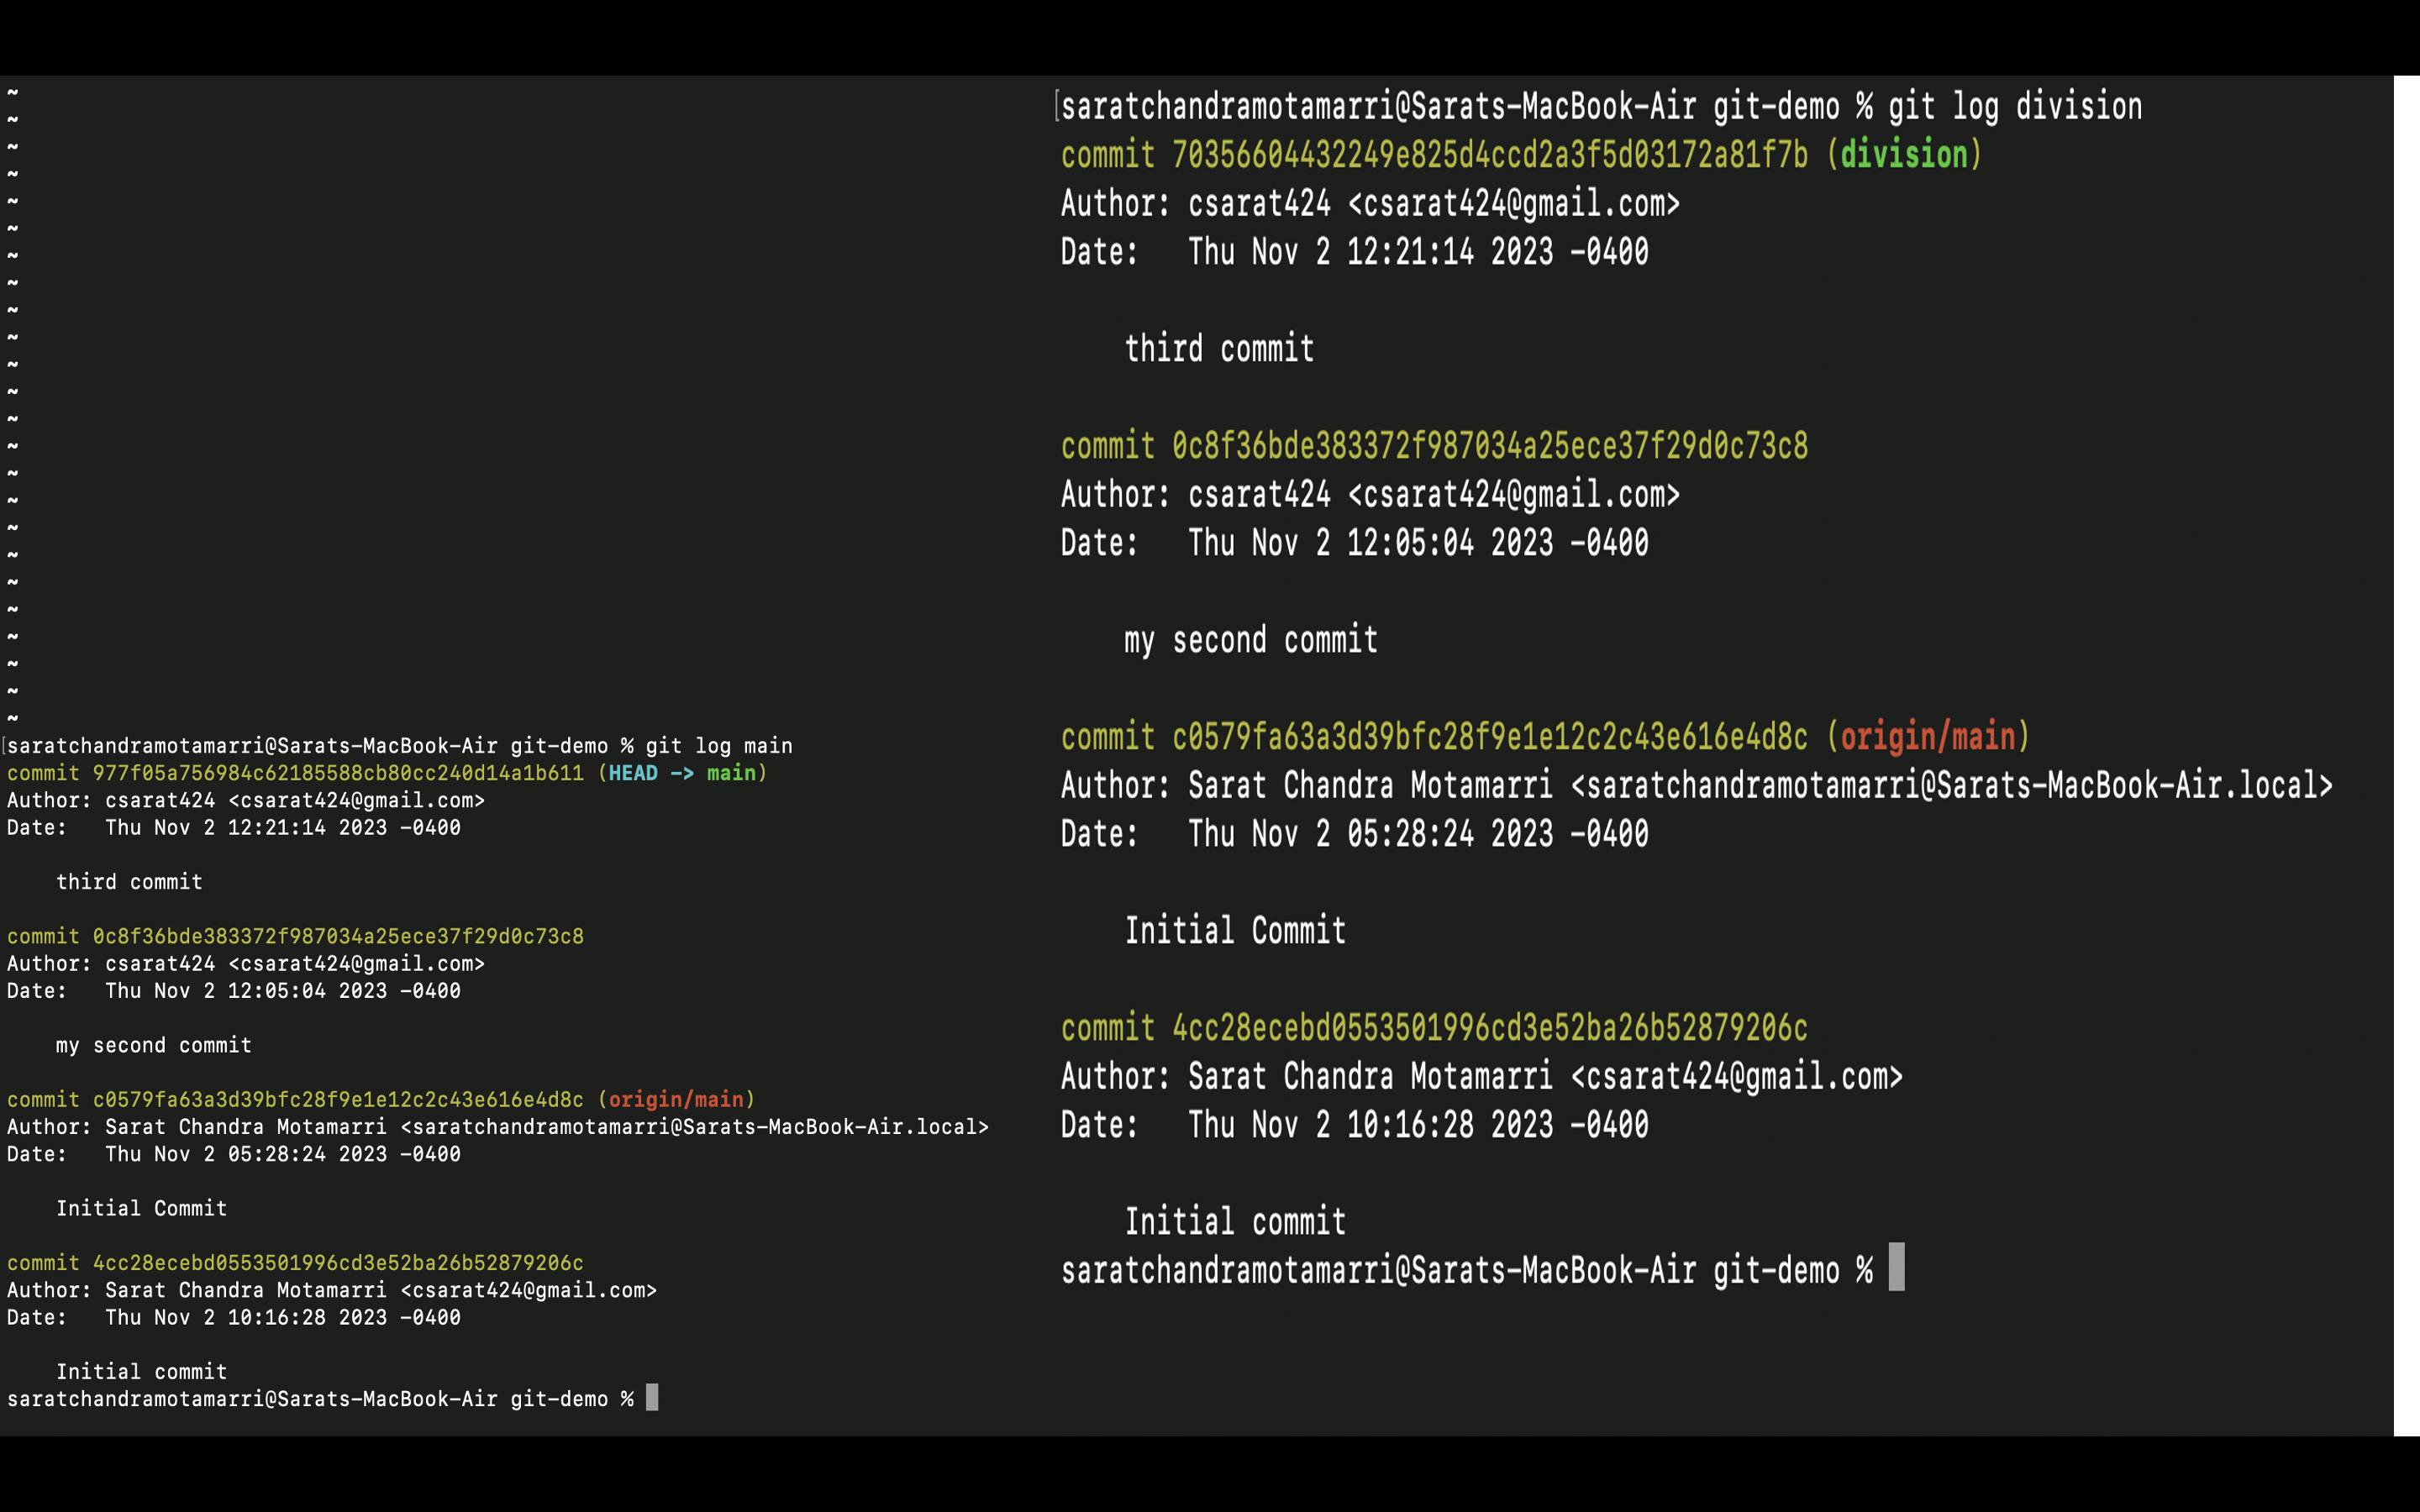
- Now I will use "git log division" and copy the commit id of the third commit
- Now I used "git cherry-pick followed by the commit id" which displays that 1 file changed.
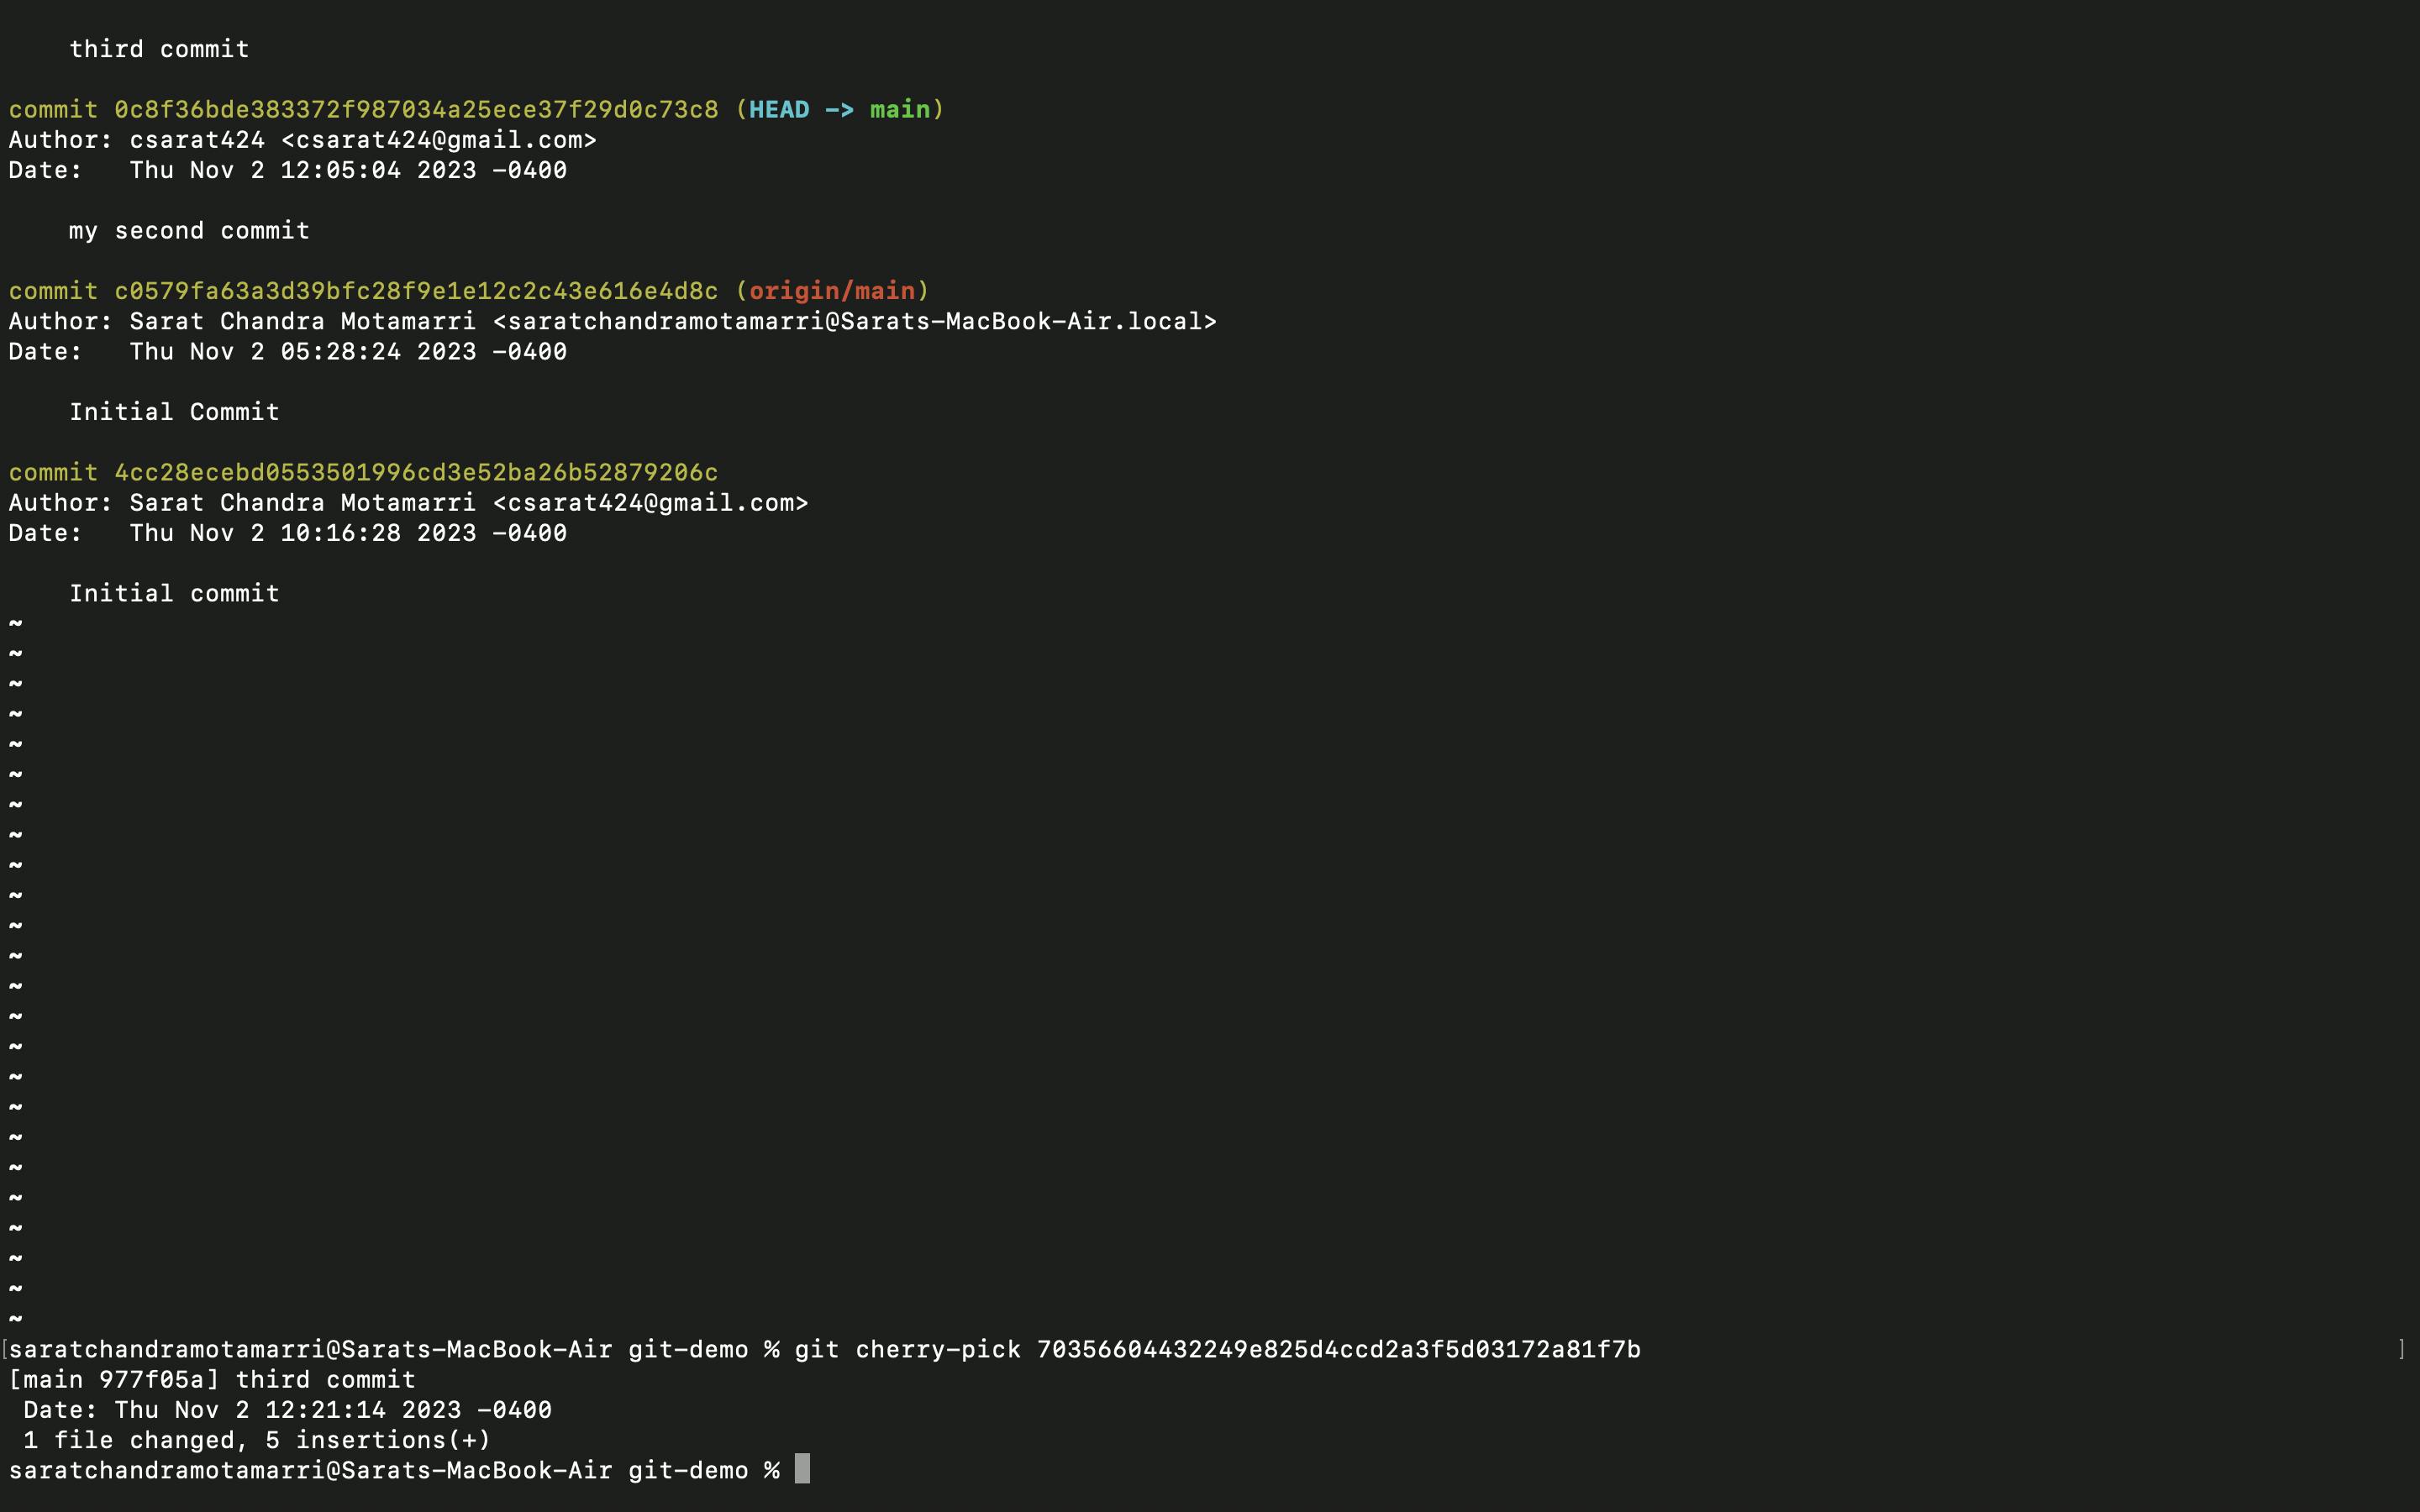
- Now if I do "git log", it will show that the division branch is merged with the main.
If I do "git log main", and " git log division", I will see all three commits which means by using the "git cherry-pick" command the division branch has been merged with the main branch.
Generally cherry-pick command is used when there are one or two commits. If there are some 80,000 commits or more this method is not recommended and also practically not possible.
Git merge vs Git rebase:
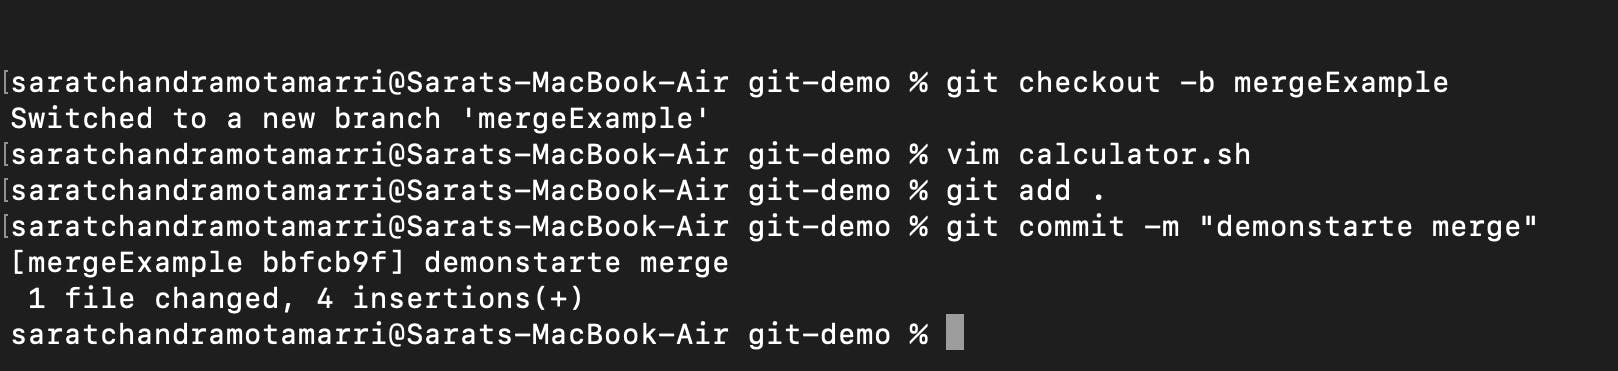
Let me add a new branch using "git checkout -b mergeExample" to the same project and add a new line/functionality to the calculator. sh.


- I have added and committed
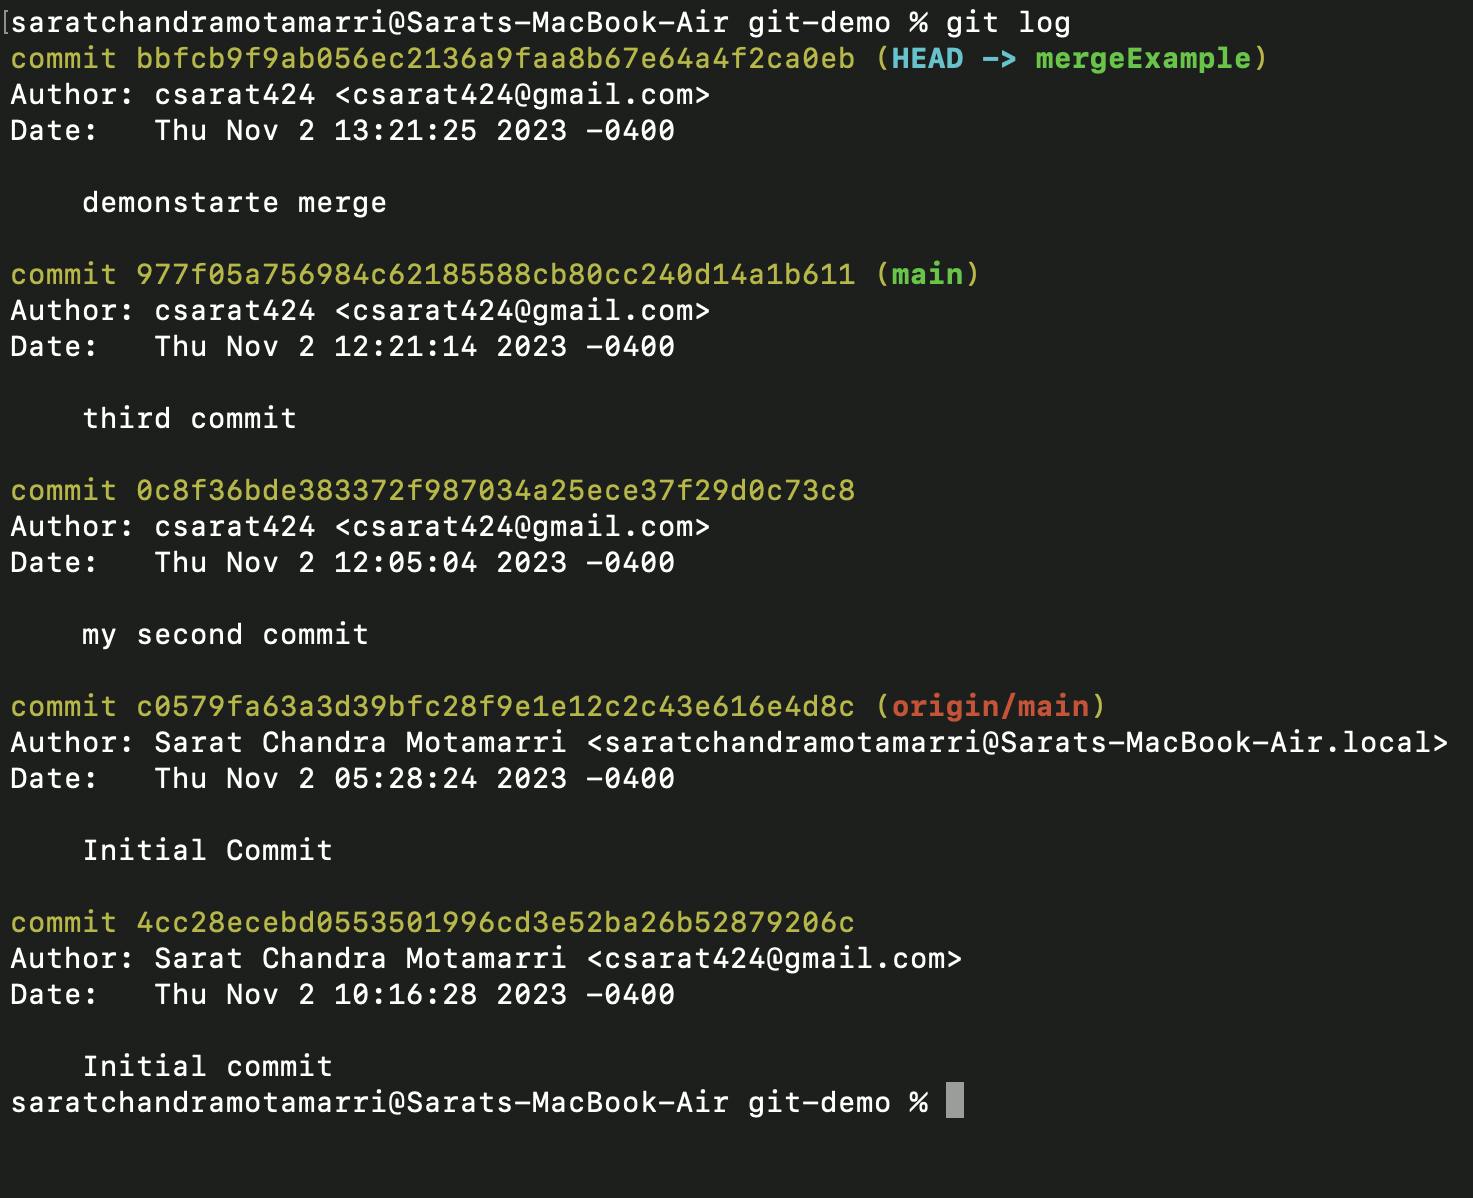
- If we do "git log" it shows a new commit, but with a "mergeExample" branch.
- Now I will go checkout to the main branch and create another branch called "rebaseExample"

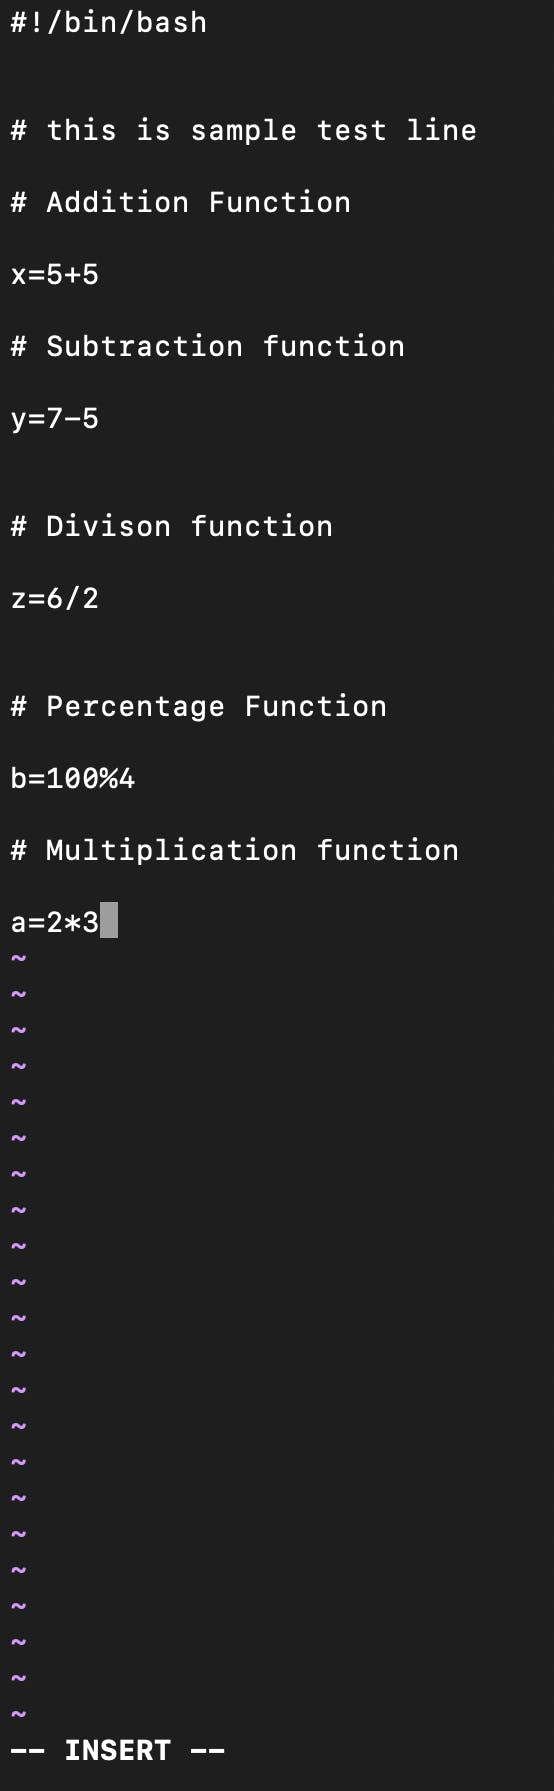
- Now in this "rebaseExample" branch let us add a new line/functionality to the same calculator.sh file ( if we notice carefully the multiplication functionality which we added is not visible here as that was created in a different branch "mergeExample" branch altogether.) and add and commit.

- Now let's do "git log --oneline" which displays all the commits in a single line
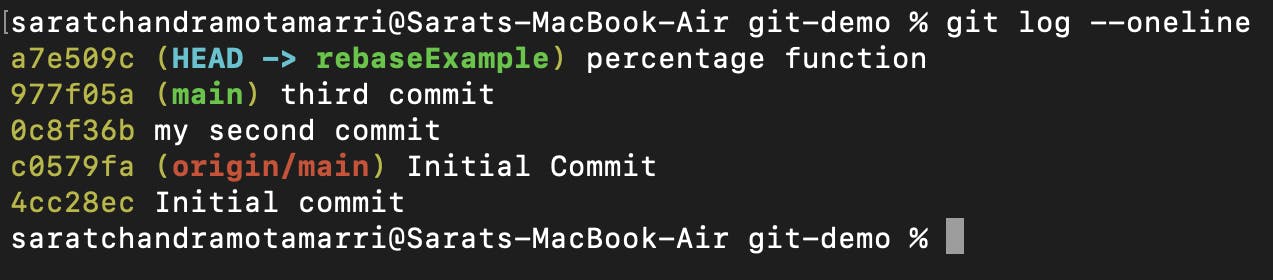
- Similarly, if we do "git log mergeExample --oneline" it will display all the commits in a single line respective to that branch.

- Now I will checkout to the main branch and add another line/functionality to the same calculator.sh file, add it and commit it. (The reason is while developers working on "mergeExample" and "rebaseExample" branches respectively, the developers will be working on the main branch, i.e., on the existing line/functionality.)


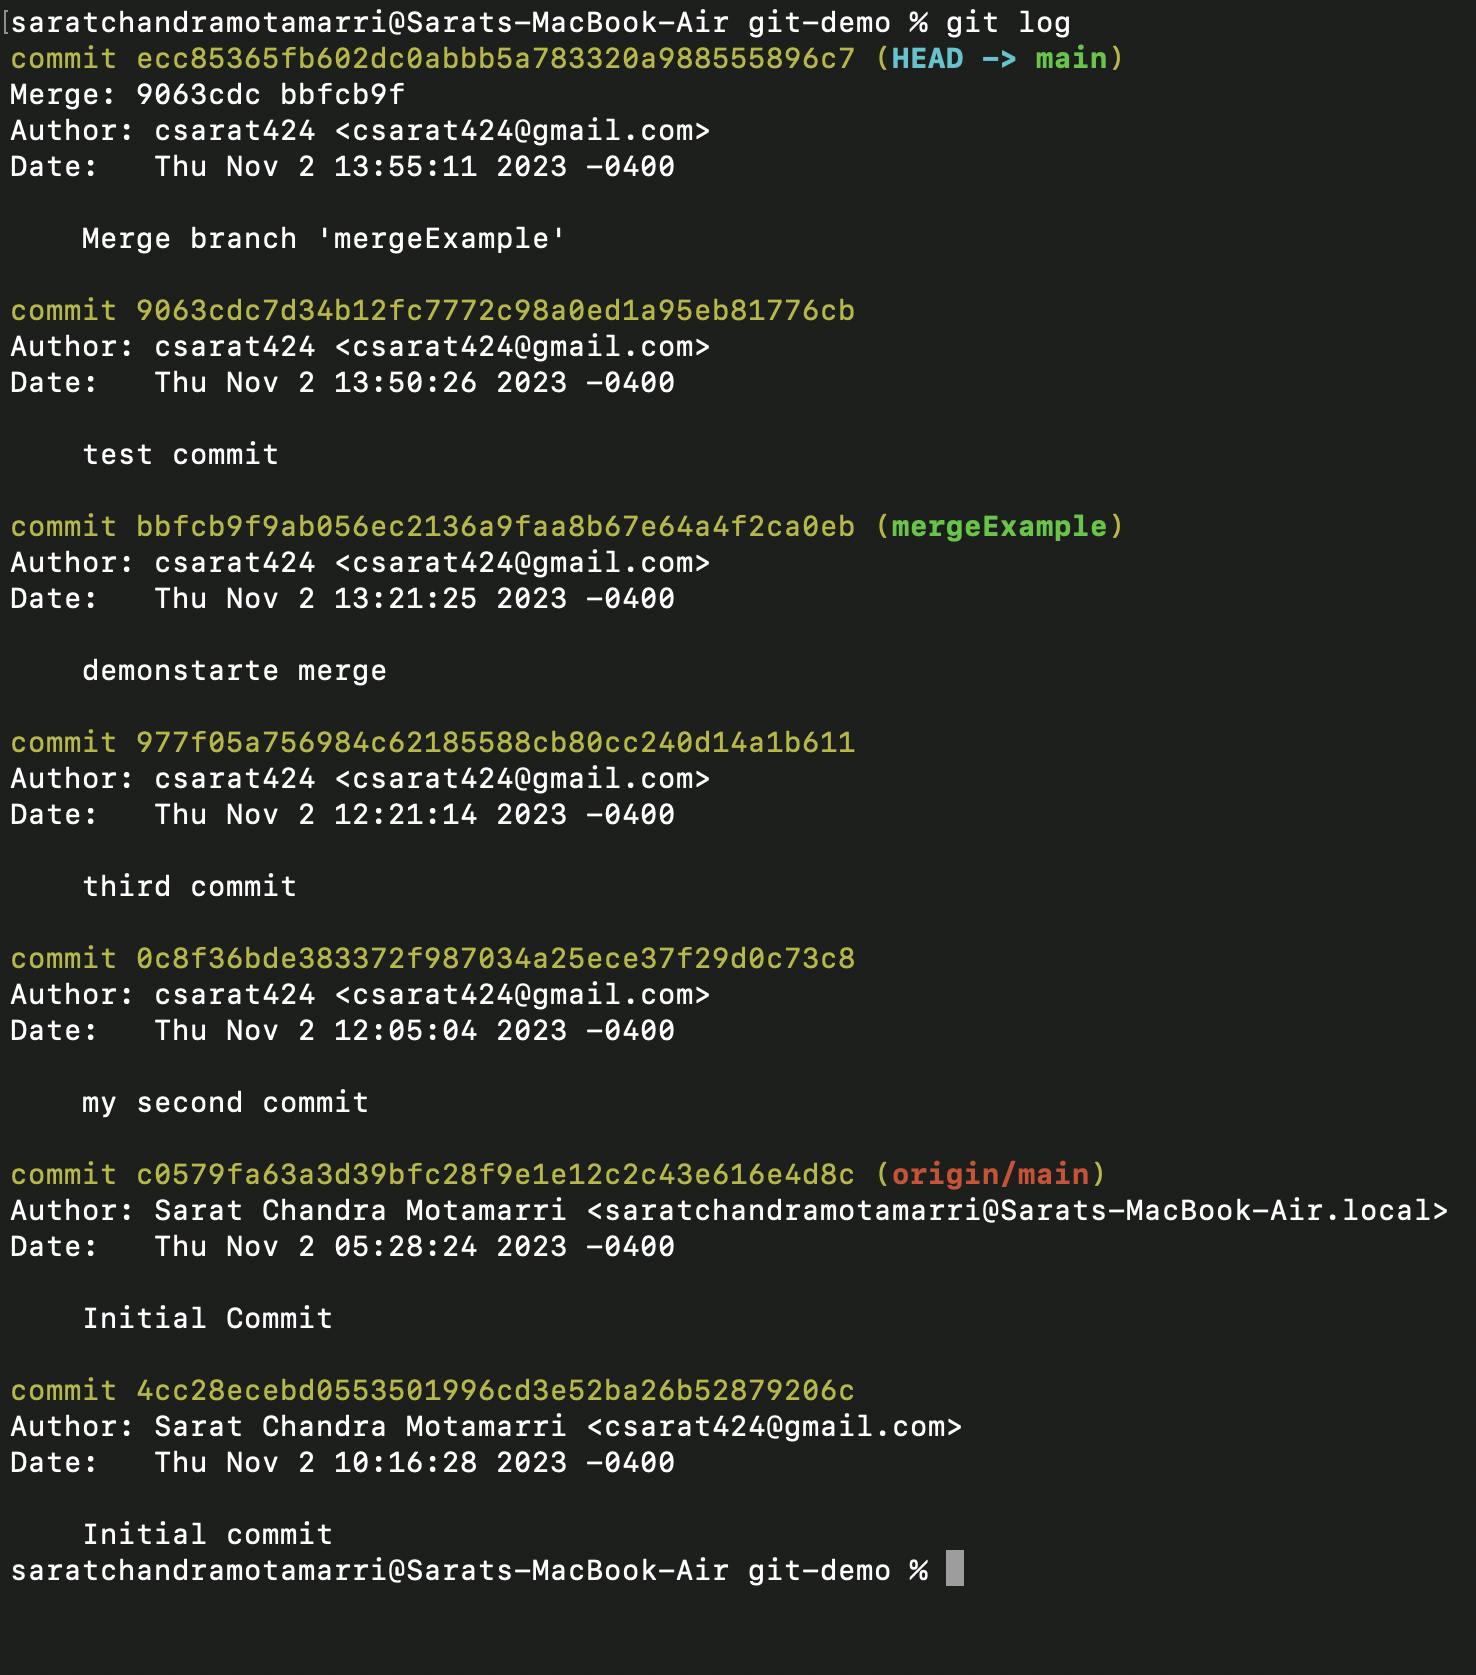
- Now let us merge "mergeExample" branch with the main and do the "git log". It will display all the commits that happened and mergeExample branch will be merged.
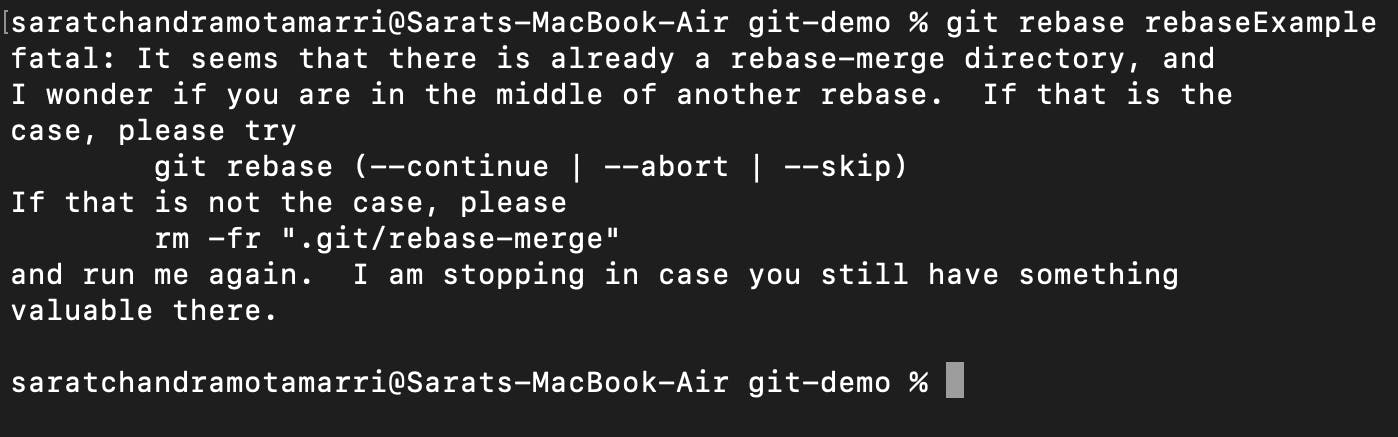
- Now let us try to merge the "rebaseExample" branch when merging, I ran into an error because we updating the same file so it asks which change needs to be included, in this case, the merge conflicts reflect in either ".>>>>>>" or " =====". (In this case, we need to sit developer and ask what changes need to be included & what changes need to be excluded).
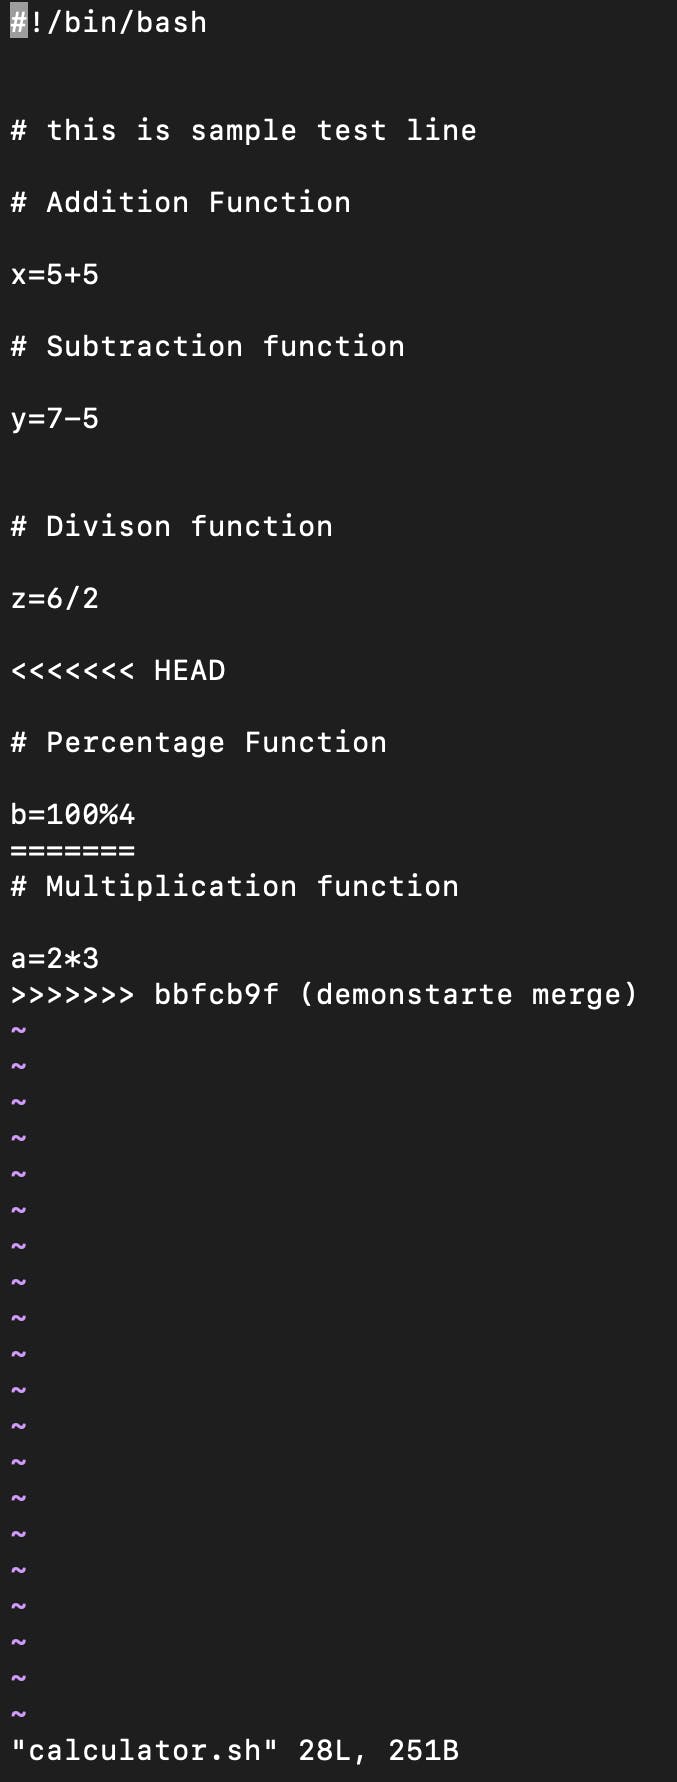
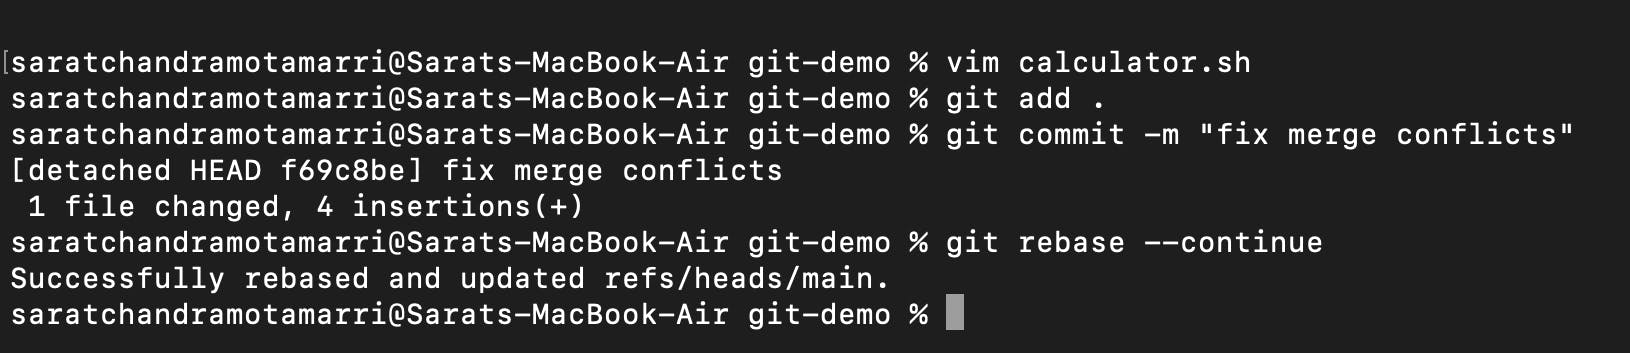
so in this case, I have removed all the merge conflicts and kept both functionalities as I needed them, then I added it and then committed it with a new message "fix merge conflicts".
- Now I have continued with rebase "git rebase --continue".
- Now if I do "git log", it displays
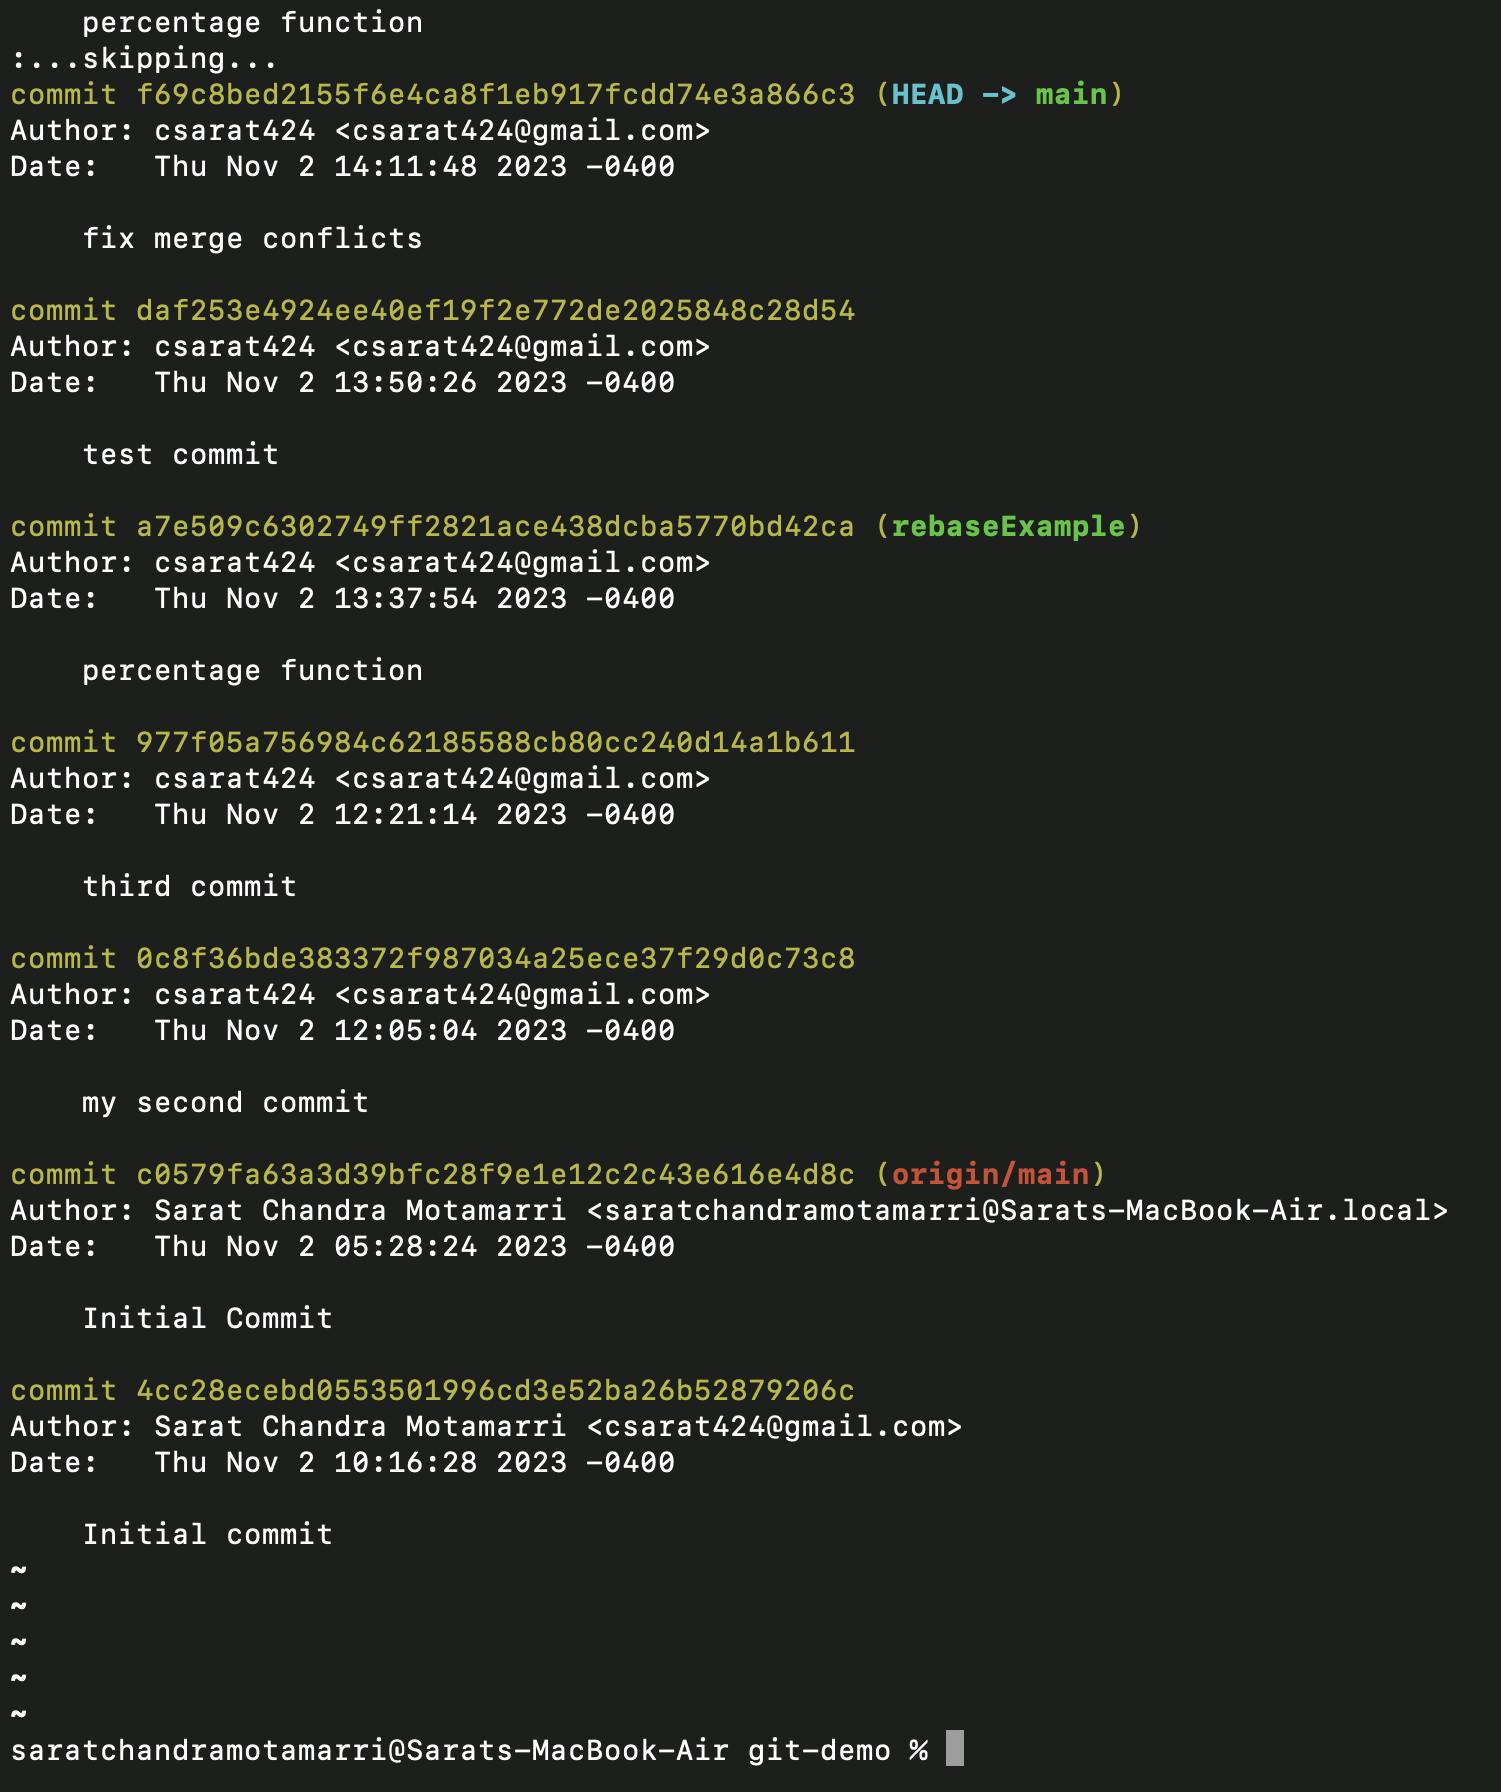
In short, with rebase we can get linear commit, but it is not the same with the merge.
Simpler Understanding of the Workflow:
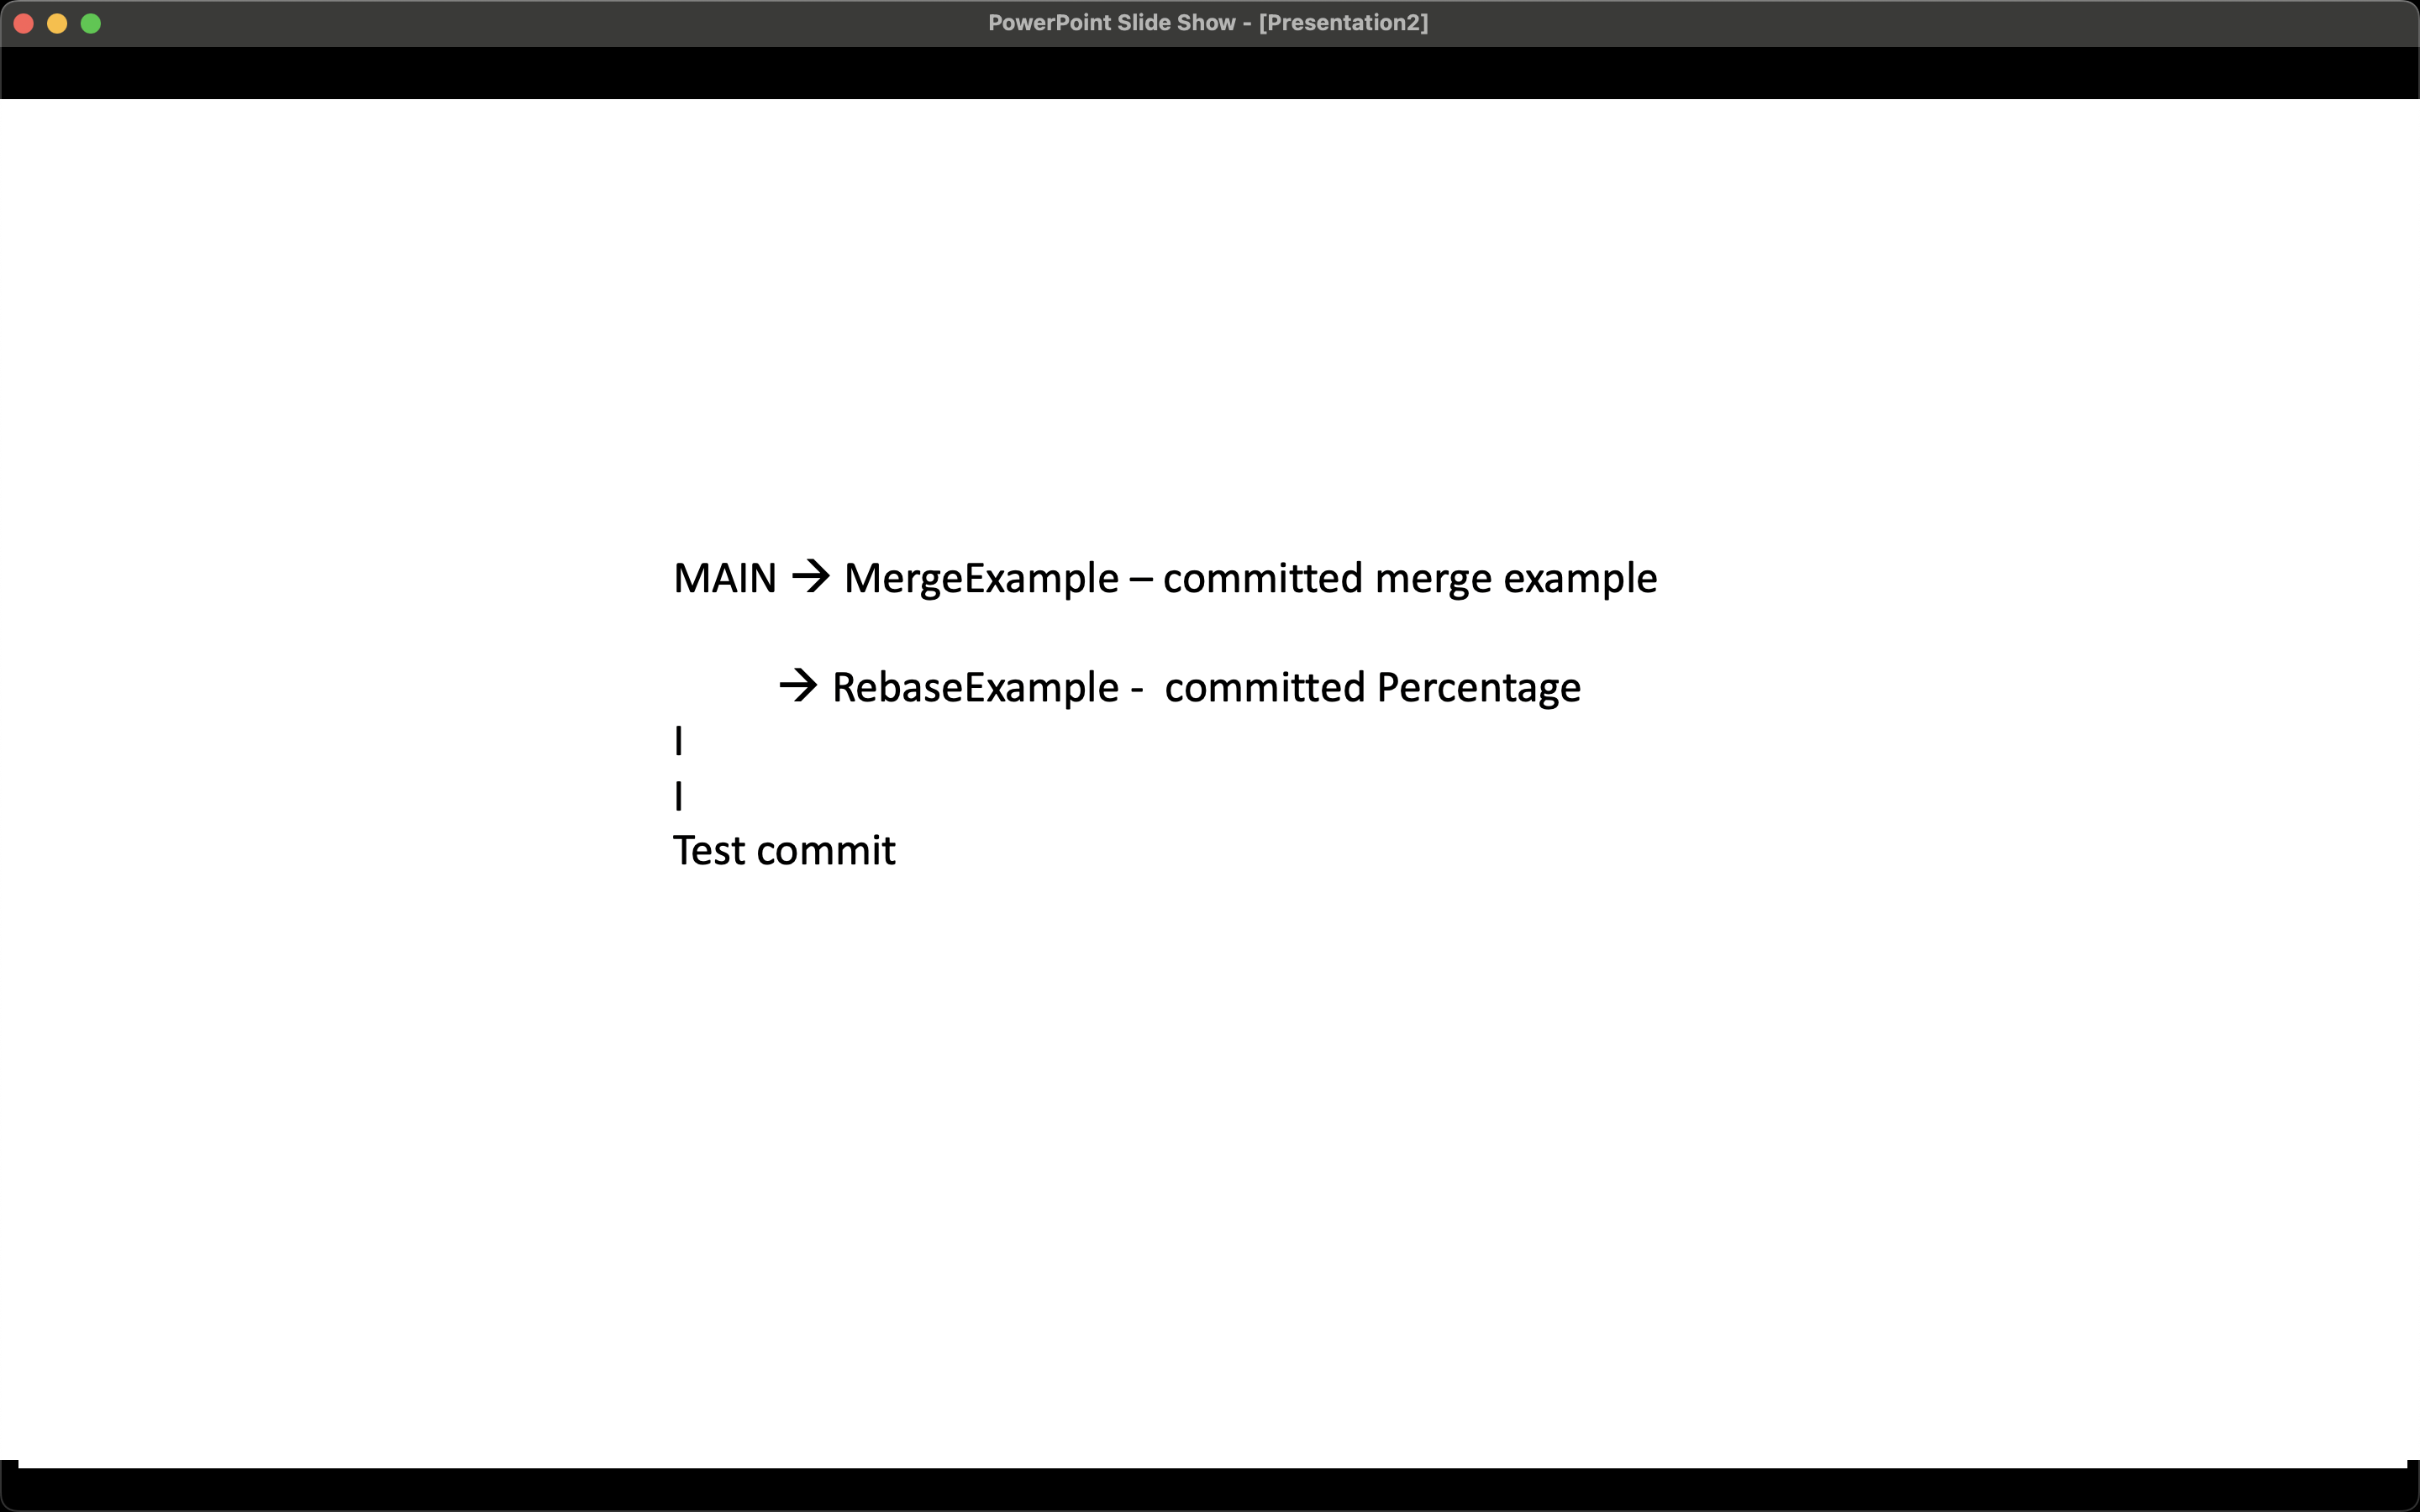
The merge changes are updated at the top whereas rebase changes are updated after the changes made in the main branch.
Simple Example: Imagine you have two branches: main and feature. Here's how they look with git merge and git rebase:
Git Merge:
      main ──────●────────●
           \         \
            ●         ●
              \         \
             feature
With git merge, you create a new merge commit that combines the changes from the feature branch into the main branch. The branch history is preserved, but it can get a bit cluttered with multiple merge commits.
Git Rebase:
      main ──────●──────●
                  \
                feature
With git rebase, you move the entire feature branch to a new base (the latest commit on main) and replay the changes on top of it. This results in a linear history without merge commits. It can make the branch history cleaner but can be risky if done on shared branches.
In summary, git merge creates merge commits to combine branches, while git rebase rewrites the branch history to make it look like the changes were made sequentially. The choice between them depends on the specific needs of the Git workflow and the impact on the branch history.